Initial marker setup (option), Marker speed adjustment, Marker extension – Great Plains YP625PD Operator Manual User Manual
Page 115: Marker speed adjustment marker extension
Great Plains Manufacturing, Inc.
Appendix B - Initial Setup
111
02/23/2011
401-754M
Initial Marker Setup (Option)
Marker Speed Adjustment
Overhead Sharp Object and Crushing Hazards:
Never allow anyone near the planter when folding or
unfolding the markers. You may be injured if hit by a folding or
unfolding marker. Markers may fall quickly and unexpectedly
if the hydraulics fail. Marker discs may be sharp.
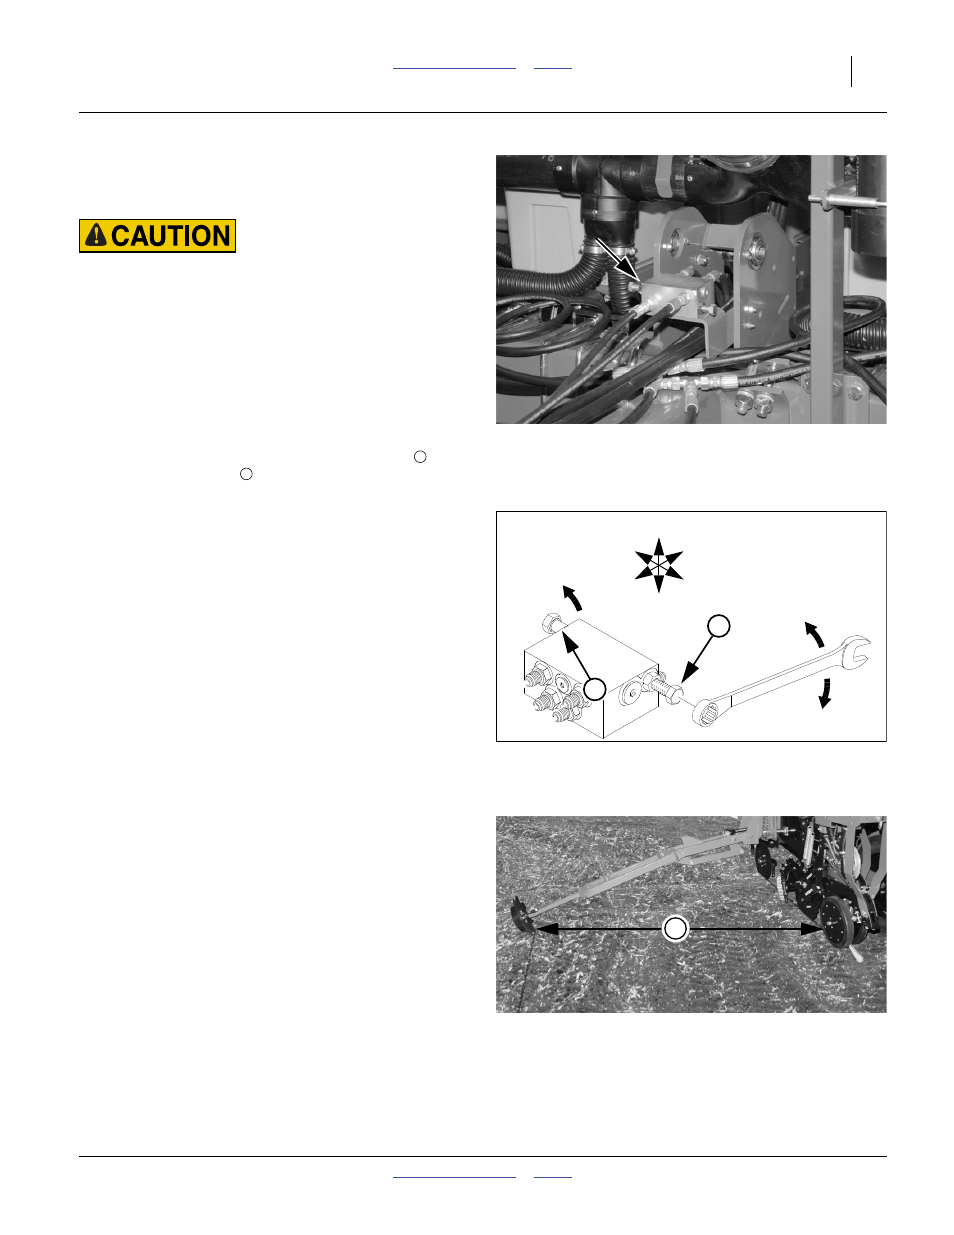
Refer to Figure 104 and Figure 105
Adjust folding speed for dual markers with hex
adjustment screws on the sequence valve body. The
valve sequence body is top center of main tool bar.
Loosen jam nuts before making adjustments.
There is one adjustment screw for raising speed
and
one for lowering speed
. You can identify adjustment
screws by markings stamped in valve body.
Turn adjustment screws clockwise (S: slower) to
decrease folding speed and counterclockwise (F: faster)
to increase folding speed.
With tractor idling at a normal operating speed, adjust
marker folding to a safe speed. Excessive folding speed
could damage markers and void the warranty.
After adjusting the folding speed, tighten jam nuts on hex
adjustment screws to hold settings.
Marker Extension
Marker extension needs to be adjusted once for the initial
YP625PD planter setup, and later only if changing row
spacing (including row shut-off for twin- or single-row
operation on a triple-row planter).
1.
Move the planter to a location where both markers
may be safely unfolded.
2.
Lower the planter. Pull forward and lower rows into
ground.
Note: Due to the relatively steep arm angles of short
markers, extension measurements are likely to be
incorrect if the main tool bar is not at normal
operating height (66 cm).
Figure 104
Marker Sequence Valve Location
31007
1
2
Figure 105
Marker Speed Adjustment
14048
F
S
S
1
2
U
D
B
F
R
L
ll
Figure 106
Marker Extension
31039
E