Seed plate maintenance, Cleaning and storing seed disks – Great Plains PD8070 Operator Manual User Manual
Page 84
80
PD8070
Great Plains Manufacturing, Inc.
401-479M
2014-07-23
Seed Plate Maintenance
Inspect seed plates for wear and damage. See
“Installing Brush Meter Plates” on page 19 for plate
removal.
Place a straightedge across the planting face of the
plate. If the gap between the top outer edge of the plate
and the straightedge is greater than
1.9 mm (0.075 inches,
5
⁄
64
inches),
replace the plate.
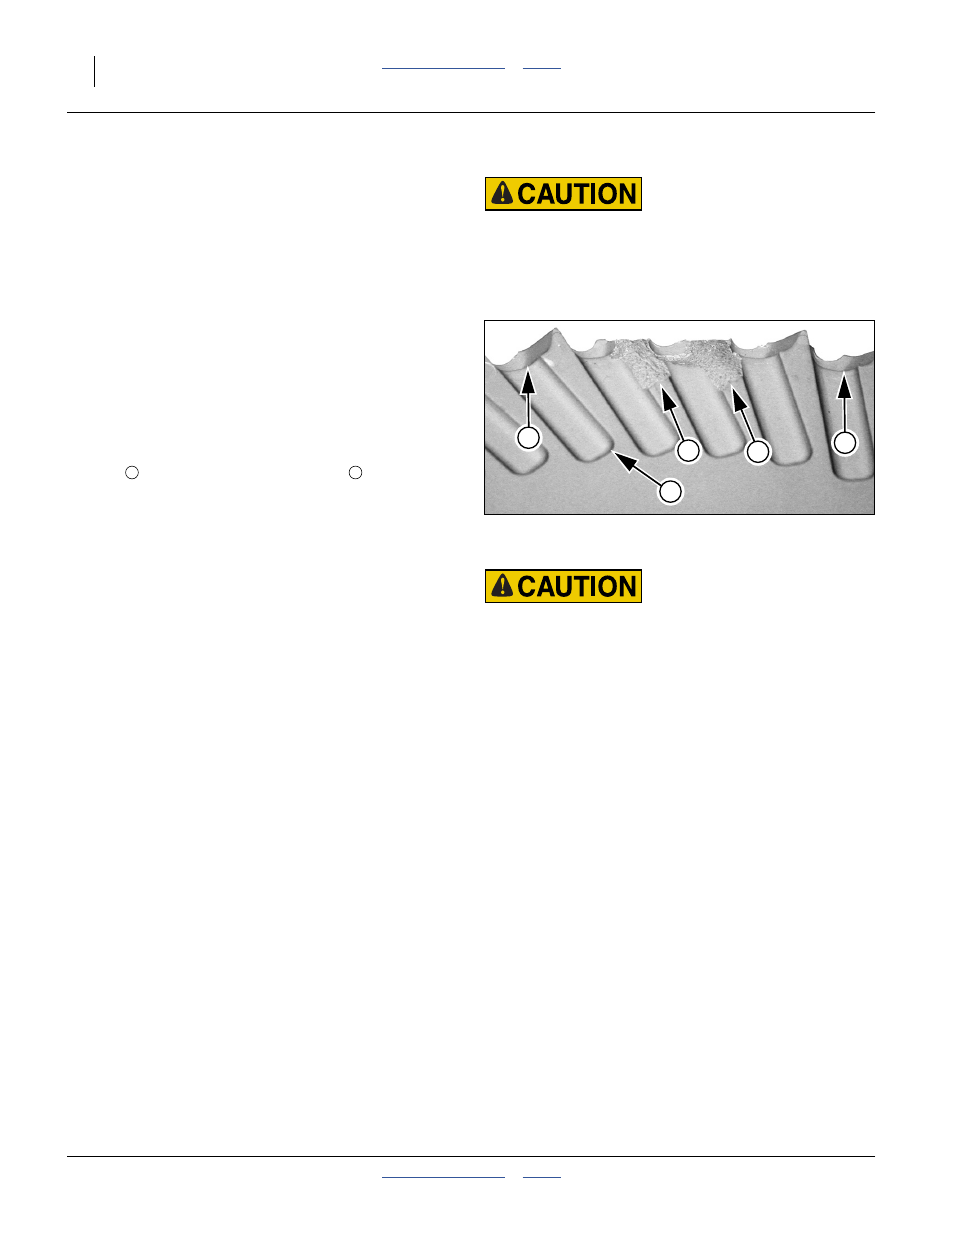
Refer to Figure 95
Inspect plates for damage. The plate depicted has
chipped ridges (probably from being dropped on a hard
surface). Wear less severe than this can cause doubles.
Inspect plates for wear. Sharp edges of pockets and
grooves tend to wear first.
If there is any seed dust or treatment build-up in the cell
pockets
, or in the seed guide grooves
, clean the
disks and re-inspect.
Cleaning and Storing Seed Disks
Use warm or hot water, mild soap, and a sponge or soft
brush to remove build-up.
If plates are washed, allow them to dry completely prior
to storage.
Retain original shipping cartons for plate storage.
Otherwise, store them on edge (and not leaning), or
stacked horizontally on a spindle, to eliminate any risk of
warps. Any seed residue on plates may attract pests.
Fully enclose dry plates to prevent rodent damage.
Possible Chemical Hazard:
Wear gloves when washing plates. Avoid spray. Do not wash
plates where food is prepared, or where cookware or
dinnerware is washed. Seed plates will have talc and graphite
residue, and may have residues of hazardous seed treatments.
Figure 95
Damaged Seed Plate
34474
2
3
2
1
1
Agricultural Chemical Hazard:
Follow material supplier recommendations carefully. Handle
the meter as if it were treated seed. use supplier-recommended
cleaning agents. Any seed treatment build-up inside a meter is
likely to be at a higher concentration than on the actual seed.
2
3