ClearOne MAXAttach IP User Manual
Page 23
20 Technical Support: 800.283.5936
Configuration: Network Settings Screen
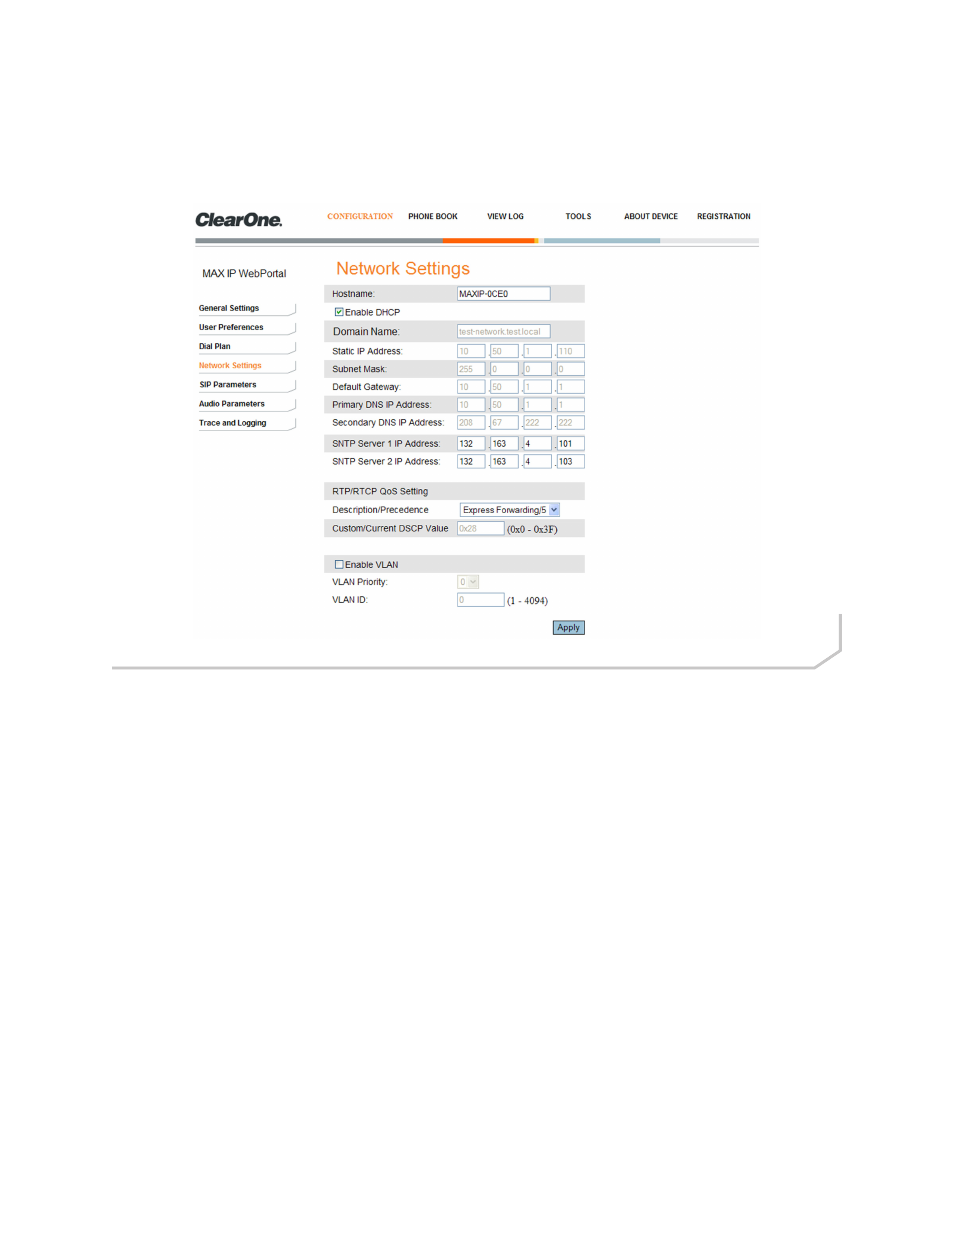
Use the Configuration: Network Settings screen (Figure 2.10) to set up your MAX IP phone on the network. Set the
Hostname, Domain Name, Static IP Address, Subnet Mask, Default Gateway, Primary DNS IP Address, Secondary
DNS IP Address, SNTP Server 1 IP Address, SNTP Server 2 IP Address, VLAN Priority, and VLAN ID from this screen,
along with enabling/disabling DHCP and VLAN.
• Hostname: This is the name of the host (or the MAX IP’s device name on the network) and is the same as the sys-
tem name found on the Device Information screen.
• Enable DHCP: Click this check box to enable DHCP on the MAX IP phone. When enabled, the settings for Domain
Name, Static IP Address, Subnet Mask, Default Gateway, Primary DNS IP Address, and Secondary DNS IP Address
are all grayed out as they are obtained automatically from the DHCP server. Uncheck this box to disable DHCP to
enter the appropriate values in above-mentioned fields manually.
• SNTP Server 1 and 2 IP Addresses: The SNTP servers are time servers. Enter the IP address of the desired
server and click Apply to go out and get the current time from the corresponding time server. The time returned is in
Greenwich Mean Time, adjusted according to the setting of the time zone (see Configuration: User Preferences
screen on page 8 for more information on the time zone setting).
• RTP/RTCP QoS (Quality of Service): QoS is implemented on the MAX IP using DSCP (Differentiated Service
Code Point). The DSCP is a selector for a router’s per-hop behaviors. Each group of DSCPs (or class) has the
same precedence value, from 0 to 7, with the default precedence value for MAX IP being 5. Select the preferred
precedence value from the drop-down menu; advanced users can also enter a custom DSCP value in the text field.
• Enable VLAN, VLAN Priority, and VLAN ID: VLAN is used to segment a single physical network into several vir-
tual networks. It is used to differentiate between VoIP (Voice over IP) data and other data. Once VLAN is enabled
by clicking the check box next to Enable VLAN, you can set the VLAN priority. VLAN priority is the priority of the
MAX IP phone on the VLAN. Click the drop-down box next to VLAN Priority and select the desired priority. Values
are 0 to 7. The VLAN ID is a unique identifier set by the system administrator which can be of any value between 1
and 4094.
»
NOTE: After VLAN is enabled, you will not be able to access the MAX IP phone through the Web Portal
unless your PC has access to the VLAN you just configured. To regain access to the Web Portal, you will
have to disable LAN (see To Enable/Disable VLAN on page 30).
Click the Apply button to activate any changes made to the Network Settings screen.
Figure 2.10 - Configuration: Network Settings Screen