Aileron and flap servo installation – E-flite F-4 Phantom 32 DF User Manual
Page 7
7
E-flite F-4 Phantom 32 DF Assembly Manual
5. Once the CA has fully cured, gently pull on
the wing and aileron (and flap) to make sure the
hinges are glued securely. If not, reapply thin CA
to any hinges that are not secure. Flex the aileron
and flap through their range of motion a number
of times to break in the hinges. This will reduce the
initial load on the servo for your first flights.
6. Repeat Steps 1 through 5 to install the remaining
aileron and flap hinges.
Aileron and Flap Servo Installation
Required Parts
Wing panel (right and left)
Transmitter
Receiver
Receiver battery
Servo with hardware (4)
Hardwood block, 15mm x 13mm x 6mm (8)
2mm x 8mm self-tapping screw (16)
Required Tools and Adhesives
Phillips screwdriver: #1
Hobby knife with #11 blade
Pencil
Razor saw
Thin CA
5-minute epoxy
Mixing cup
Mixing stick
Drill
Drill bit: 5/64-inch (2mm)
Side cutter
Pin vise
Felt-tipped pen
Medium grit sandpaper
When centering the flap servo, begin by setting
the throws at the transmitter to 0% for both the
up and down flap positions. This should be done
for both 2- and 3-position flap switches.
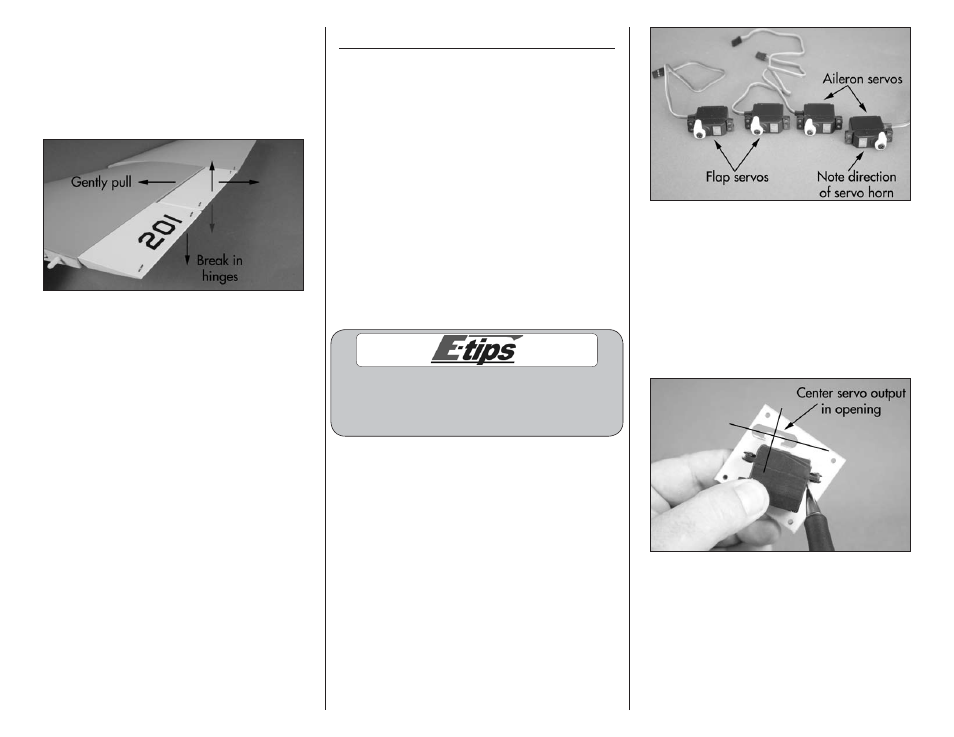
1. Prepare the aileron and flap servos by installing
the rubber grommets and brass eyelets as shown in
the radio or servo instructions. Use the shorter side
of a JR standard horn for the two aileron servos
and the longer side for the flap servos. Center the
aileron and flap servos using the radio system. Use
side cutters to remove any arms from the horn that
may interfere with the operation of the servo. Note
that one servo is set in the opposite orientation as
shown in the photo in the following column.
2. Use a felt-tipped pen to mark the flap and
aileron servo covers so they can be returned to
their correct locations, then remove the covers from
the wing. Set the flap cover aside. Use a pencil
to mark the centerlines for the servo output on the
cover. Position the servo on the cover so the center
of the servo horn is centered in the opening using
the lines drawn on the cover. Use a pencil to mark
the locations for the servo mounting blocks on the
servo cover.