E-flite F-4 Phantom 32 DF User Manual
Page 23
23
E-flite F-4 Phantom 32 DF Assembly Manual
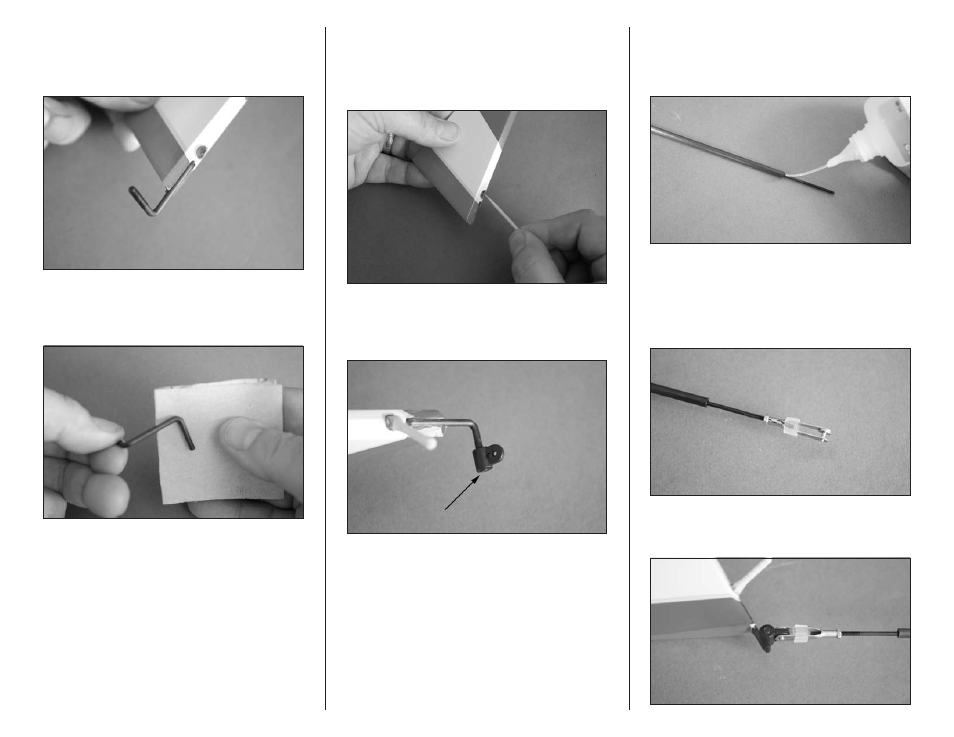
4. Check the fit of the torque rod. It must fit flush
with the leading edge of the rudder. Make sure that
the threaded end of the torque rod is on the outside
of the rudder.
5. Remove the torque rod and use medium grit
sandpaper to lightly sand the torque rod where it
comes in contact with the rudder.
6. Mix a small amount of 5-minute epoxy. Apply
the epoxy in the holes for the hinges and torque
rod. Fit the hinges and torque rod to the rudder.
Use a paper towel and rubbing alcohol to remove
any excess epoxy before it can cure.
7. Once the epoxy has fully cured, thread the
torque rod end on the rudder torque rod so it is
flush with the end of the rod.
8. Center the carbon tube on the pushrod and
apply thin CA to the pushrod and carbon tube
to glue them together. Allow the CA to wick in
between the two for a secure bond.
9. Cut a piece of silicone tubing and slide it onto the
clevis. Thread a 2mm nut on the pushrod, then the
clevis to the pushrod. Prepare both ends of the pushrod
at this time. Make sure to use threadlock on the clevis
and nut to prevent them from vibrating loose.
10. Attach the clevis to the torque rod. Slide the
silicone tubing over the clevis.