Fan installation – E-flite F-4 Phantom 32 DF User Manual
Page 26
26
E-flite F-4 Phantom 32 DF Assembly Manual
9. Check the operation of the elevator using the
radio system. You may need to change the servo
reversing at the transmitter depending on the radio
system and servos used to achieve the correct
direction of throw.
10. Use the tape included with the model to attach
the tail cone to the fuselage.
Fan Installation
Required Parts
Fan assembly
Fuselage assembly
3mm x 10mm self-tapping screw (4)
Required Tools and Adhesives
Thin CA
Phillips screwdriver: #1
Flexible tape
Pin vise
Pencil
Felt-tipped pen
Ruler
Hobby scissors
Drill bit: 5/64-inch (2mm)
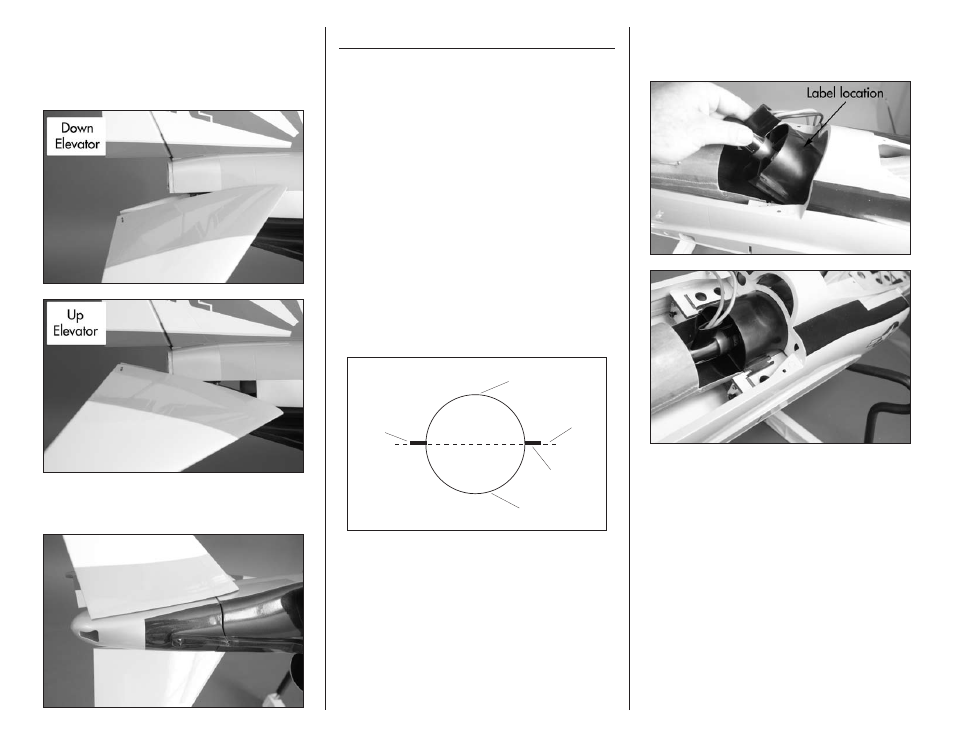
The fan used in our instruction model
was a pre-production unit and did not have
a label. The location of the label is called
out as a reference for production units.
1. Locate the fan unit. View the fan unit and use the
drawing provided to determine the top and bottom
of the fan.
Fan bottom
Fan centerline
Mounting lug
Label
Mounting lug
2. Follow the instructions included with the fan unit
to prepare it for installation in your model.
3. Fit the fan housing into the fuselage. Slide the
fan forward to make sure it is fully inserted into
the intake.