E-flite F-4 Phantom 32 DF User Manual
Page 29
29
E-flite F-4 Phantom 32 DF Assembly Manual
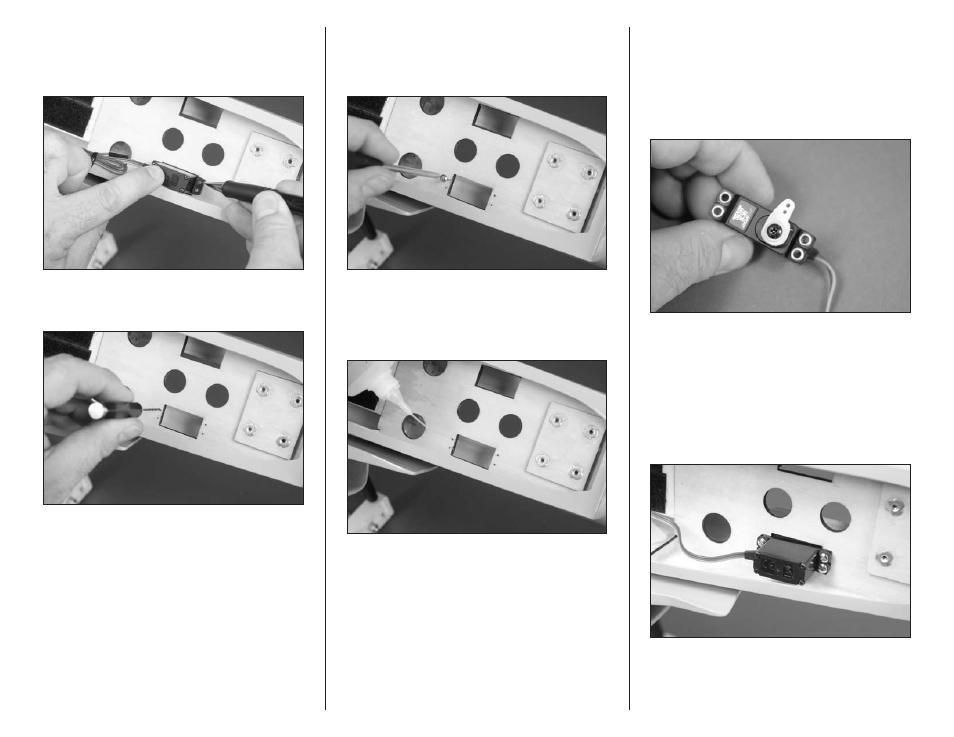
3. Place the servo in the opening with the
servo output facing the rear of the fuselage.
Use a pencil to mark the locations for the servo
mounting screws.
4. Use a pin vise and 1/16-inch (1.5mm) drill bit
to drill the holes for the servo mounting screws.
5. Use a #1 Phillips screwdriver to thread a servo
mounting screw into the mounting holes for the
steering servo. Remove the screw after cutting the
threads in the plywood.
6. Place 2–3 drops of thin CA in each of the holes.
This will harden the threads made by the screws
making them more secure when the steering servo
is installed.
7. Center the steering servo using the radio system.
The steering servo will use the short side of a
standard JR 4-way horn. Use side cutters to remove
any arms from the horn that may interfere with the
operation of the servo. Secure the horn to the servo
using a #1 Phillips screwdriver and the servo from
the servo.
8. The steering linkage will be connected to the
hole in the servo that is 7/16-inch (11mm) from the
center of the arm as illustrated in the photo above.
9. Install the steering servo in from the top of the
fuselage using the hardware provided with the
servo and a #1 Phillips screwdriver. The servo
output faces the rear of the fuselage.