R3080d hard disk – ClearCube R-Series Data Center Products User Manual
Page 112
88 • Hardware Upgrade and Replacement Procedures
R-Series Data Center Products User’s Guide
R3080D Hard Disk
To replace or upgrade a 2.5-inch hard disk in an R3080D, perform the following steps.
1. Power off the blade and remove it from the chassis. Place the blade on a stable
surface, such as a desk or bench.
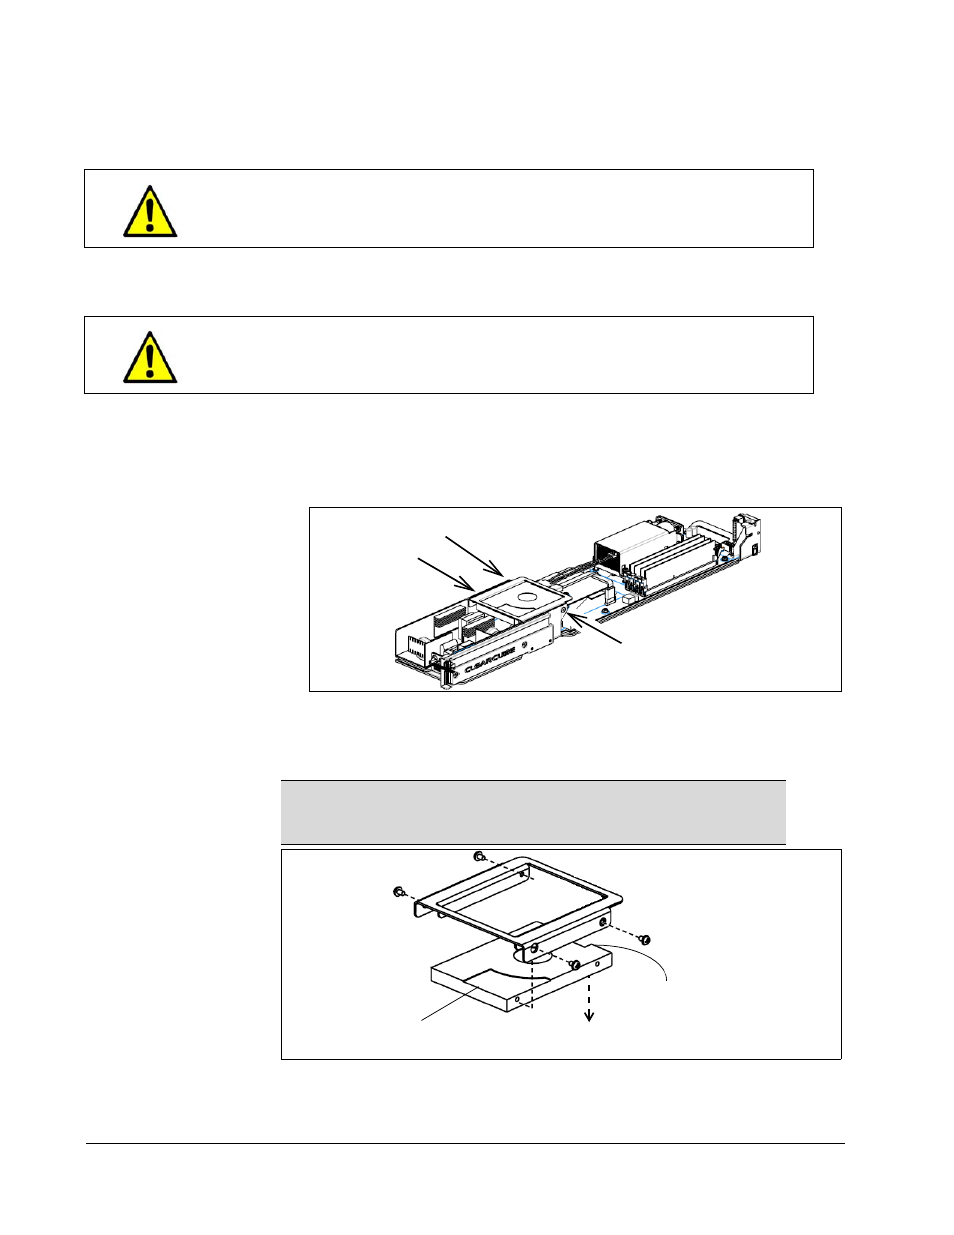
2. Remove the hard disk carrier (shown in the following figure) from the blade frame.
a.
Remove SATA data cables and power cables from the hard disks and,
optionally, from the motherboard.
b. Remove the 3 screws attaching the hard disk carrier to the blade.
3. Remove the 4 screws connecting the hard disk to the carrier (note that these
screws are smaller than the screws you removed in the previous step). Remove the
old hard disk and set it aside (contact the hard disk manufacturer or ClearCube for
recycling information).
Use the correct ClearCube-supplied or ClearCube-approved screws
to secure each hard disk to the tray. Screws that are too long can
damage hard disks, damage threads in the tray, or both.
Some surfaces on the blade may be hot, especially when the blade
has been powered on. Remove and handle the blade with care.
NOTE
You will need a screwdriver that you can insert through 6 mm
holes to remove 2 of the screws attaching the hard disk to the
rear or the carrier, as shown in the following figure.
Hard Disk
SATA Power and
Data Connectors
HDD Manufacturer
Label Facing Down