Replacing an r4300 power supply unit (psu) – ClearCube R-Series Data Center Products User Manual
Page 130
106 • Hardware Upgrade and Replacement Procedures
R-Series Data Center Products User’s Guide
5. Slowly insert the new fan pack to ensure proper seating of the connector.
6. Replace the screws to secure the fan pack.
7. Replace the power cords and then power on the blades.
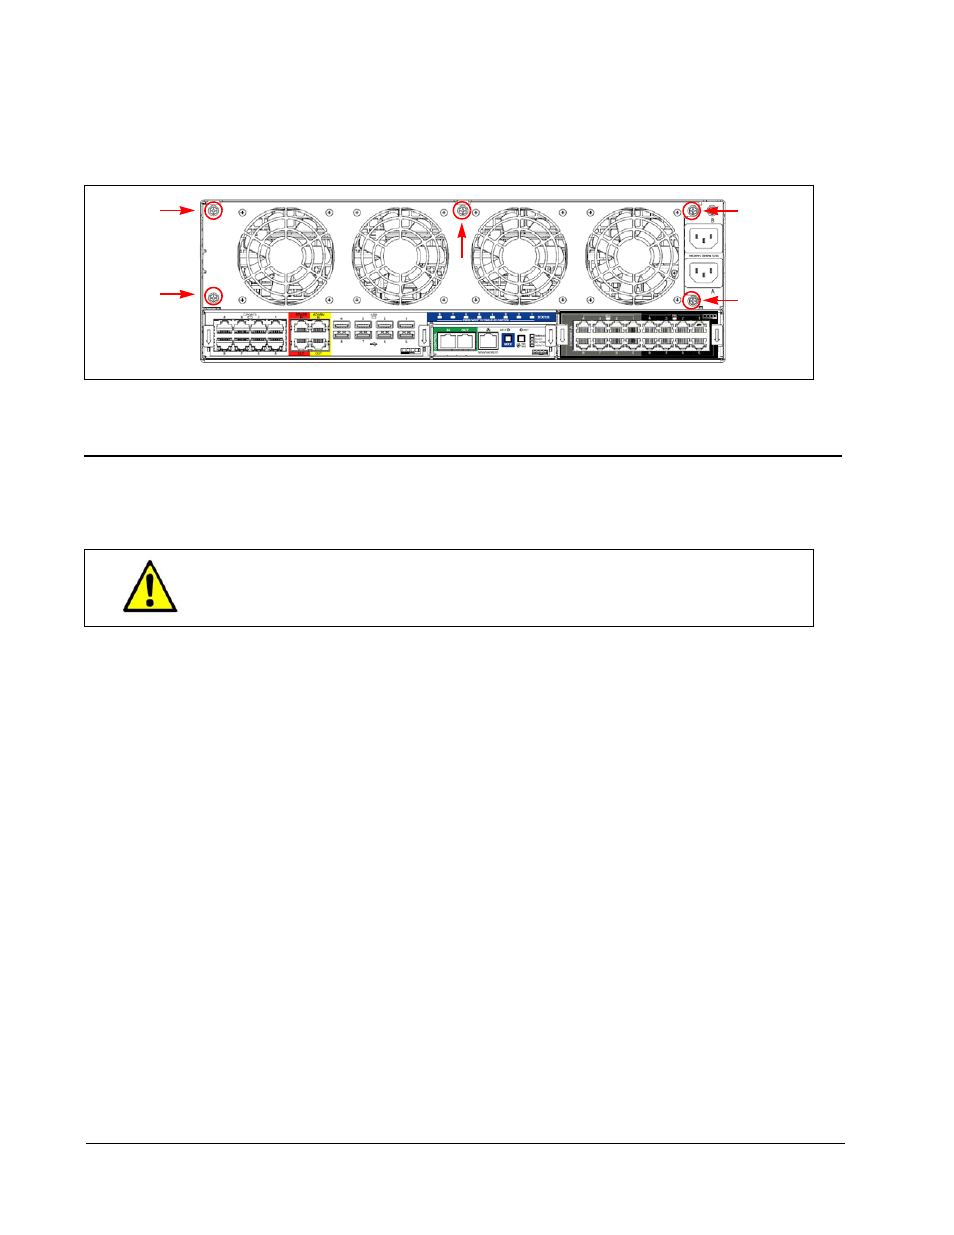
Figure 54 R4300 Fan Pack Attachment Points
Replacing an R4300 Power Supply Unit (PSU)
To replace a PSU in the R4300 chassis, do the following:
1. Before you begin, be sure to have a replacement PSU and a #2 Philips screwdriver
ready.
2. Power down blades and remove all R4300 chassis power cords.
3. Using a #2 Phillips screwdriver, remove the 5 screws on the back of the chassis
that attach the fan pack. Insert a finger in the slot on the left side of the fan pack
and slowly pull the fan pack out.
4. Pull the failed PSU (with a red LED illuminated) straight out until it clears the
chassis.
5. Insert the replacement PSU and push it firmly until the connector seats. A green
LED is illuminated.
6. Slowly insert the new fan pack to ensure proper seating of the connector.
7. Replace the screws to secure the fan pack.
8. Replace the power cords and then power on the blades.
Use caution when hot-swapping R4300 PSUs and Fan Packs: be sure
to follow the instructions below.