Replacing an r3040s hard disk – ClearCube R-Series Data Center Products User Manual
Page 109
R-Series Data Center Products User’s Guide
Hardware Upgrade and Replacement Procedures • 85
•
Small tray (part number G0700056)—contains up to two hard disks.
•
Large tray (part number G070059)—for multiple configurations:
–
For up to four standard-capacity hard disks
–
For two 300 GB hard disk drives (part number G913040-300)
–
For all hard disk configurations with V5224 PCoIP cards
R3040S Hard Disk Tray, Drive Layout, and SATA Headers on
Motherboard
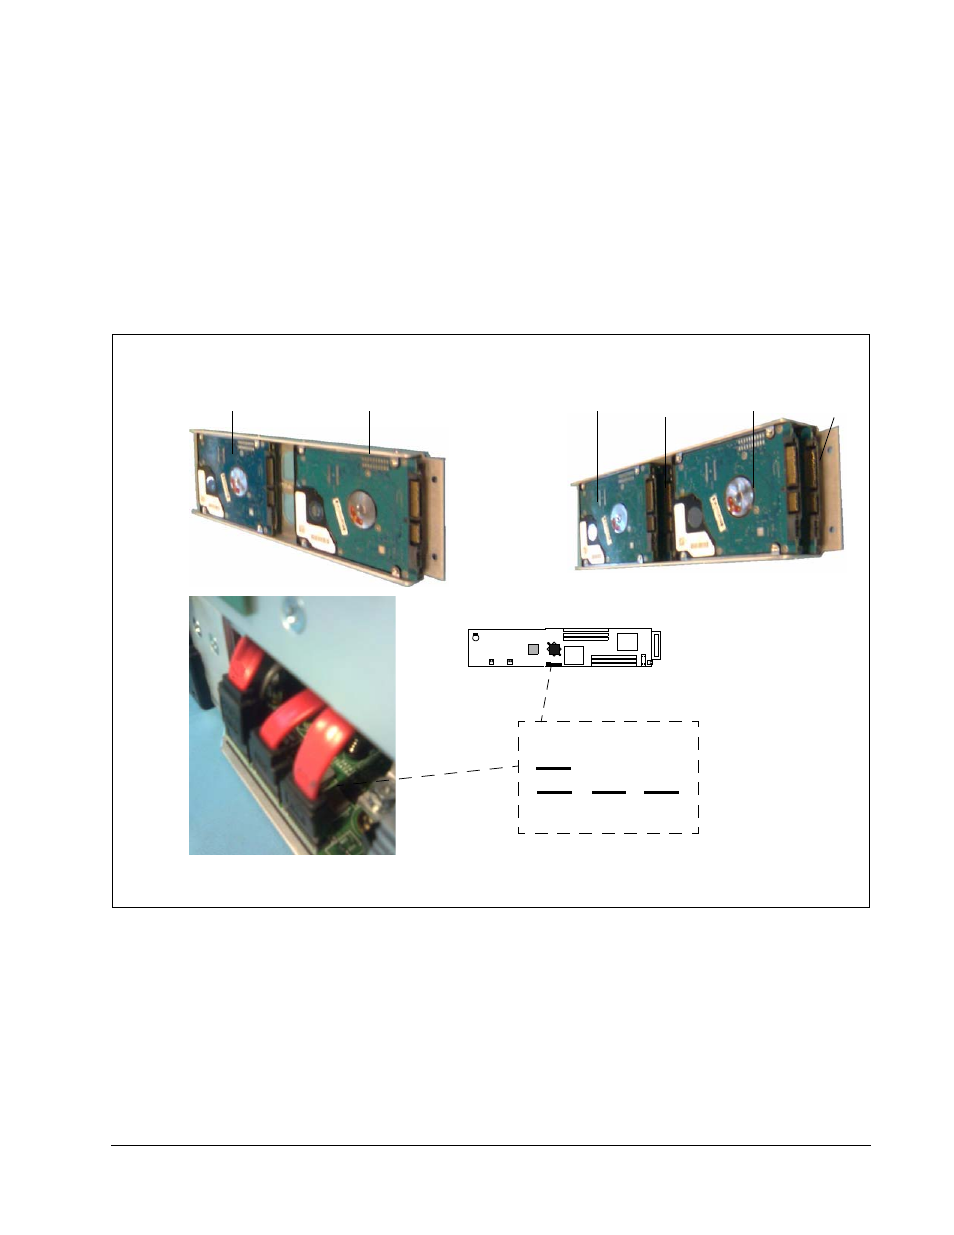
The following figure shows each R3040S hard disk tray model and details the location
of the drives in the tray and the associated cables.
Figure 45 R3040S Hard Disk Drive Trays, Cables, and Cable Headers
Replacing an R3040S Hard Disk
Perform the following steps to replace an R3040S hard disk.
1. Power off the blade and remove it from the chassis. Place the blade on a stable
surface, such as a desk or bench.
Disk 2
Disk 1
Fron
t of
Bl
ade
Small Tray
Disk 4
Disk 3
Fron
t of
Bl
ade
Large Tray
Disk 2
Disk 1
CP
U 1
CP
U 0
F
ront of
Bla
d
e
1
2
3
4
CMOS Battery
SATA Headers and Numbered Cables on Motherboard (on Underside of Blade Near Interposers)