ClearCube Sentral 6.9.3 User Manual
Page 35
Sentral Quick Start Guide
28
Rev F 2.2.08.06.2014
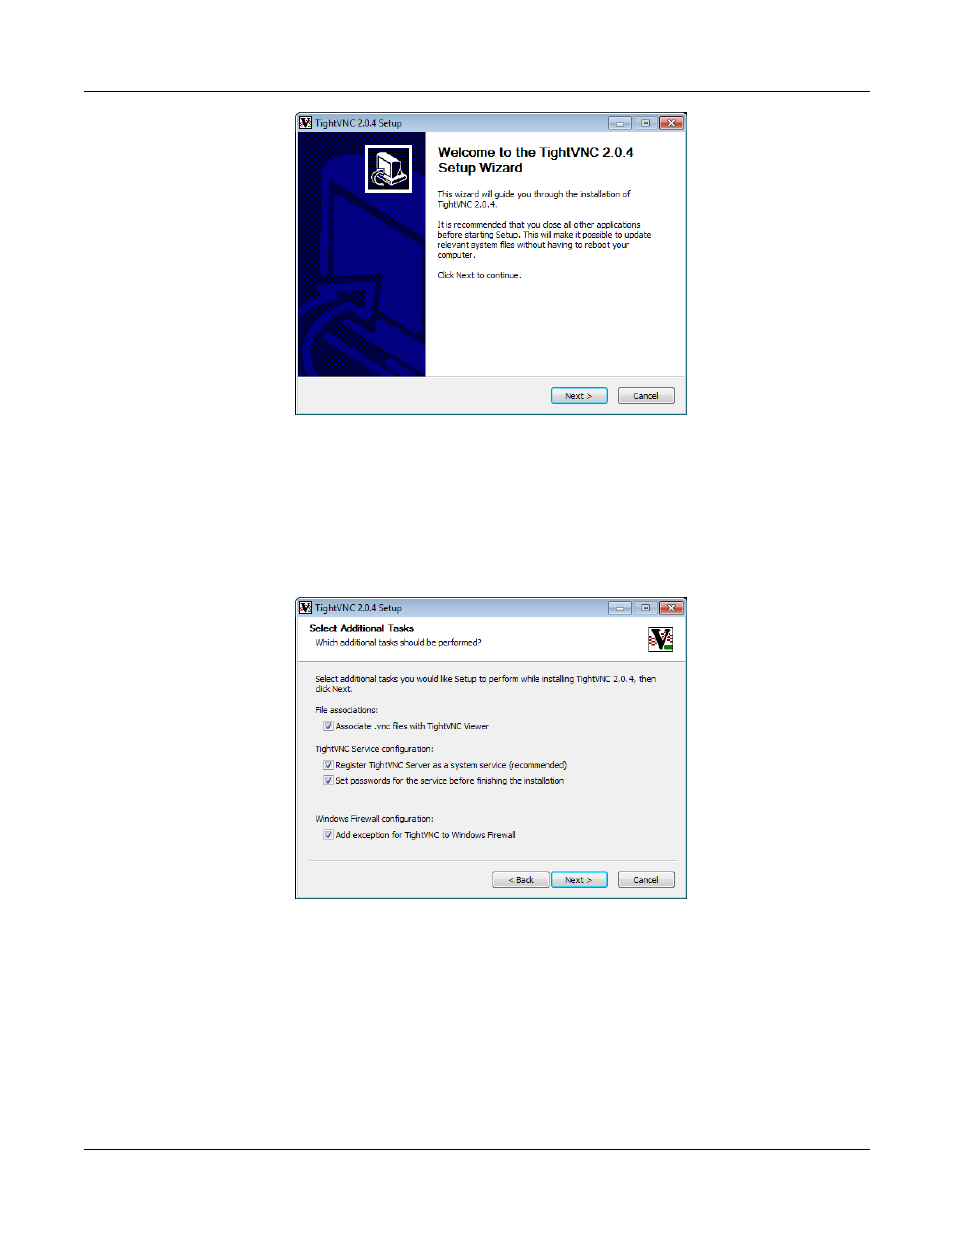
Figure 18. TightVNC Setup Wizard
10. Click I Agree to continue.
11. Accept all default values and click Next until you reach the Select Additional Tasks screen.
12. Be sure to select all options in the Select Additional Task screen, shown below, and then click Next.
Figure 19. TightVNC Select Additional Tasks screen
13. The installer starts the TightVNC service and displays the Service Configuration screen. Specify a
password for service authentication and for the control interface. These passwords apply only to
VNC. Click Install.
14. The TightVNC installer shows that installation is complete. Click Next. The Completing TightVNC
Setup Wizard screen is displayed. Click Finish to close the TightVNC wizard.