Creating a shared user mapping, Creating a dedicated user mapping, Figure 26 – ClearCube Grid Center Admin Guide 4.11 User Manual
Page 55: Adding a shared resource
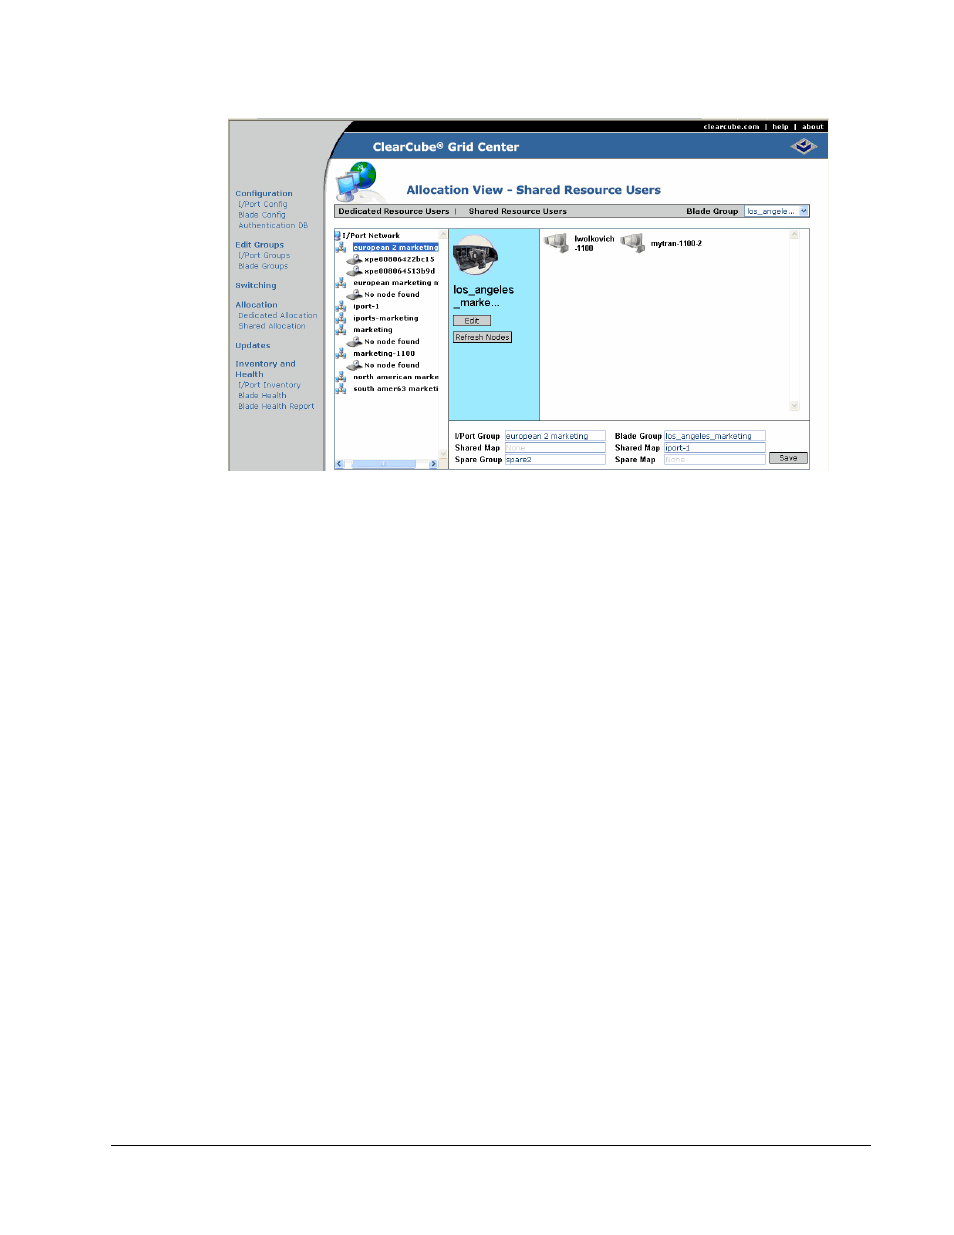
Figure 26 Adding a Shared Resource
Grid Center 4.11 Administrator’s Guide
Allocation • 49
Creating a Shared User Mapping
Before creating a shared user mapping, each Blade client must be configured as a
Shared resource type (see Creating a Blade Group on page 43). The Blade group
and I/Port groups must also be configured as Shared resource types (see Creating a
Blade Group on page 43 and Creating an I/Port Group on page 44).
1. From the Allocation View, click the Add link.
2. Select Shared Resource Users from the drop-down menu in the upper gray
bar.
3. Click on the I/Port Group name in the left pane.
4. Select the Blade Group to be shared from the drop-down menu in the upper
gray bar.
5. Click on any of the Blades shown in the right pane.
6. Click the Save button to save the shared user mapping.
7. To verify mapping was saved, click the Allocation link in the left menu and
click the link in the right pane to see the Shared Resource Users List.
Creating a Dedicated User Mapping
Before creating a dedicated user mapping, you must configure the Blade clients as a
Dedicated resource type (see Creating a Blade Group on page 43). The Blade group
and I/Port groups must also be configured as Dedicated resource types (see Creating
a Blade Group on page 43 and Creating an I/Port Group on page 44).