Installation. see, Figure 8, Figure 9 – ClearCube C/Port & MVX User Manual
Page 23
C7130 and C7120 C/Port Installation
• 13
2. Locate your C/Port in a ventilated area away from any heat sources. Do not stack your
C/Port on top of monitor ventilation vents or on top of other significant heat generating
devices.
If you ordered the C/Port mounting kit, attach it to the desktop surface with screws or with
double-sided tape. The C/Port mounts onto the bracket with the keyhole-shaped holes on
the bottom, and can be easily removed if necessary.
3. Connect the mouse, monitor, keyboard and any audio devices to the respective connectors
on the C/Port.
4. Connect USB devices first to the C/Port and then plug in the power cord for the USB
device (if applicable).
5. Connect the twisted-pair link cable (CAT5 or similar) from the chassis to the CPU jack on
the C/Port. For dual-processor blades, the link cable must be connected to the secondary
C/Port jack on the chassis (e.g., if the blade is placed in slots 3 and 4, the link cable should
be plugged into C/Port jack #4 on the chassis).
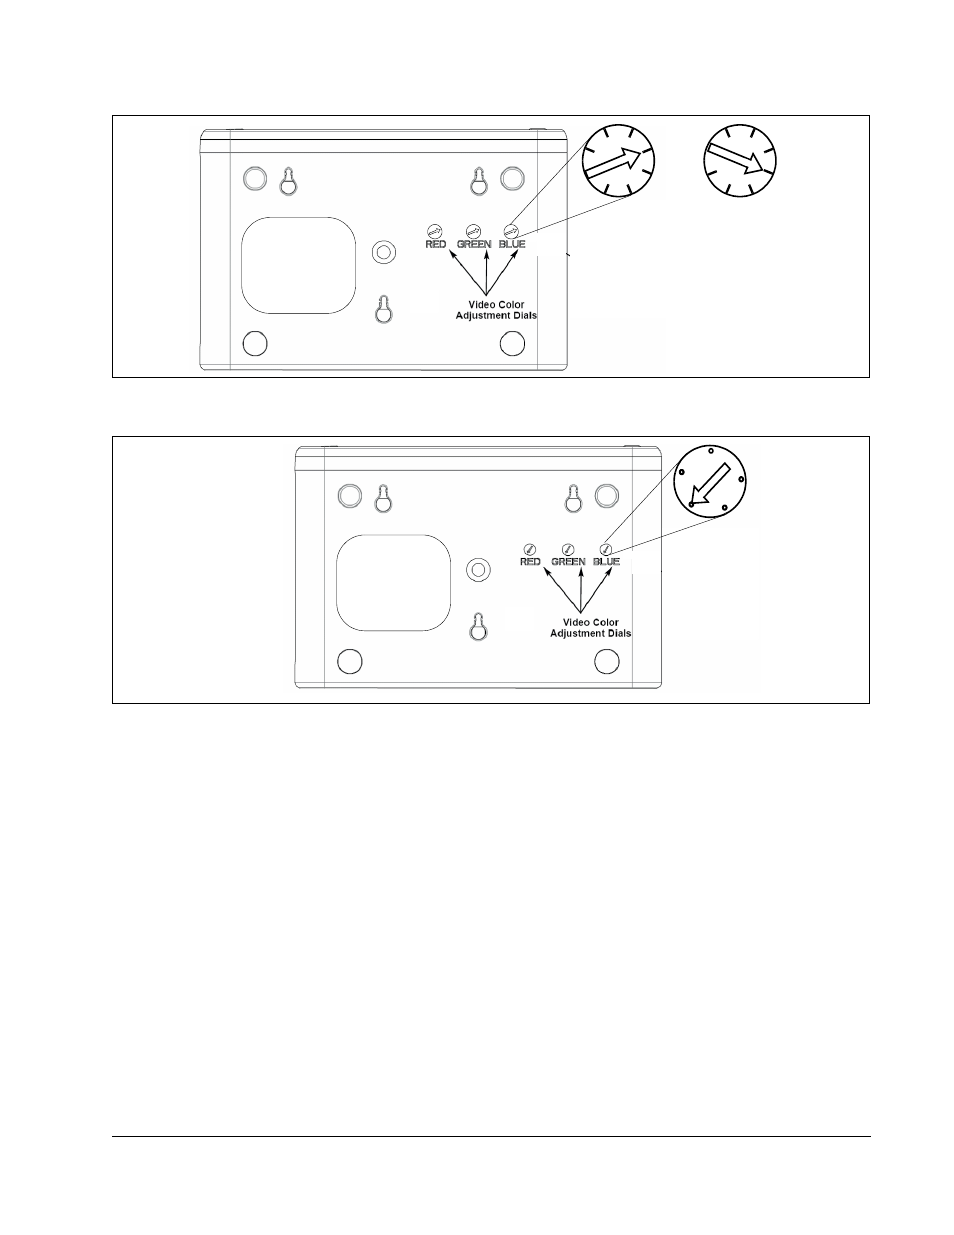
Figure 8. C7130 C/Port Color Switches
Figure 9. C/Port Color Switches, Earlier Versions
0
E
C
A
2
4
6
8
C7130
0
E
C
A
2
4
6
8
C7130 Auto-Tune
Default Setting
(F, not marked)
C7130 Manual Tune
Setting
(1, not marked)
Universal C/Port II
8
6
0
2
4
C7110 / C7120 C/Port
Default Setting
(1, not marked)
C7110