Installing the c/port on the desktop, Th a desktop, Figure 7 – ClearCube C/Port & MVX User Manual
Page 22
12 •
C/Port Installation
Installing the C/Port on the Desktop
If you do not have easy access to the data center to determine whether you are connecting to an
R4300 or R4200 chassis, use the simple matrix shown in
procedure. If you are unsure of the chassis type to which the C/Port connects, use the manual
tuning procedures.
To install a C/Port, do the following:
1. Verify the type of C/Port you are installing by reading the label on the bottom of the
C/Port.
a. If you are installing a C7130, verify that the three color switches on the bottom of the
C7130 are set to the positions marked F. This switch setting enables Auto-tuning on
the C7130. Use the C/Port tuning tool or a small flat-blade screwdriver to change the
switches, if necessary. See
b. If you are installing an earlier model, verify that the three color switches on the bottom
of the C/Port are set to the positions marked 1. This switch setting enables manual
tuning on all C/Ports. Adjust the switches if necessary. See
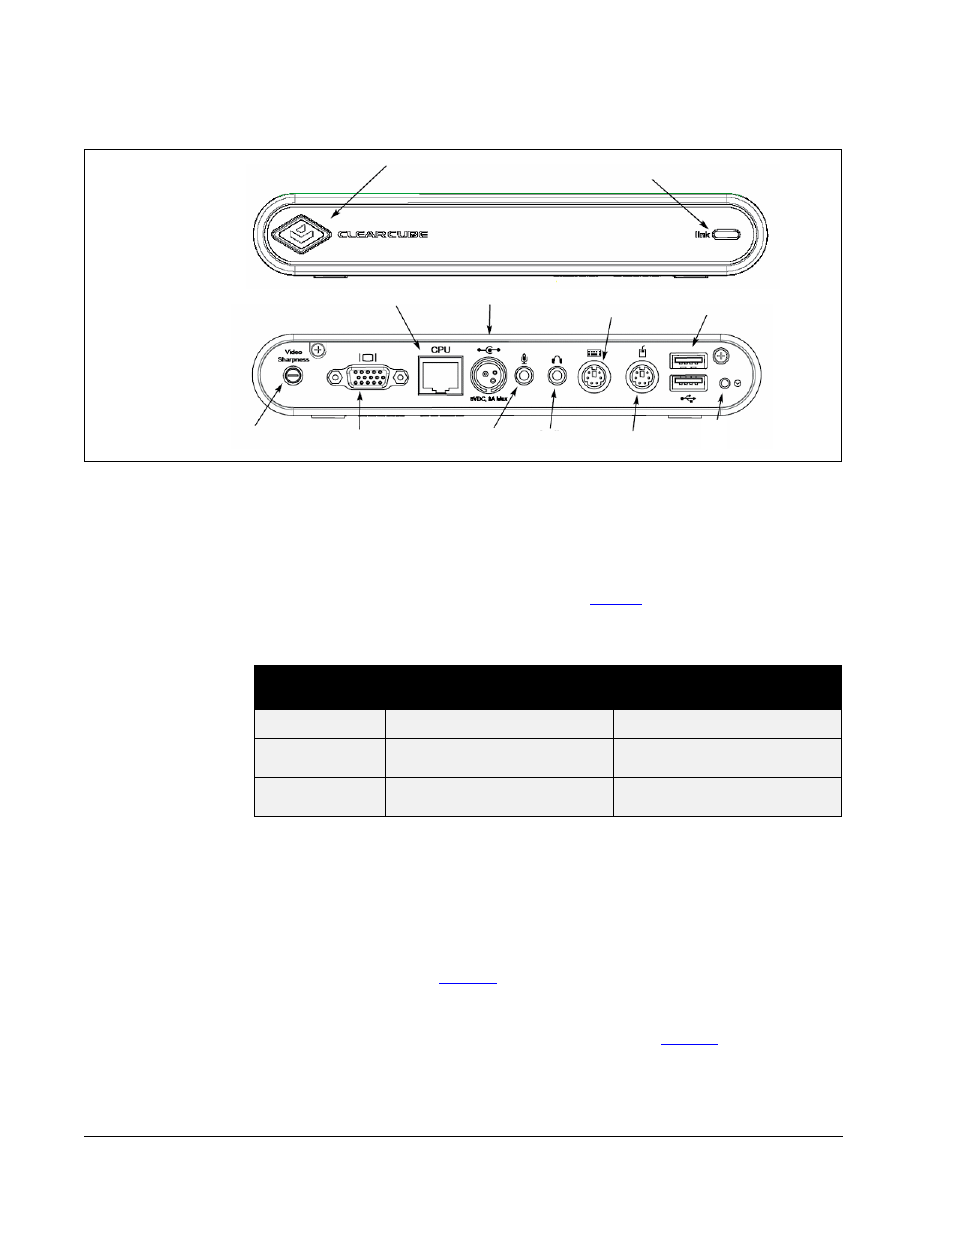
Figure 7. C/Port Front and Back Panels
Table 2. C/Port Tuning Procedure
R4300 Chassis
R4200 Chassis
C7130 C/Port
Auto-Tune
Sharpness and Color
Auto-Tune Sharpness,
Manual Tune Color
C7120 or earlier
C/Port
Manual Tune
Sharpness and Color
Manual Tune
Sharpness and Color
Power Indicator
(Blue Light
Around Badge)
Video Sharpness
Video Output
Blade Connection (RJ-45)
C/Port Link Status
DC Power Input
Keyboard Port
USB (2 Ports)
Mouse Port
Audio
Microphone
Adjustment Dial
(Green = link, Red = no link)
Input
Output
Blade
Reset/Power
Button