Installation instructions – Brandmotion 1009-9518 User Manual
Page 2
INSTALLATION INSTRUCTIONS
9518 Instructions 6-26-13.Doc
Page 2 of 7
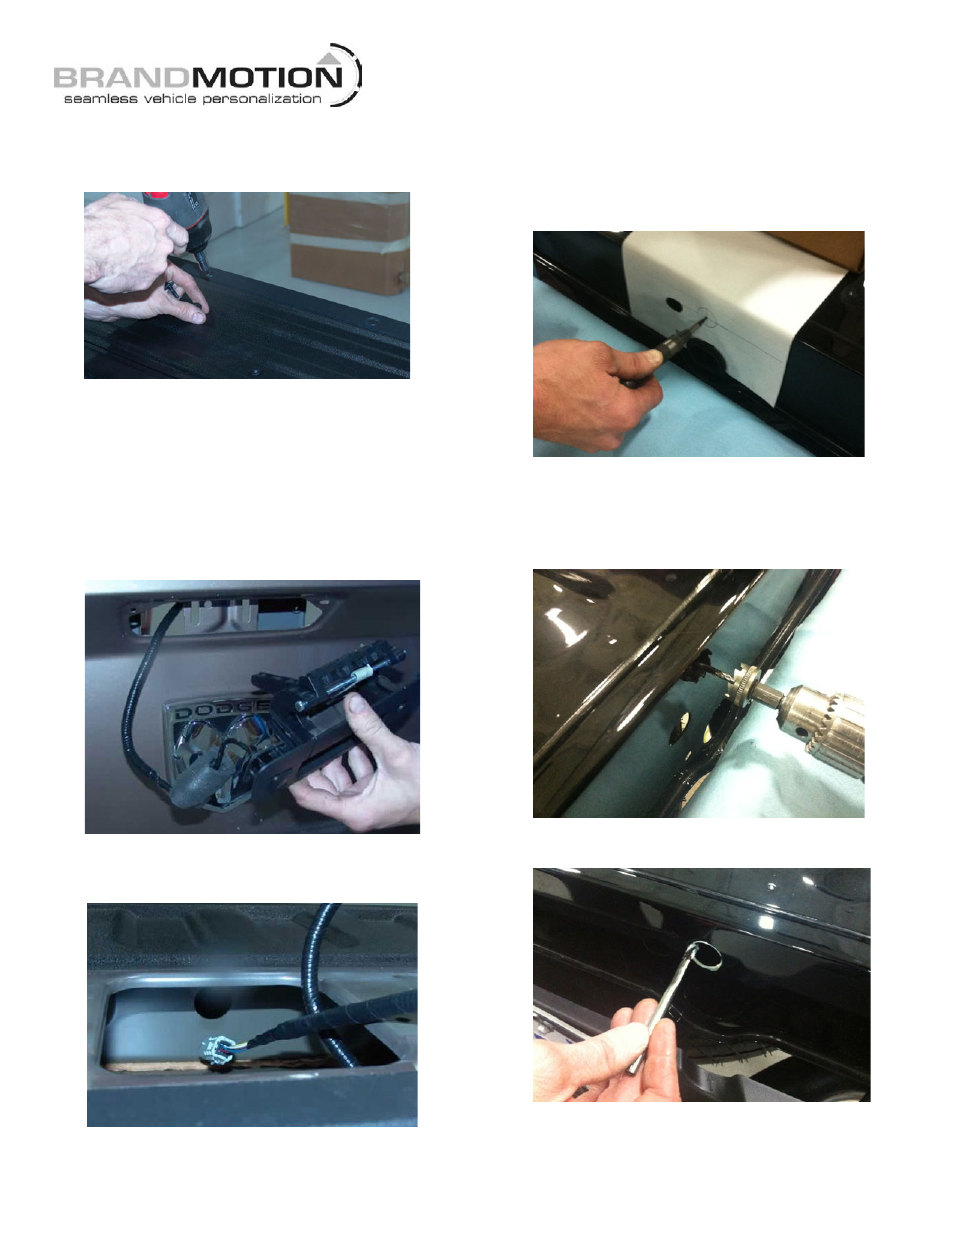
5. Remove the handle access panel inside the tailgate
using a T30 Torx driver. (NOTE: If vehicle is
equipped with a bed liner, the tailgate portion of the
liner must be removed prior to this step.)
6. Remove nuts attaching handle to tailgate using an
8mm Socket, then remove handle from tailgate.
7. Remove the lock cylinder from existing handle.
8. Remount the lock cylinder in the supplied Tailgate
Camera Handle using an 8mm Socket.
9. Route gray Camera Harness connector through
tailgate and use an 8mm Socket to install supplied
Tailgate Camera Handle using the existing
hardware.
10. Reinstall handle bolts.
11. Route supplied Camera Harness through the pass-
through hole in the inner brace of the tailgate.
12. Route Camera Harness through the rectangular hole
in the bottom of the tailgate.
13. Use Masking Tape to affix supplied Template B
above the oval spare tire access slot (located just
right of center on the pickup bed rear edge) and
mark the hole center using a Center Punch.
14. Check the area behind the hole you marked for
wiring. If any wiring is present, secure it away from
the area to be drilled.
15. Use a 1” Hole Saw to make the Camera Harness
pass through hole.
16. Use a Cotton Swab or small brush to apply supplied
Z-tec Corrosion Inhibitor to exposed metal edges.