4 - configuring video setup, Configuring video setup, Control buttons and power indicator – Rockwell Automation 6185-K Economy Line Monitors User Manual User Manual
Page 20
20
6185 Economy Line Monitors
Publication 6185-UM003C-EN-P
Configuring Video Setup
Configuring Video Setup
Configuring Video Setup
Configuring Video Setup
After making the connections, you are ready to setup your monitor.
This section describes how to setup and configure your monitor.
In the figure on the left, the gray shaded areas represent where you are
now in the general process to install, connect, and adjust your monitor.
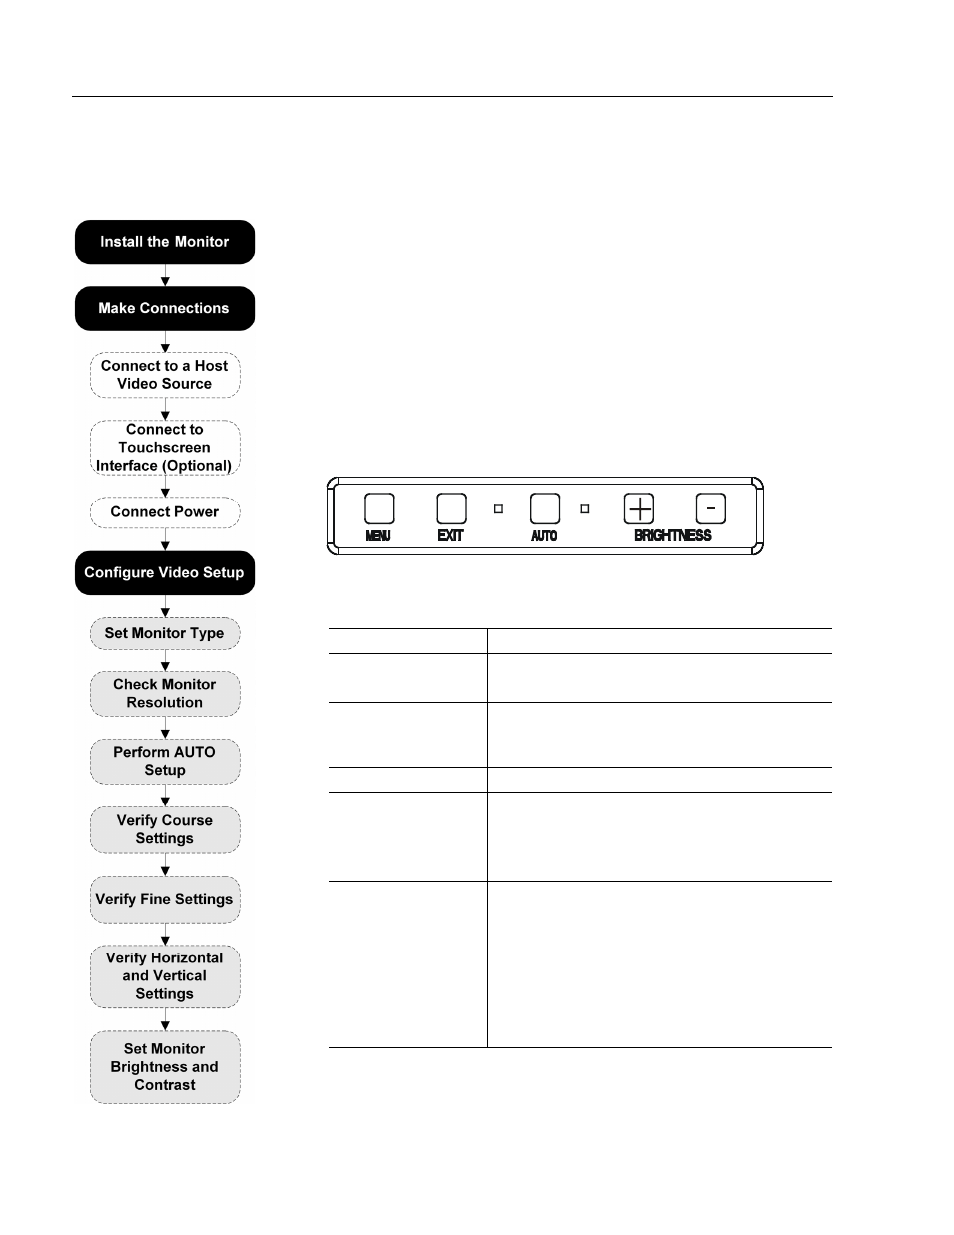
Control Buttons and Power Indicator
Figure 11
Front Panel User Controls
Table B
Control Buttons
Control
Description
Menu
Opens the OSD and sub-menus
Selects the highlighted function
Exit
Exits the OSD
Selects the Video signal (A or B) while the OSD is
off (6185-J and 6185-K only)
Auto
Starts the Auto Video Adjustment function
Brightness +/-
Adjusts the brightness level if pressed while the
OSD is off
Moves between OSD menus and submenus
Decreases or increases values
LEDs
There are two LEDs on the keypad:
•
Green LED On: Power good, video and sync
signals are present and good.
•
Amber LED On: Monitor in power saving mode
or power good, but video sync signals are not
present (disconnected cable) or out of range.
•
Amber and Green LEDs Flashing: Key has
been pressed when keypad is locked out.