Rockwell Automation 6181 Industrial Computer User Manual
Page 78
9–6
Replacing the Backlight Tubes
Publication 6181-UM001D-EN-P
5. Pivot the chassis to the left. If you have a touchscreen unit, make
sure the touchscreen cable comes out of the chassis without
becoming snagged and damaged.
6. Lift and pivot the chassis off of the display assembly and place the
chassis on its side to the left of the display assembly.
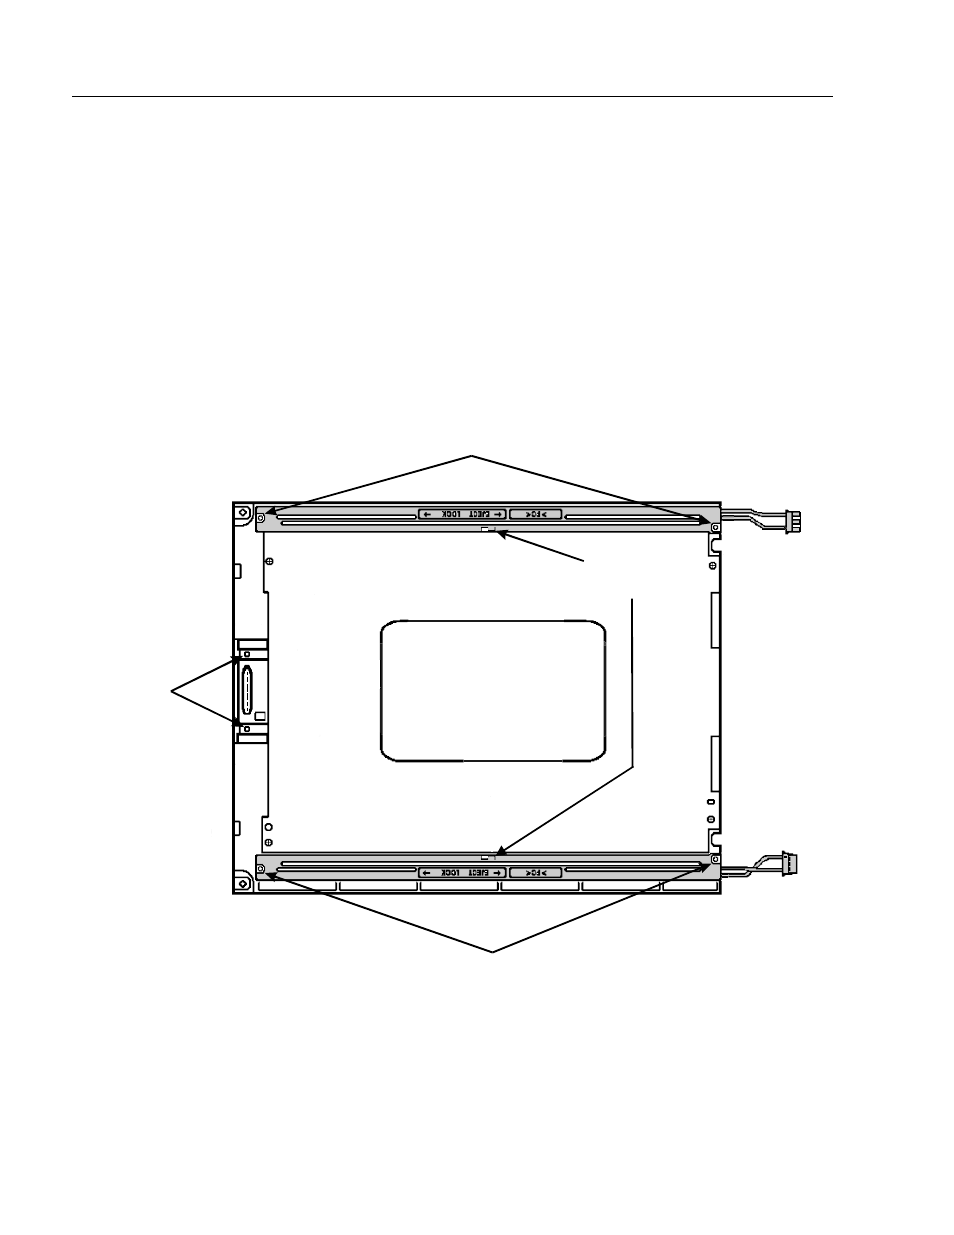
7. Disconnect the display cable from the flat panel display by removing
the 2 screws holding it to the small printed circuit board on the
display (see figure below). The display assembly is now completely
free of the unit.
Replacing the backlight tubes:
1. Remove the 2 screws holding each backlight tube in place.
Backlight Screws
Display Cable
Retaining
Screws
Backlight Screws
Backlight
Retaining Tabs
Backlights
are shaded
in gray.
2. Slide the tube to the right about 1/8 in. (3 mm) and gently pull the
tube up and out of the assembly.
3. Insert the replacement backlight tube into the slot and slide it to the
left until the holes for the screws are aligned.