Creating a private share for a user – Western Digital My Book Live Duo User Manual User Manual
Page 85
MY BOOK LIVE DUO
USER MANUAL
MANAGING USERS – 79
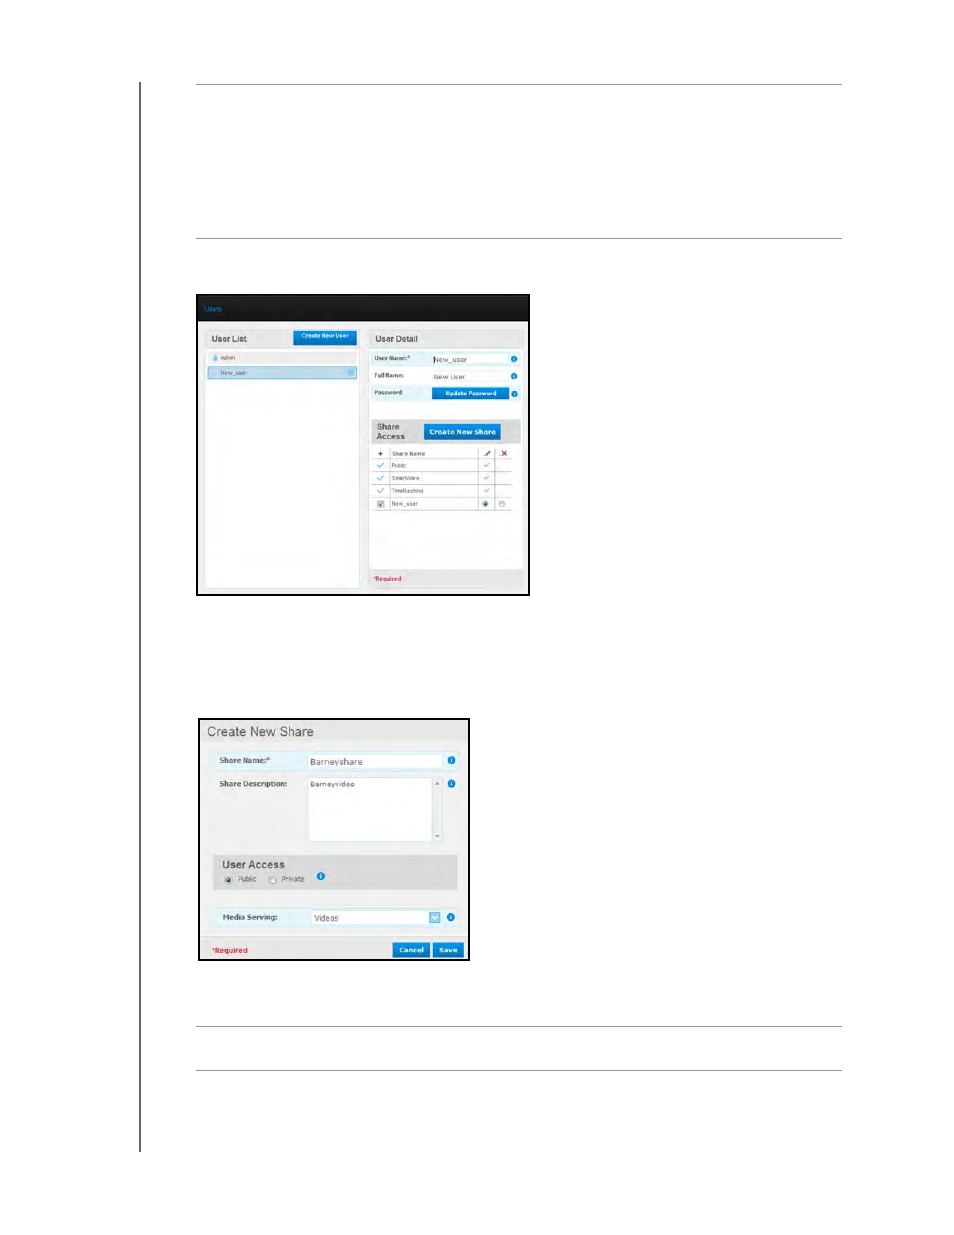
4. Click the Save button. The new user is listed in the User List, and the Share Access
section moves to the right panel:
Creating a Private Share for a User
1.
If you want to create a private share for the user, in the Share Access section on the right
panel, click the Create New Share button. A Create New Share box displays over the
page:
2. Complete all required settings (indicated by red asterisk) and any optional settings, as
follows:
Allow access to existing
shares
Select this option to grant the new user access to other
shares. Select the check box next to each share the user can
access, and then specify the level of access by selecting the
full access or the read-only access icon.
For example, the new user may be given read-only access to
the family’s photos or Mom’s videos (so he can’t change,
delete, or add to them), but full access to Projects, so he can
add, edit, or delete project files.
Share Name
Assign a name to the share that clearly indicates the type of
files it will contain.
Share Description
Enter a brief description of the content in the share. Note that
share descriptions must begin with an alphanumeric value
and can contain up to 256 characters.