Replacing a drive – Western Digital My Book Live Duo User Manual User Manual
Page 131
MY BOOK LIVE DUO
USER MANUAL
REPLACING A DRIVE – 125
Replacing a Drive
The My Book Live Duo device is a limited user-serviceable product that allows for replacing
the hard drives in the enclosure.
If the LEDs on the unit are flashing or you have received an alert, the network drive may be
faulty. To determine which drive is faulty, do the following:
1. On the dashboard’s navigation panel, click Settings, then click the Storage tab. Review
Drive A and Drive B to determine which drive is faulty.
2. If one of the drives has Failed or Storage Failed?, and note the letter of the drive (for
example, Drive A).
In the event a fault occurs and you would like to service the device yourself, visit
WD Technical Support at
http://support.wdc.com
and search the Knowledge Base Answer
ID 8644 for detailed instructions on obtaining a replacement drive. When contacting
Technical Support, have the following items ready: The My Book Live Duo device serial
number, date of purchase, and the serial number of the internal hard drive(s) requiring
replacement. Once you have received the replacement drive(s), follow the steps below to
replace the faulty drive.
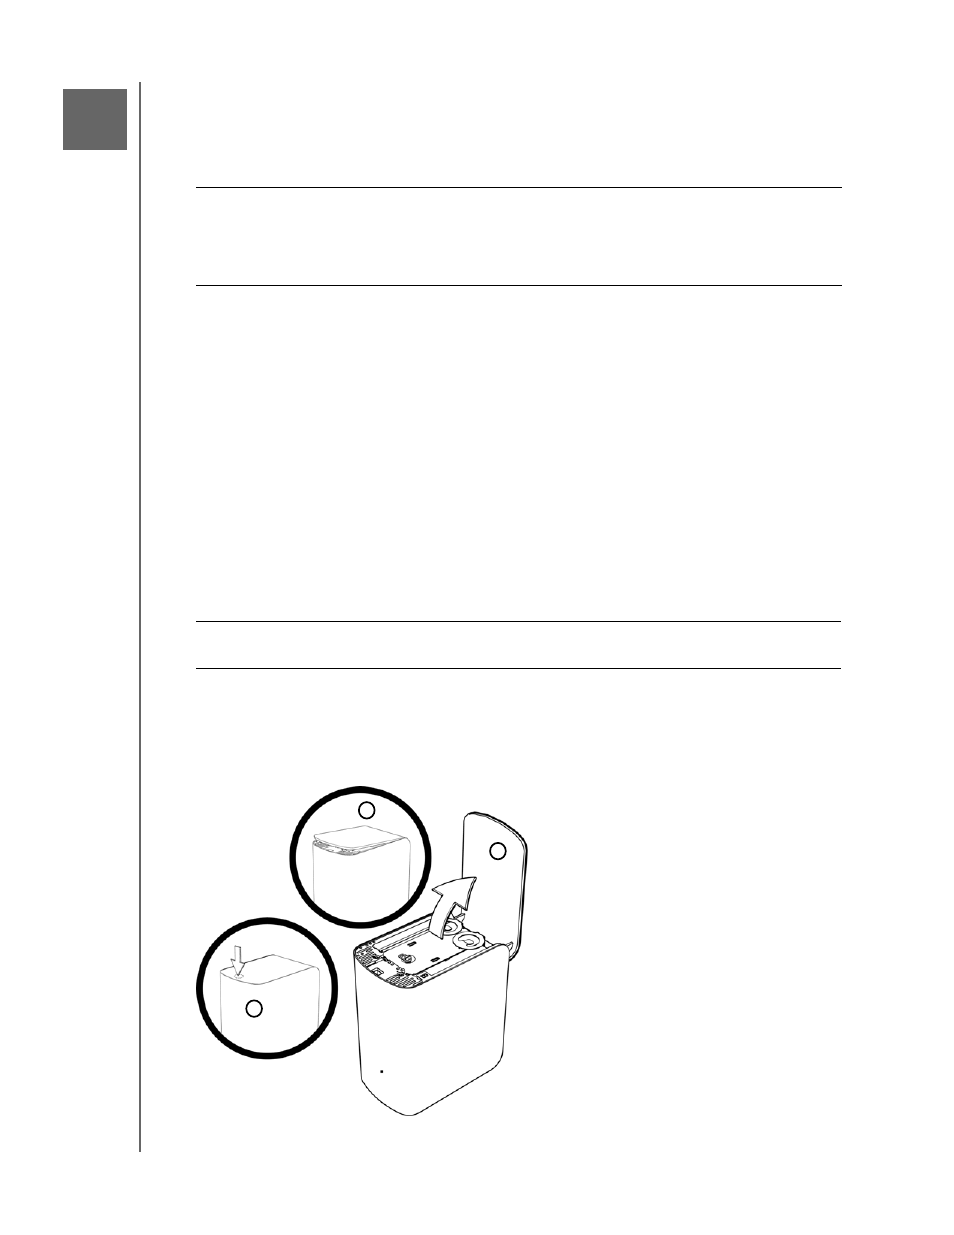
1. Before getting started, power off the unit and disconnect all of its cables.
2. Place the unit on a clean and stable surface.
3. Using your thumb, firmly push down on the top front panel of the unit to release the latch
and open the cover.
Important: Only WD large capacity hard drive assemblies can be inserted into the
My Book Live Duo drive enclosure. Visit
http://support.wdc.com
and
search the Knowledge Base Answer 8644 for detailed instructions on
obtaining a replacement drive for this product. Use only WD hard drive
assemblies or your warranty will be voided.
Important: To avoid electrostatic discharge (ESD) problems, ground yourself by
touching metal before handling the device.
14
1
2
3