Prescolite CF10UD432EB User Manual
Instruction sheet, Installation instructions
Instruction
Sheet
www
.prescolite.com
• Prescolite
TollFree
Technical Support
1.888.PRS.4TEC
• Hours: 8am - 5pm ET
101 Corporate Drive• Spartanburg, SC 29303
With representatives offices in principal cities throughout North America.
Copyright 2005, 08/05 revision, All Rights Reserved - Printed in U.S.A.
Part No. . . . . . . . . . . . . . . . . . . . . . . . . . . . . . . . .93001021
Instruction
Sheet
INSTALLATION INSTRUCTIONS
CF10UD226EB/ CF10UD232EB/ CF10UD242EB/
CF10UD426EB/ CF10UD432EB/ CF10UD442EB
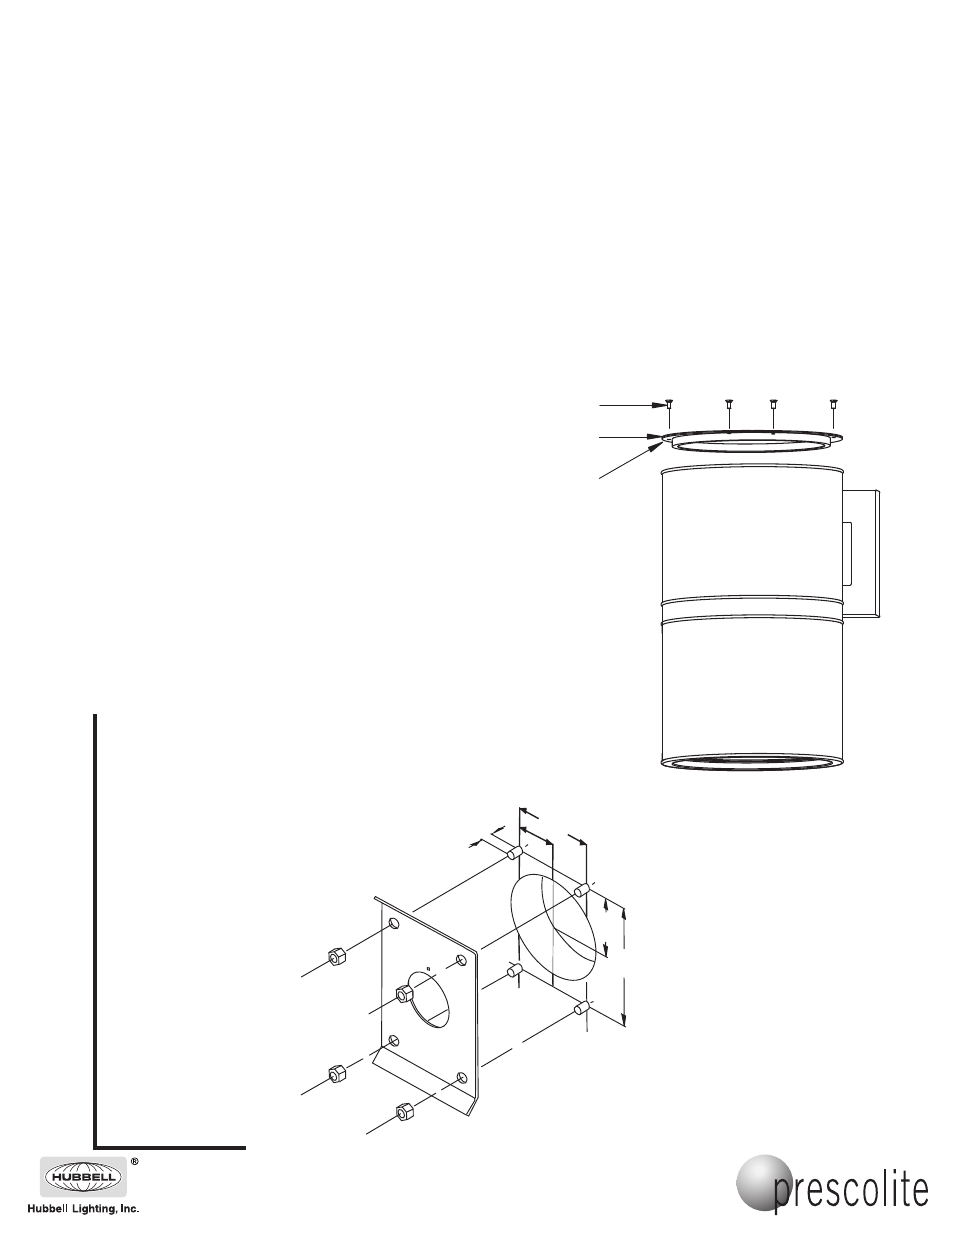
WET LOCATION RING
MOUNTING SCREWS
Fig. 1
WALL MOUNT
IMPORTANT SAFETY INFORMATION. READ AND FOLLOW ALL SAFETY INSTRUCTIONS. Follow label information
and instructions concerning Wet or Damp Locations, installation near combustible materials, insulation, building materials,
and proper lamping. Do not install in areas subject to combustible vapors or gases. Before wiring to power supply and
during servicing or relamping, turn off power at fuse or circuit breaker. All servicing or relamping must be performed by
qualified service personnel. Product must be grounded to avoid potential electric shock or other potential hazard.
Product must be mounted in locations and at heights and in a manner consistent with its intended use, and in
compliance with the National Electrical Code and local codes. The use of accessory equipment not recommended by
the manufacturer or installed contrary to instructions may cause an unsafe condition. Do not block light emanating from
product in whole or part, as this may cause an unsafe condition. Do not allow items such as drapes, curtains, screens or
the like to come into contact with the product or to block light from the product, as this may cause an unsafe condition.
WET LOCATION RING
GASKET
1.
Secure mounting plate to wall with box centrally located (Fig.
1). Maximum bolt size is 3/8”. If studs are used, they should
protrude no more than 1/2” beyond wall surface.
2.
Hang luminaire on mounting plate and make electrical connec-
tions .
3.
Lower luminaire until it rests against wall. Lock it in place by
tightening the two set screws on the bottom of canopy casting.
4.
Make electrical connections.
5.
Remove the wet location ring (on the top) by unscrewing the 4
screws (Fig. 2).
6.
Install the lamps.
7.
Mount the wet location ring. Make sure that the gasket stays in
place and it is not damaged. Tighten the screws in order to
provide proper sealing of the luminaire.
1
5
/
8
”
2
1
/
2
”
5”
3
1
/
4
”
Fig. 2
1
/
2
” Max