Prescolite B6 BAR HANGER User Manual
Ins tru ctio n s he et, Installation instructions b6 bar hanger
Ins
tru
ctio
nS
he
et
w
w
w
.p
r
e
s
c
o
li
te
.c
o
m
•P
res
co
lite
To
llF
ree
Te
ch
nic
al
Su
pp
ort
1.8
88
.P
RS
.4T
EC
•
Ho
urs
:8
am
-5
pm
ET
Part No. . . . . . . . . . . . . . . . . . . . . . . . . . . . . . . . .03379500
INSTALLATION INSTRUCTIONS
B6 BAR HANGER
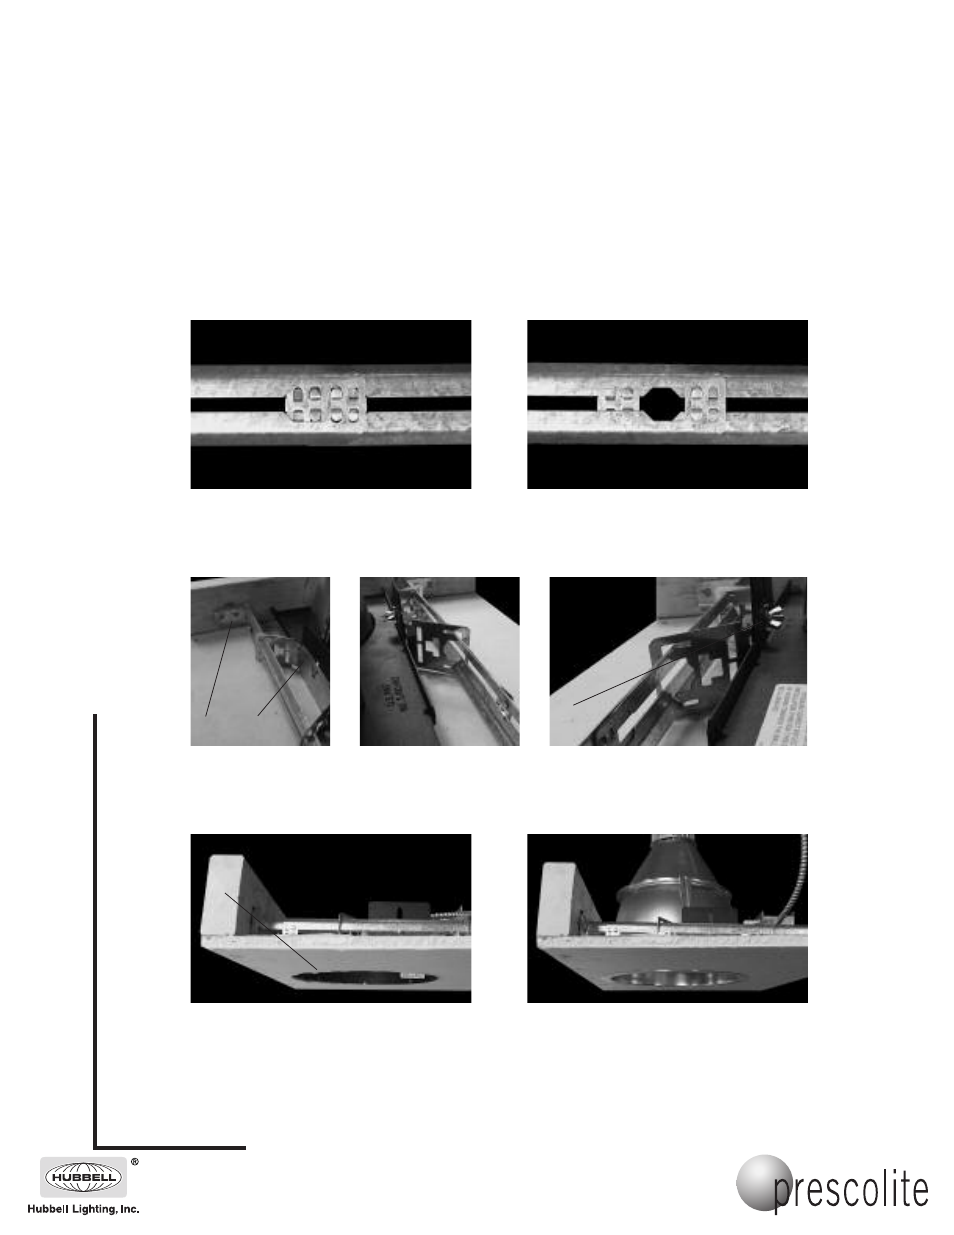
(After inserting into brackets {A} on housing) Assemble
the bar hangers by overlapping the ends of the two sec-
tions and placing the tabs on each section into the square
hole in the opposite section.
Slide the sections together so that the tabs engage the
slots.
IMPORTANT SAFETY INFORMATION. READ AND FOLLOW ALL SAFETY INSTRUCTIONS. Follow label information
and instructions concerning Wet or Damp Locations, installation near combustible materials, insulation, building materials,
and proper lamping. Do not install in areas subject to combustible vapors or gases. Before wiring to power supply and
during servicing or relamping, turn off power at fuse or circuit breaker. All servicing or relamping must be performed by
qualified service personnel. Product must be grounded to avoid potential electric shock or other potential hazard.
Product must be mounted in locations and at heights and in a manner consistent with its intended use, and in
compliance with the National Electrical Code and local codes. The use of accessory equipment not recommended by
the manufacturer or installed contrary to instructions may cause an unsafe condition. Do not block light emanating from
product in whole or part, as this may cause an unsafe condition. Do not allow items such as drapes, curtains, screens or
the like to come into contact with the product or to block light from the product, as this may cause an unsafe condition.
After inserting bar hangers into housing brackets (A) and connect-
ing bar hanger ends, secure both bar hanger ends to one joist (B),
then secure bar hanger ends to opposite joist with customer sup-
plied fasteners.
The vertical housing position can be raised and low-
ered and locked using the wing nut (C). The housing
flange needs to be flush with the ceiling (D).
Without reflector/trim ring. Showing housing flange.
Install reflector/trim ring last to cover hole and finish instal-
lation.
A
B
C
D
701 Millennium Boulevard • Greenville, SC 29607
With representatives offices in principal cities throughout North America.
Copyright 2007, 02/07 revision, All Rights Reserved - Printed in U.S.A.