B. programming avrs using atmel studio 6 – Pololu USB AVR User Manual
Page 13
3.b. Programming AVRs Using Atmel Studio 6
If you have an Orangutan or 3pi Robot or wish to use the Pololu AVR C/C++ Library for some
other reason, we recommend following the
instead of this tutorial.
The following tutorial covers the steps needed to program AVRs in Windows using
and a Pololu USB AVR Programmer. Atmel Studio 6 is a free integrated
development environment (IDE) provided by Atmel. In this tutorial, we will write a simple program to blink an LED
connected to pin PD1 of an AVR. If you want to program an AVR that does not have an LED connected to pin PD1,
the code in this tutorial can be modified.
You will need to:
• Download and install
by following the instructions
on Atmel’s website.
• Install the Pololu USB AVR Programmer’s drivers on your computer. See
for instructions.
• Upgrade your programmer’s firmware to version 1.07 or later. See
for instructions. If your
programmer was shipped from Pololu after 2012-02-29, then you already have the right firmware.
• Add the appropriate XML file to Atmel Studio 6 to get it to support the AVR you wish to program, if
necessary. See
for instructions.
After you have completed these prerequisites, you can create a new Atmel Studio 6 project:
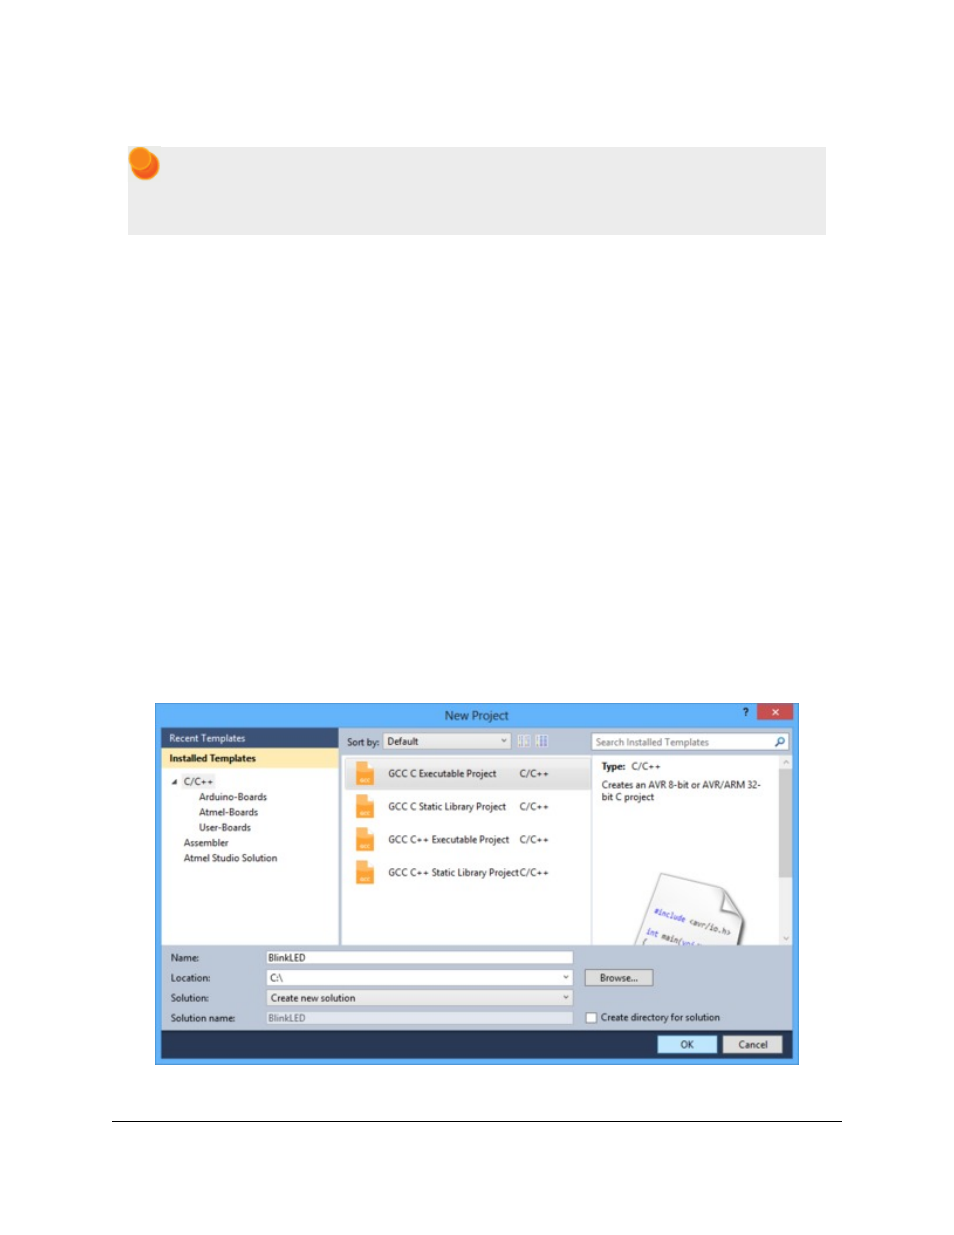
1. Open Atmel Studio 6 and click New Project. In the New Project dialog, select GCC C Executable Project
for the template. Enter the project name and location. In this tutorial, we will name our project “BlinkLED” and
put it in the “C:\” directory, but you can choose a different name and location if you would like. Uncheck the
Create directory for solution box to simplify the directory structure of your project. Click OK.
The New Project dialog of Atmel Studio 6.
Pololu USB AVR Programmer User's Guide
© 2001–2014 Pololu Corporation
3. Getting Started in Windows
Page 13 of 54