Working with celsius, 1 tempering profiles, 1 creating a new tempering profile – Memmert CELSIUS 10 FDA User Manual
Page 33: 2 graphical and tabular view
33
CELSIUS 10 FDA-Edition
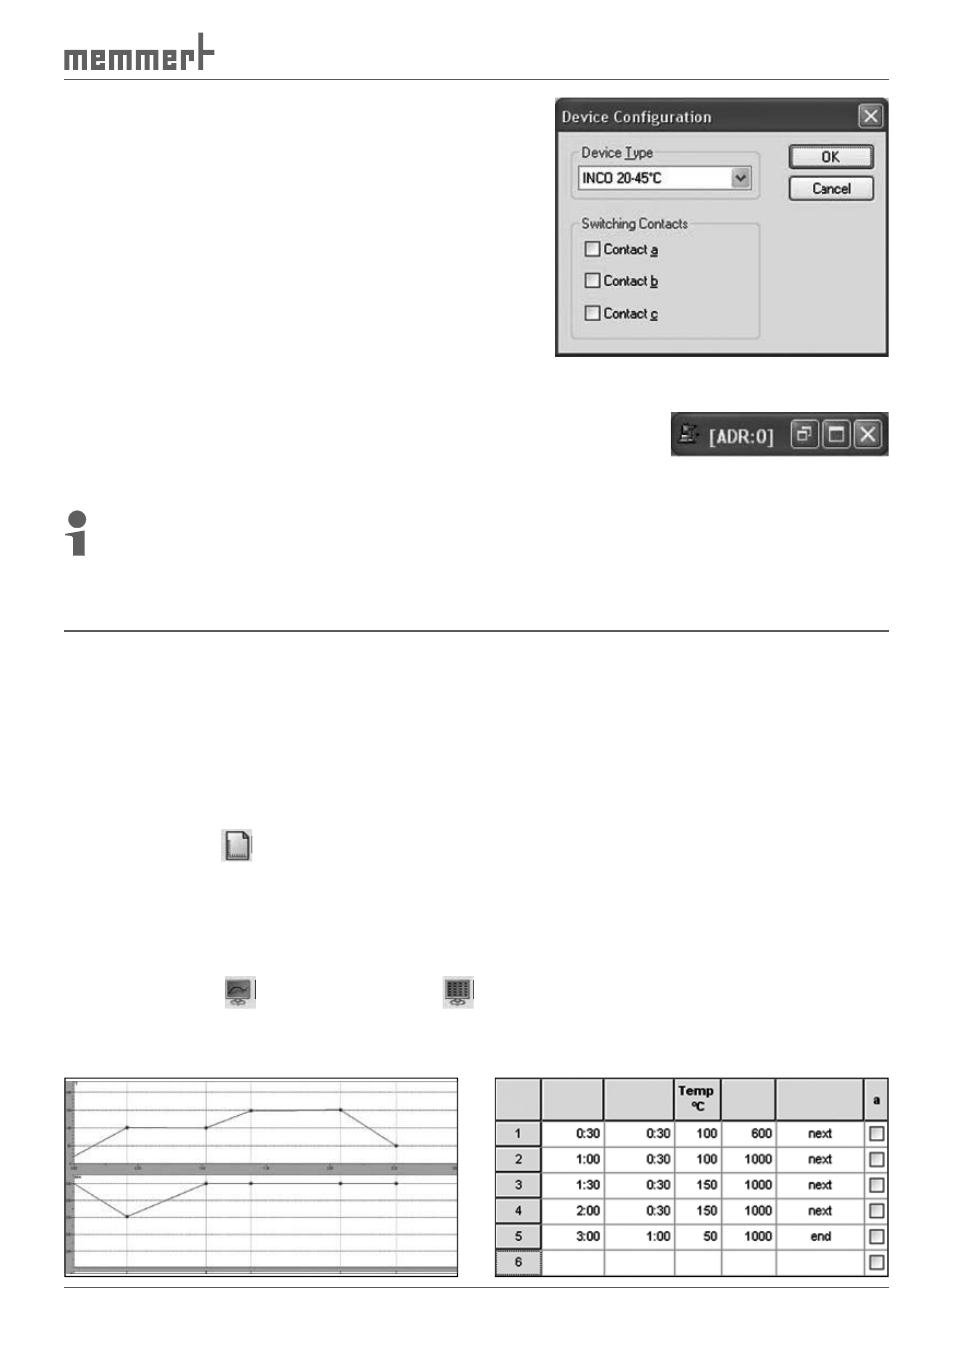
For ovens logged on offline, the desired device
configuration must be specified in another dialog. The
configuration dialog appears automatically if an oven
was logged on offline.
Select from the list the oven type that you want to
simulate or to which you want to transfer a temper-
ing profile, and confirm this with "OK". With optional
extras (e.g. additional switching contacts), these must
be activated manually for them to be used later on.
Depending on what oven type you set, different,
oven-specific setting options (e.g. flap or fan) will be
available later when you are creating a tempering
profile (see pages 29 and 34 ).
If an oven has been logged on for the first time, a graphics window
is automatically generated so that a new tempering profile can be
created. The window can be opened or minimised with a double
click.
If there is more than 30 minutes difference between the oven and computer times, a
warning is displayed when the oven is logged on. In this case, you should set the oven to
the time displayed by the computer (see user manual for the oven).
8. Working with CELSIUS
8.1 Tempering profiles
8.1.1 Creating a new tempering profile
A new, empty tempering profile can be created in three ways:
►
in the graphics window that is automatically started when a new oven has been logged
on (see above)
►
via "File"
→"New Profile"
►
by clicking on
in the toolbar
8.1.2 Graphical and tabular view
Tempering profiles can be created and edited in graphical (see page 29) and tabular form (see
page 34).
You can switch between the two views at at any time:
►
with the icons
(graphical view) and
(tabular view) in the toolbar
►
via "View"
→"Graphics" or "View"→"Table"
Example of graphical and tabular presentation of the same tempering profile:
Time
hh:mm
Period
hh:mm
Vacuum
mBar
Type