Section 2: installing the gateway, Section 2, Installing the gateway – ETC Net3 Two Port DMX Gateway User Manual
Page 8
4
Net3 Two Port Gateway Setup Guide
Section 2: Installing the Gateway
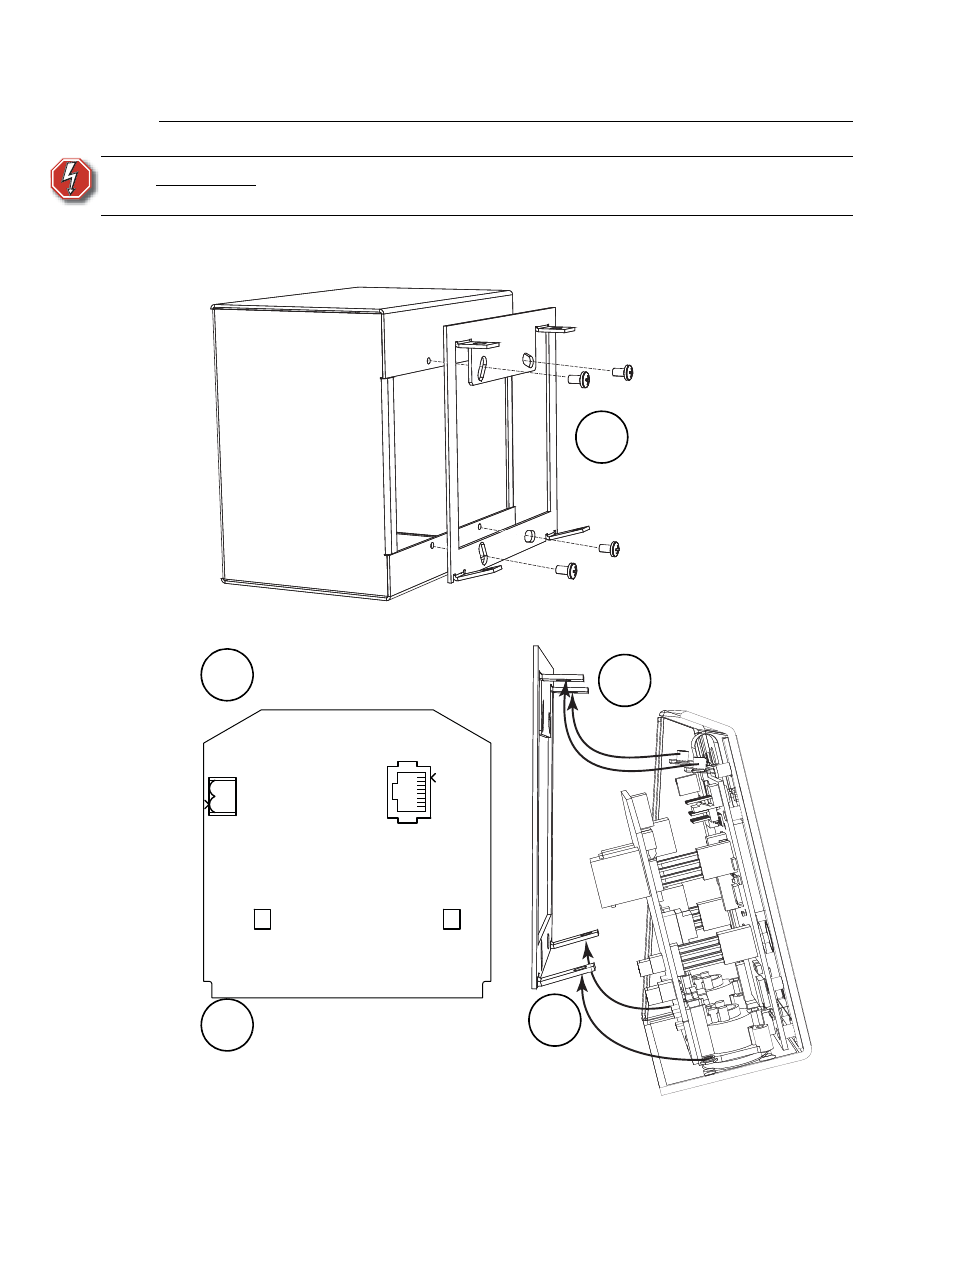
With power disconnected from the Gateway, you can install or remove the unit from its
enclosure. When using PoE (Power Over Ethernet), don’t patch this unit prior to installation.
W A R N I N G :
RISK OF ELECTRIC SHOCK! Power must be removed from the Gateway
before removing the unit or servicing the unit.
ON
ON
10/100 ETHERNET
12V PWR
J9
J8
S1
S2
-
+
...swing the bottom of the
gateway into place and
tighten the screws on
either side of the bottom of
the unit.
1
4
5
Use the provided screws
to secure the mounting
bracket to the enclosure.
Note that this same
bracket works for in-wall
back boxes,
surface-mount boxes and
portable enclosures.
Line up and insert the top
alignment pins first, then...
2
3
Make the power and data connections.
This may consist of only plugging in the Ethernet
connection if you are using PoE or both power
and Ethernet connections.
Near-side
gateway cover
is not shown
for clarity.
Set the DMX termination if necessary via S1 and
S2. S1 controls the termination for Port 2, and S2
controls the termination for Port 1.
These switches are defaulted to on for every
module and it is very rare that you would ever
need to disable DMX termination on this unit.
This dc input
supports 8-28Vdc.