Lull 944E-42 Service Manual User Manual
Page 260
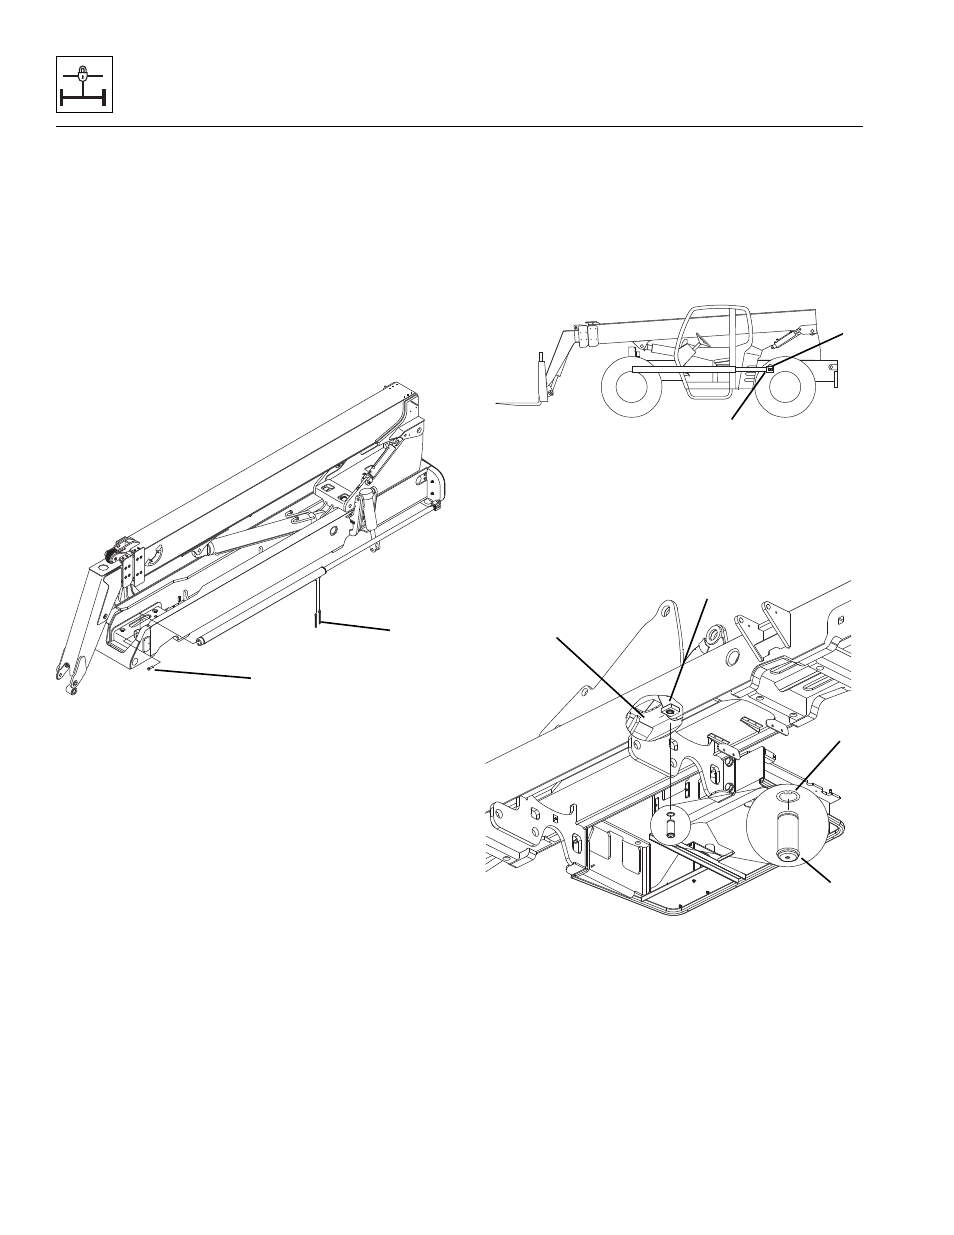
Transfer Carriage
11-20
944E-42
7. If you are replacing the pin, remove the bottom snap
ring (7).
8. Shut the engine OFF.
9. Place a Do Not Operate Tag on both the ignition key
switch and the steering wheel, stating that the
machine should not be operated.
10. Open the engine cover. Allow the system fluids to
cool.
11. Properly disconnect the batteries.
12. Secure the transfer cylinder with a sling and take up
any slack.
13. Label, disconnect and cap all hydraulic hoses (8)
attached to the transfer cylinder. Cap all fittings and
openings to keep dirt and debris from entering the
hydraulic system.
14. Remove two bolts (9) securing the transfer cylinder
to the machine.
15. Lift, lower and place the transfer cylinder on support
blocks on a firm level surface.
b. Transfer Cylinder Installation
1. Lift the transfer cylinder into position on the vehicle
chassis.
2. Replace two bolts securing the transfer cylinder to
the frame.
3. Uncap and reconnect the previously labeled
hydraulic hoses to the transfer cylinder.
4. Move the transfer carriage 5 ft 8 in (172 cm) so that
the pin (1) connecting the transfer cylinder to the
transfer carriage is at a pin access hole (2) near the
rear of the cab.
Note: Make sure the threaded hole, of the transfer
cylinder pin, is facing downward during installation.
5. Connect the transfer cylinder (3) to the transfer
carriage mount (4) with the transfer cylinder pin (5)
securing it with retaining rings (6).
6. Properly connect the batteries.
7. Close and secure the engine cover.
MU3371
8
9
MU3051
1
2
MU5491
5
6
4
3