Drive shaft assembly – Lull 1044C-54 Series II Service Manual User Manual
Page 354
Axles and Brakes
9-10
31200079
4. Use a soft, round drive pin with a flat face approximately 1/32" (0,8
mm) smaller than the hole diameter in the yoke to drive on one end of
the cross and bearing assembly until the opposite bearing assembly
comes out of the yoke.
5. Turn the yoke over and tap on the exposed end of the cross until the
opposite bearing assembly comes out of the yoke.
6. Remove the cross from the yoke.
7. Repeat Steps 2 thru 6 to remove the cross and bearing assembly on
the other end of the drive shaft.
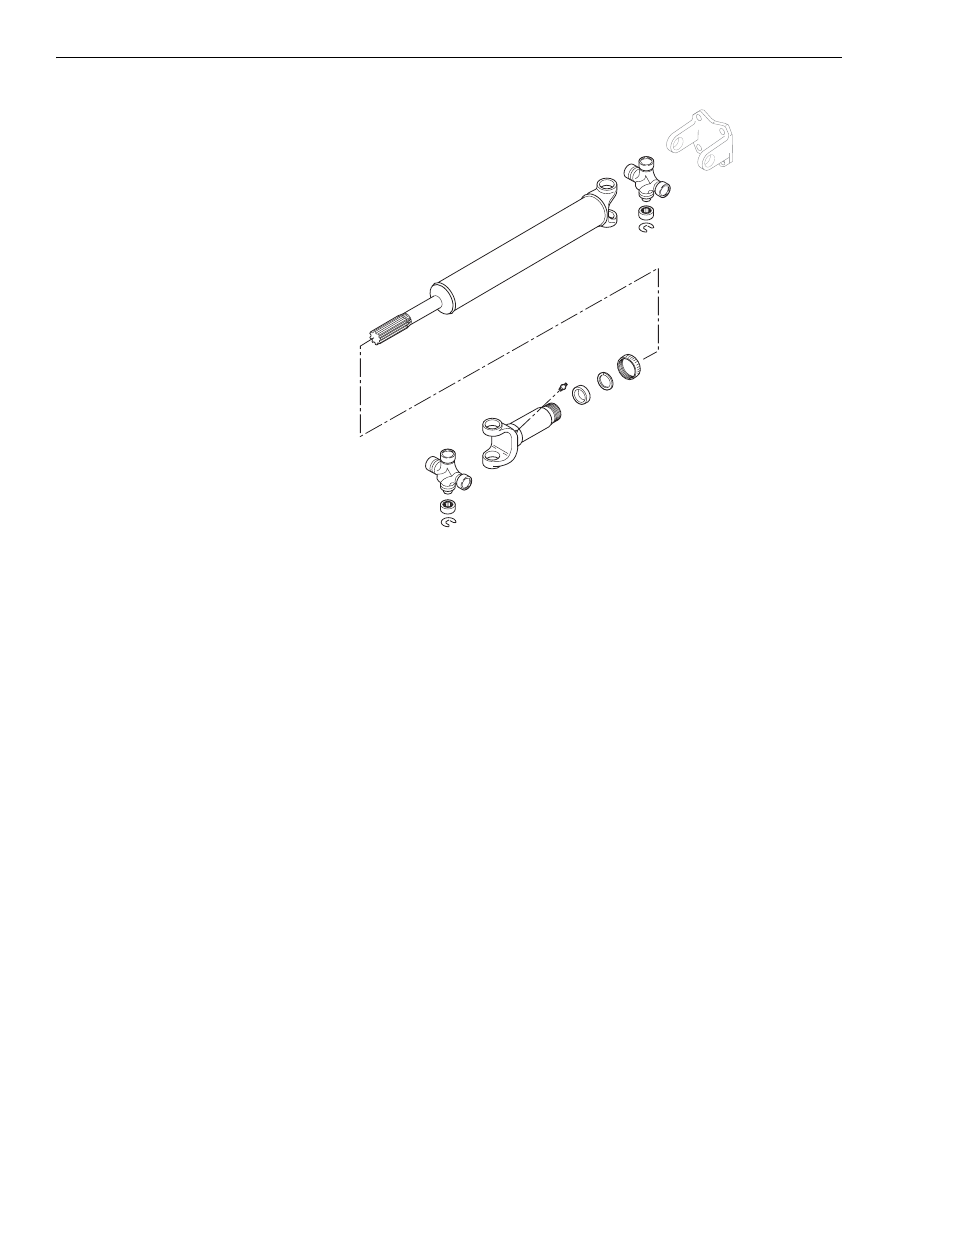
Drive Shaft Assembly
1. Install the dust cap, split retaining ring and felt seal onto the splines of
the drive shaft tube assembly.
Important: Ensure that the reference marks made before removal on the drive
shaft and slip yoke are aligned. The drive shaft and yokes must be in
the same plane to help prevent excessive vibration.
2. Align the reference marks made previously on the drive shaft and slip
yoke.
3. Slide the slip yoke onto the splines of the drive shaft and tighten the
dust cap securely. DO NOT overtighten or the cap will break.
4. Install the cross and bearing assembly into the yoke.
5. Secure the cross and bearing assembly into the yoke with snap rings.
Pinch each snap ring with a pliers and insert them into their grooves in
the yoke.
MV0380