Attaching the desktop stand – Apple Studio Display User Manual
Page 47
Attaching and Removing the Desktop Stand and Flip-Out Stand
47
7
Place the display on a clean, flat surface.
Make sure the surface is clean and flat or you may damage the screen.
8
Store the flip-out stand in a safe place.
Attaching the Desktop Stand
1
If necessary, remove the flip-out stand. (See “Removing the Flip-Out Stand” on page 46.)
2
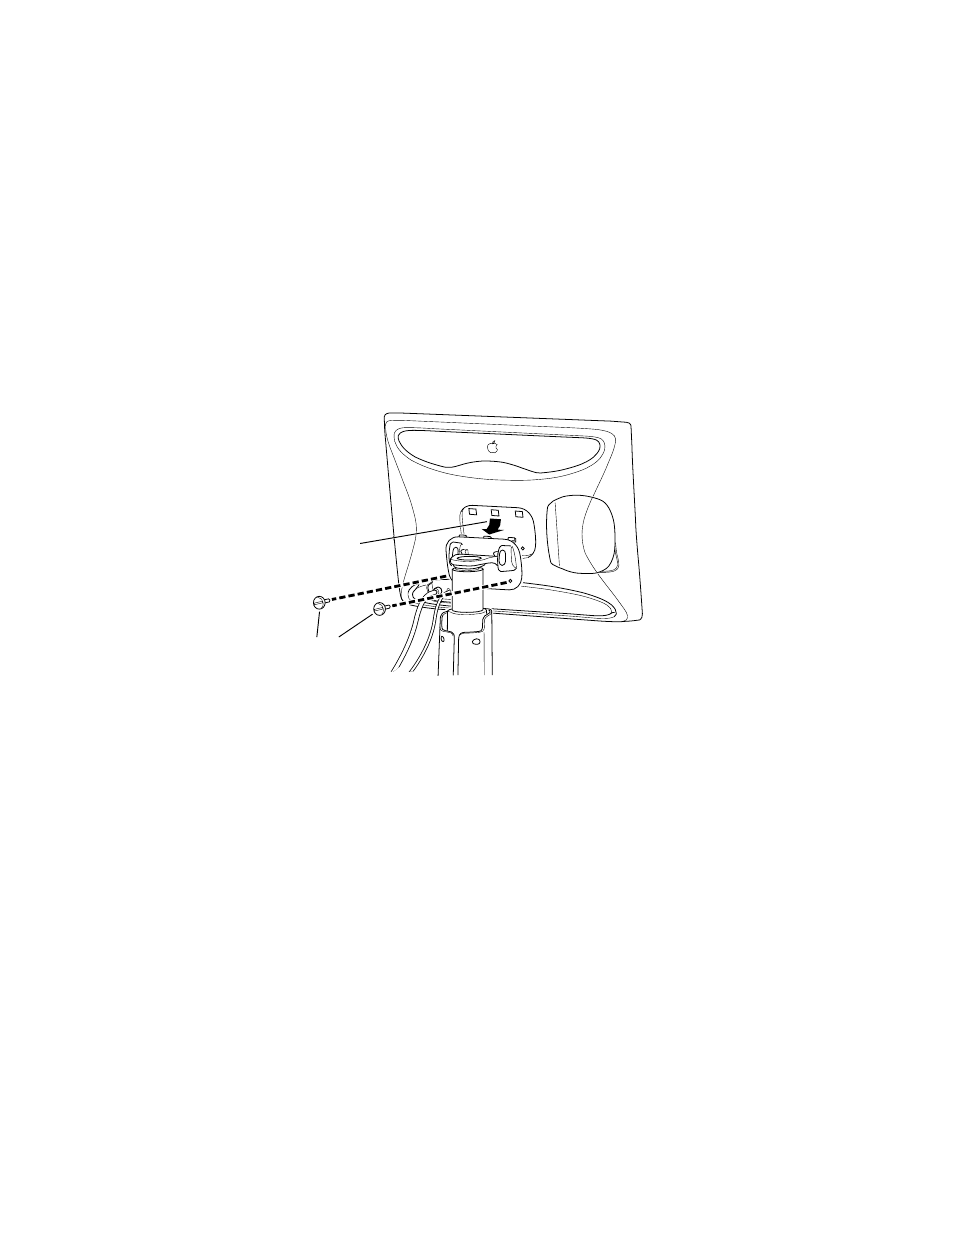
Lift the display up and hook the three plastic tabs on the top of the desktop stand into the
three openings on the back center area of the display.
3
Screw in the two plastic thumbscrews on the bottom of the cover.
Use a coin or flathead screwdriver to tighten the screws. Don’t overtighten the screws; you
might strip the threads.
4
Place the display cable, power adapter cable, and ADB cables through the cable guides.
5
Connect the ADB cable that’s attached to the desktop stand inside the cable guide to the
ADB port (marked with V) on the back of the display.
6
Decide how you want to connect the keyboard and mouse.
For example, you can connect your mouse cable to your keyboard and then connect the
keyboard to one of the ADB ports (marked by V) on either side of the desktop stand. Or, if
you prefer, you can plug both your keyboard and mouse into the ADB ports (marked by V)
on the desktop stand.
First, hook the
display on to
the desktop stand.
Then tighten the
thumbscrews.
Important
Make sure you leave some slack in the cables so you can tilt, swivel, and turn the
display.