Attaching the flip-out stand – Apple Studio Display User Manual
Page 45
Attaching and Removing the Desktop Stand and Flip-Out Stand
45
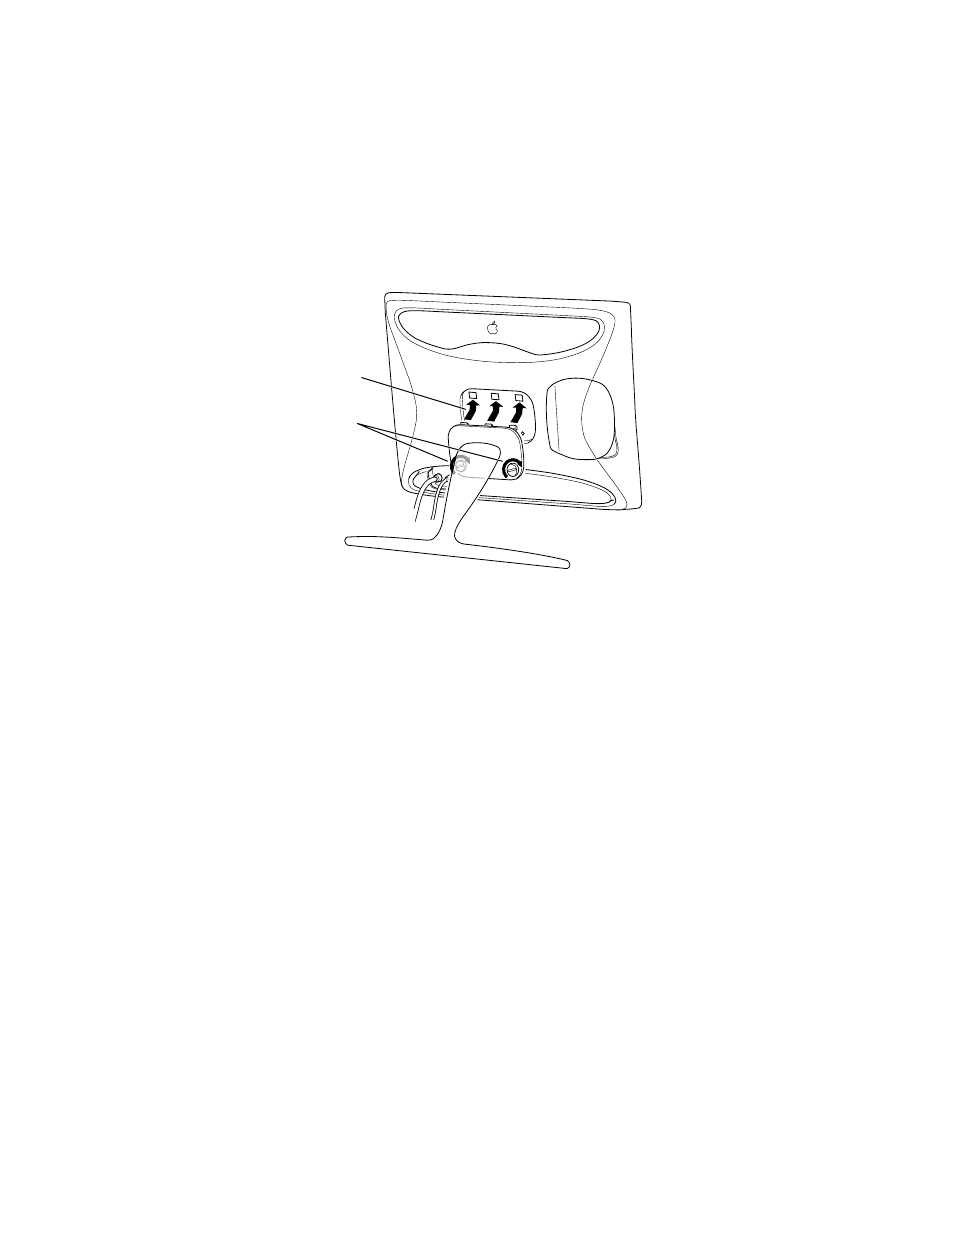
Attaching the Flip-Out Stand
1
If necessary, remove the desktop stand. (See “Removing the Desktop Stand” on page 43.)
2
Hook the three plastic tabs on the top cover of the flip-out stand into the three openings on
the back center area of the display.
3
Place the bottom part of the cover against the display and screw in the two plastic
thumbscrews.
Use a coin or flathead screwdriver to tighten the screws. Don’t overtighten the screws; you
might strip the threads.
4
Flip out the stand and place the display with the stand on a flat surface, such as a table or
desk.
5
For Mac OS–based computers, connect the ADB cable on your keyboard or other type of
input device into the ADB port (marked with V) on the back of the display.
6
Lift the display up slightly and press the power (®) button on the right underside of the
display to turn it on.
7
Turn your computer on.
8
If desired, attach a locking cable to the security slot on the back of the display.
For more information, see the documentation that came with the locking cable.
Note: To use any of the controls on the underside of the display, you need to lift the display
up slightly.
First, hook the
flip-out stand
on to the back
of the display.
Then tighten
the thumbscrews.