9 engine replacement, 1 engine removal, 2 engine installation – SkyTrak 8042 Service Manual User Manual
Page 141: Engine replacement, Engine removal, Engine installation
7-9
6036, 6042, 8042, 10042, 10054
Engine - Cummins QSB3.3T/QSB4.5T
7.9
ENGINE REPLACEMENT
7.9.1
Engine Removal
Note: The radiator and oil cooler must be removed from
the machine before engine removal. Refer to
7.4, “Engine Cooling System.” Several additional
components must be removed before engine removal.
They will be addressed in the following procedures.
1. Park the machine on a firm, level surface, level the
machine, fully retract the boom, lower the boom,
place the travel select lever in the (N) NEUTRAL
position, engage the parking brake, and shut the
engine OFF.
2. Place a Do Not Operate Tag on both the ignition key
switch and steering wheel, stating that the machine
should not be operated.
3. Open the rear door. Allow the system fluids to cool.
4. Properly disconnect the battery.
5. Remove the rear door and engine side covers.
6. Drain and remove the radiator assembly. Refer to
Section 7.4.2, “Radiator/Oil Cooler and
Replacement.”
7. Remove the radiator overflow tube, overflow tank
and hose support.
8. Label, disconnect and cap the heater hoses
attached to the engine (if equipped).
Note: The engine harness is routed and attached to the
engine using hold-down clamps and plastic wire ties at
various places on the engine. Before removing engine,
ensure that the harness has been completely separated
(disconnected) from the engine. Move the harness clear
of the engine, and with the help of an observer, ensure
that the engine clears the harness during removal.
9. Label and disconnect all electrical wire connections
on the engine.
10. Label, disconnect and cap the fuel inlet line at the
fuel lift pump.
11. Label, disconnect and cap the fuel return line from
the injector pump.
12. Remove the engine-to-transmission drive shaft.
Refer to Section 5.6.3, “Drive Shaft Removal.”
Note: Before the engine can be removed from the
machine, the air conditioning hoses need to be removed
from the air conditioning compressor. This procedure
must be completed by an authorized air conditioning
service technician. This service technician will also need
to be available when the new engine is installed to re-
install the air conditioning hoses and to the air
conditioning compressor.
13. Loosen the clamps on the sleeve reducer at the
engine and on the air suction pipe.
14. Remove the air cleaner assembly. Refer to Section
7.8.1, “Air Cleaner Assembly Removal.”
15. Remove the exhaust pipe from the exhaust
manifold. Refer to Section 7.7.1, “Exhaust System
Removal.”
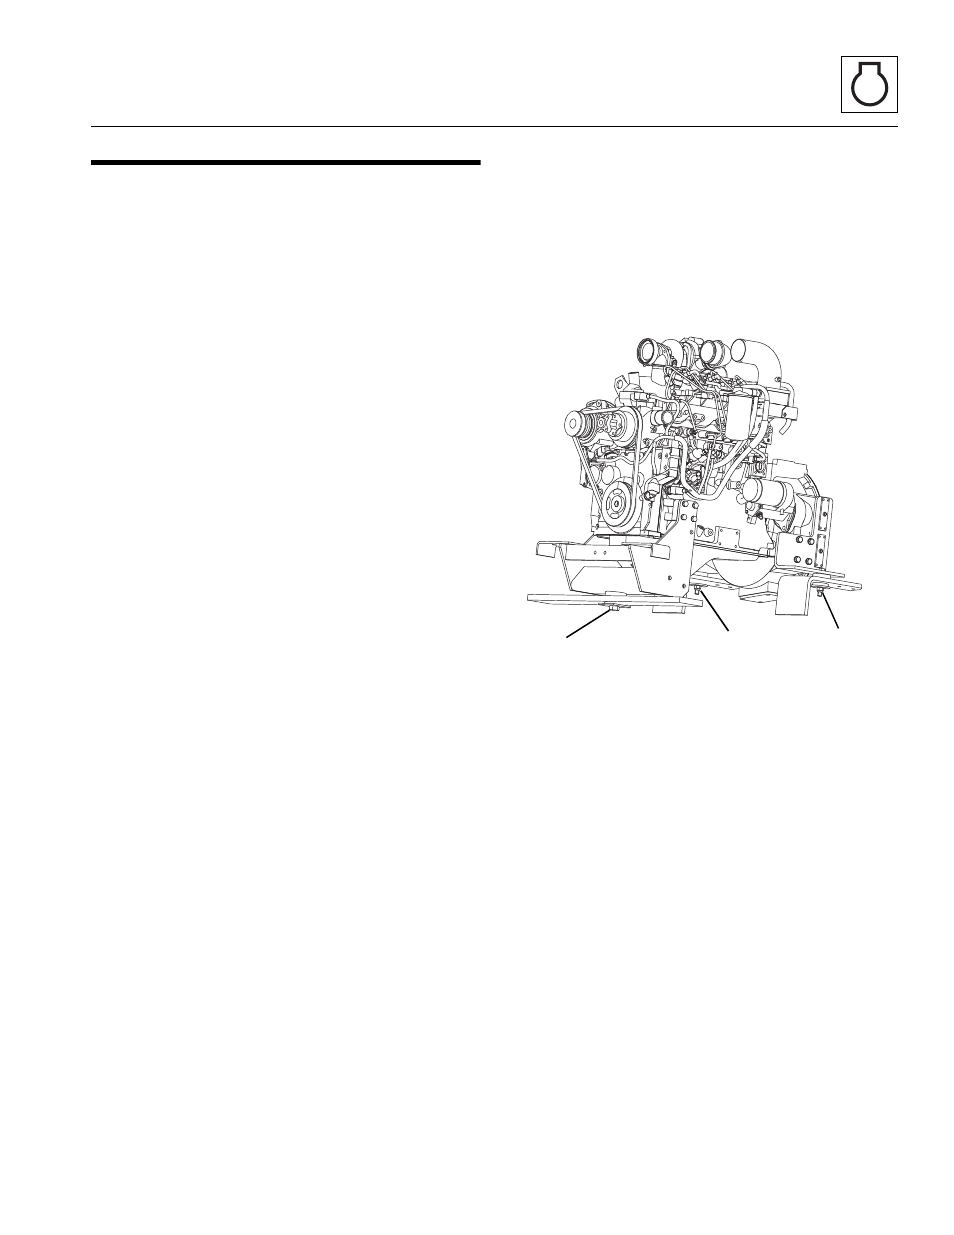
16. At the front right engine mount (5), remove the
hardware securing the mount to the frame. Repeat
procedure for left engine mount (6).
17. Remove the hardware securing the rear engine
mount (7).
18. Remove the exhaust pipe bracket.
19. Position a fork truck behind the machine, and drive
forward, placing the forks underneath the rear
engine mount and front engine mount brackets.
Slightly lift the engine, and slowly back engine out of
the machine. Have an assistant ensure that the
engine clears all frame components during removal.
20. Place engine on a flat, level surface.
21. If replacing engine, attach a lifting chain to the front
and rear engine lift brackets, and lift engine clear of
the ground.
22. Remove the three engine mounting brackets.
7.9.2
Engine Installation
Note: The engine harness is routed and attached at
various places on the engine using hold-down clamps
and plastic wire ties. Before installing engine and with
MAQ0320
6
7
5