SkyTrak 8042 Service Manual User Manual
Page 104
Cab and Covers
4-10
6036, 6042, 8042, 10042, 10054
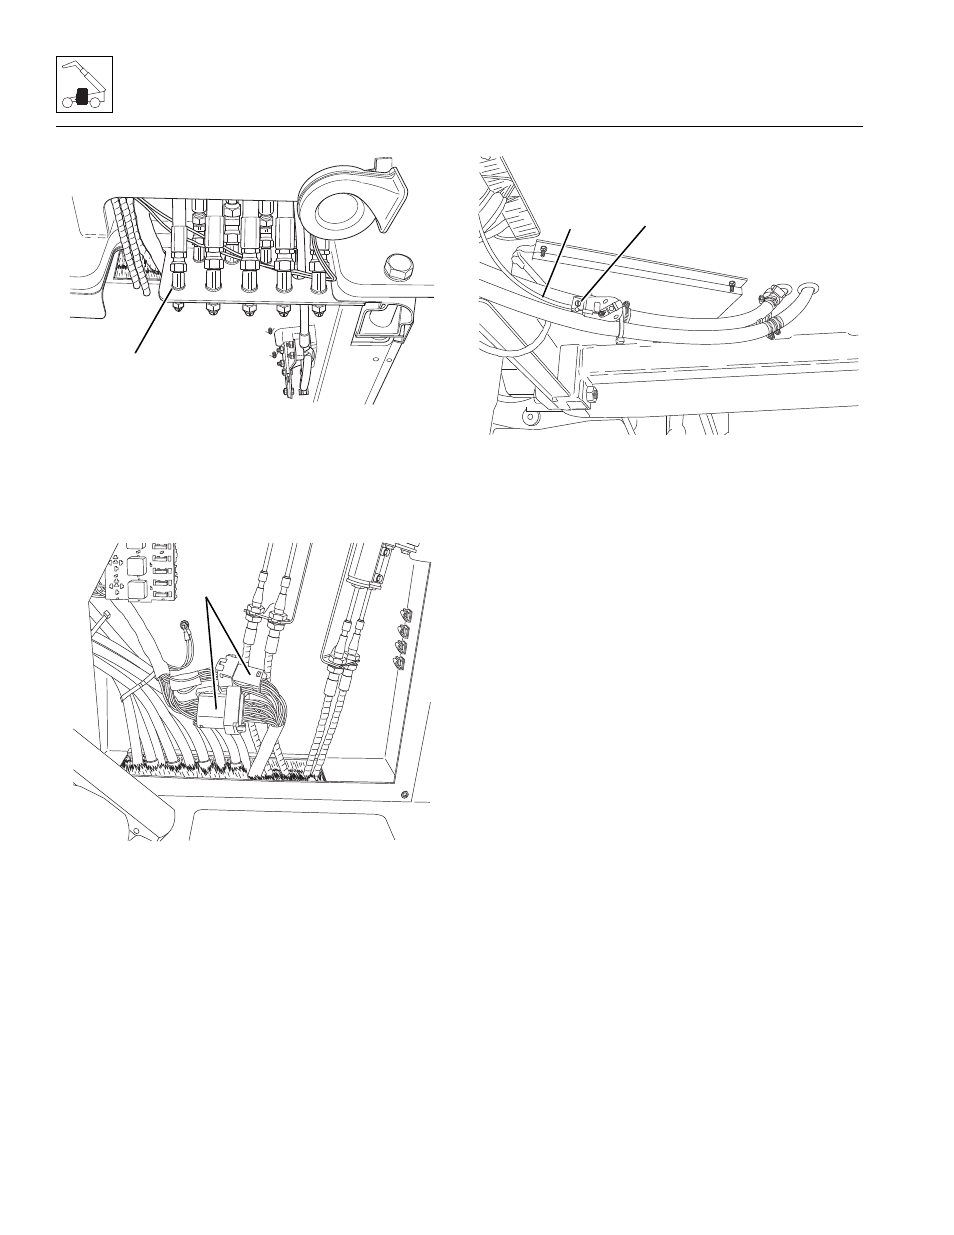
7. Uncap and connect the previously labeled hydraulic
hoses at the cab fittings (4).
8. Route the joystick control cables through the
opening at the bottom of the cab. Install the joystick
assemblies. Refer to Section 4.3.4, b. “Joystick
Assembly Installation.”
9. Route the wiring harness connectors through the
opening at the bottom of the cab. Connect the
previously labeled connectors (2).
10. Install the console panel.
11. Install the transmission covers.
12. Working under the cab, connect the coolant hoses to
the heater hoses.
13. Connect the heater control cable (2) to the heater
control valve (1).
14. Fill the cooling system completely with coolant,
allowing time for the coolant to fill the engine block.
The cooling system capacity is listed in Section 2.4,
“Fluid and Lubricant Capacities.”
15. Properly connect the battery.
16. Carefully examine all cab components, fasteners,
etc., one last time before engine start-up. Rectify any
faulty conditions.
17. Start the engine and check the operation of all controls.
Check for hydraulic fluid leaks. Check the hydraulic
fluid level in the tank and add fluid as required.
Note: When the engine is initially started, run it briefly at
low idle and check the machine for any visual sign of
fluid leakage. STOP the engine immediately if any
leakage is noted, and make any necessary repairs
before continuing.
18. Wait for the engine to cool and check the coolant
level. Add coolant to the overflow bottle as required
to bring the coolant to the proper level.
19. Install the mirrors and all other cab components as
needed, if removed.
20. Unblock the wheels.
21. Close and secure the rear door.
MA8501
4
MA8471
3
MA8781
2
1