1 hpv removal and replacement – Pulsafeeder PulsaPro 900 EN User Manual
Page 34
30
7.4.1
HPV Removal and Replacement
1. Disconnect the power source to the drive motor (e.g., lockout/tagout the motor disconnect).
2. Relieve all pressure from the piping system.
3. Drain the oil from the eccentric box / pump head by opening the drain valve.
4. Remove the reagent head and diaphragm using the procedure outlined in Section 7.1.
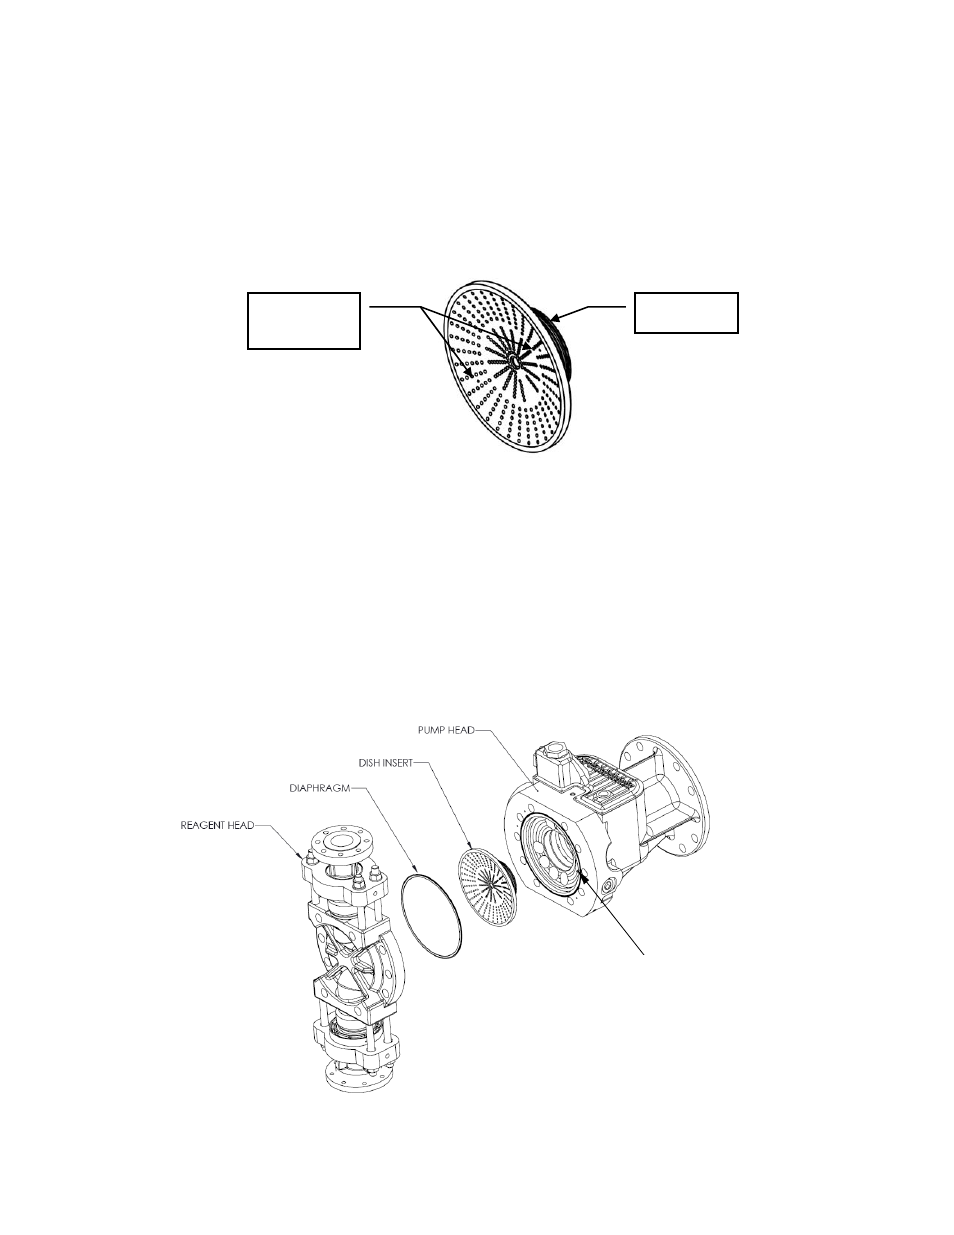
5. The dish plate is held in the pump head by two sealing o-rings. Install screws into the two M4
x 0.7 threaded jacking locations to remove the HBV / Dish plate assembly properly. Tighten
them into the dish plate to jack it out of the pump head. Take care to prevent dropping the
dish plate on final removal.
6. If cleaning of the valve is required, use a solvent compatible with Nitrile rubber and blow air
through the valve to remove all contaminants.
7. Inspect the O-Rings on the body of the valve for nicks or other damage and replace if
required.
8. Lubricate the O-Rings with PULSAlube Universal or Ultra and carefully insert the HPV
into the dish side bore of the pump head.
9. Rotate the valve and dish insert into the pump head until the hole on the back side of the outer
edge aligns with the alignment pin. Seat dish in counter bore.
O-Rings
Jacking
Locations
ALIGNMENT PIN