Search – Sony SVE15125CXW User Manual
Page 189
6. Remove the new memory module from its antistatic bag.
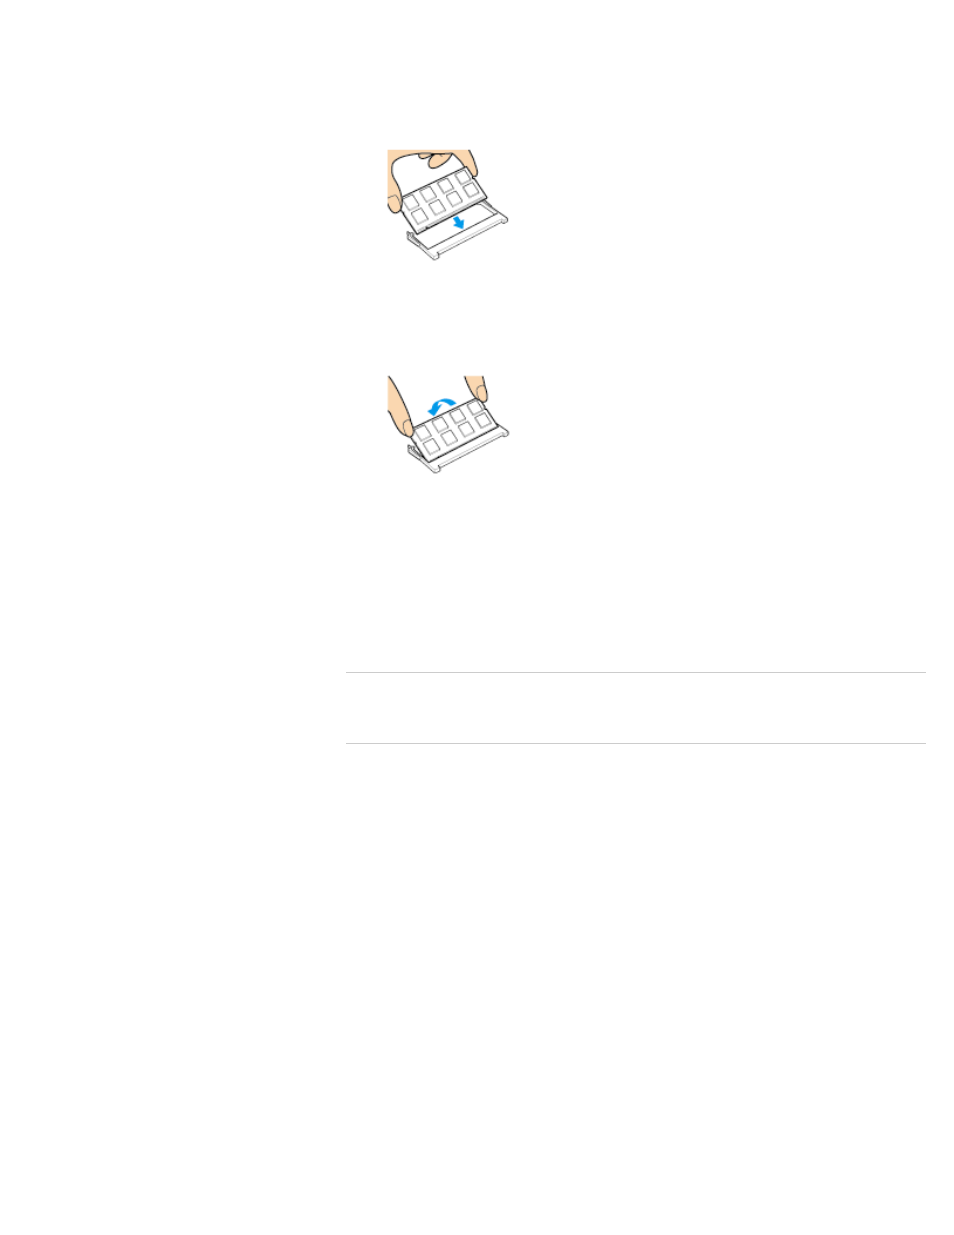
7. Hold the memory module by its edge and slide it into the memory module slot with its
end terminal facing downward while aligning the notch on the module with the small
projection in the slot.
8. Hold the memory module by its edge and push in until it clicks into place as shown in
the illustration.
The latches on both sides of the slot snap into place to secure the module. Do not
touch any ICs (black components) on the memory module.
9. Replace the memory module compartment cover and secure it with the screws you
removed in step 3.
10. Install the battery pack and connect all connection cables and peripherals that you
removed in Step 1, and turn on the computer.
11. Check that the amount of system memory has correctly changed.
If the amount of indicated system memory is correct, memory module installation was
successful.
Related Topic
Notes on Adding and Removing Memory Modules
© 2012 Sony Corporation
189
Search
- SVE14122CXB SVE14125CXW SVE1512GCXW SVE14126CXP SVE1712ACXB SVE14122CXW SVE17125CXB SVE15128CXS SVE15124CXW SVE151290X SVE14122CXP SVE15122CXP SVE1712BCXB SVE1512KCXS SVE15122CXB SVE15124CXP SVE1412ECXB SVE1412ECXW SVE15124CXS SVE141290X SVE15126CXP SVE1412CCXW SVE1512HCXS SVE1412CCXP SVE15125CXS SVE14126CXB SVE1512GCXS SVE1512JCXW SVE1512MPXS SVE14126CXW SVE1412ECXP SVE1512NCXB SVE14125CXB SVE15126CXW SVE15122CXW SVE15126CXS SVE14125CXP SVE17122CXB SVE17127CXB SVE1412BCXB SVE171290X