Shutting down the appliance, Grey intelligent key – Karcher B 60 W User Manual
Page 18
-
5
Parameters for the different cleaning pro-
grammes are preset in the appliance.
Depending on the authorisation of the yel-
low Intelligent Key, individual parameters
can be changed.
If you wish to permanently change the parame-
ters, you must use a grey Intelligent Key. This
adjustment procedure is described in the sec-
tion "Grey Intelligent Key“.
Note:
Almost all displayed text regarding param-
eter adjustment is self-explanatory. The
only exception is the parameter FACT:
–
Fine Clean: Lower brush speed for remov-
ing the grey film on fine stone floors.
–
Whisper Clean: Medium brush speed
for regular cleaning with reduced noise
level.
–
Power Clean: High brush speed for pol-
ishing, crystallising and sweeping.
Turn the program selection switch to
the desired cleaning program.
Turn the info button until the desired pa-
rameter is displayed.
Press Info button - the set value blinks.
Set the desired value by turning the info
button.
Confirm the changed setting by press-
ing the Info button or wait till the set val-
ue is automatically accepted after 10
seconds.
Caution
Risk of damage to the floor covering. Do
not operate the appliance on the spot.
Turn the program selection switch to
the desired cleaning program.
Press the pedal for lowering the clean-
ing head downwards slightly and then
move it to the left. This unlocks the ped-
al. Release the pedal slowly upwards.
The cleaning head is lowered.
Note
The brush motor comes to a halt when the
machine stops and when there is overload.
Pull the lever out and press it down; the
vacuum bar is lowered.
Note
For cleaning tiled floors, set the straight
vacuum bar in such a way that cleaning is
done at right angles to the joints.
The inclined position and the inclination of
the vacuum bar can be adjusted to achieve
better suction results (see "Setting the Vac-
uum Bar").
If the wastewater reservoir is full, the
floater will close the suction opening and
the suction turbine will run at a higher
speed. If this is the case, shut the vacuum
off and drive to empty the wastewater res-
ervoir.
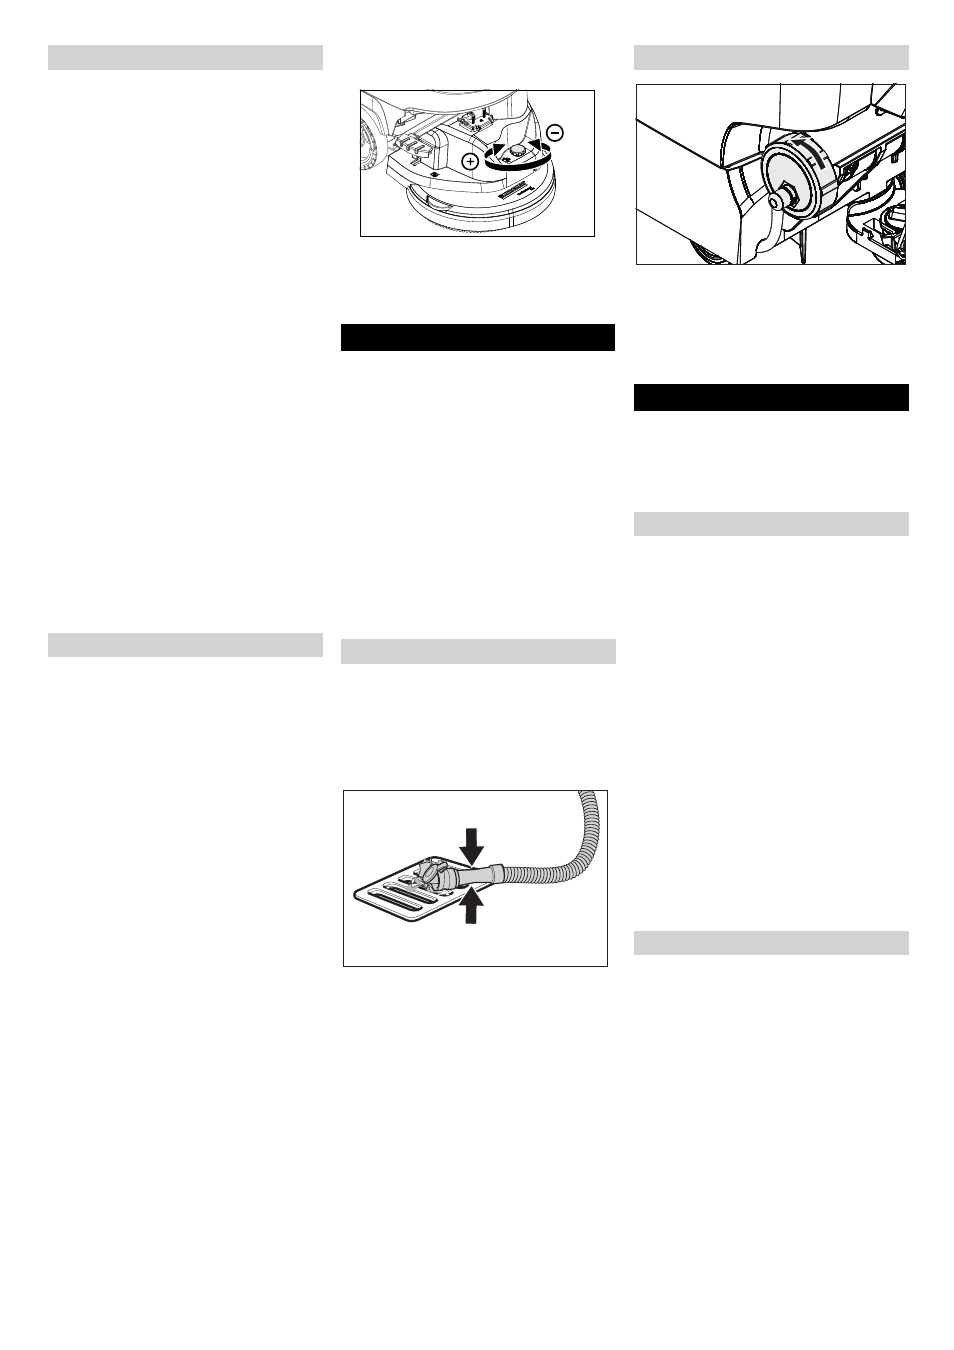
Reducing the speed: Turn the button in
"–" direction.
Increasing the speed: Turn the button in
"+" direction.
Close the regulatory button for setting
the water quantity.
Release drive lever/safety switch.
Set the program selection switch to suc-
tion or vacuuming.
Lift the cleaning head.
Briefly drive forward and suck of the re-
maining water.
Raise the vacuum bar.
The suction turbine will continue to run
for 10 more seconds to suck off residual
water from the vacuum bar and the vac-
uum hose.
Remove the Intelligent Key.
Charge battery, if required.
ṇ
Warning
Please observe the local provisions regard-
ing the wastewater treatment.
Take the water discharge hose from the
support and lower above a suited col-
lection device.
Crush or bend the dosing equipment.
Open the lid of the dosing equipment.
Drain off the dirt water - regulate the
water quantity by pressing or bending.
Rinse the wastewater reservoir with
clean water or with the rinsing system
for the wastewater reservoir (option).
For a quicker emptying process, re-
move the entire lid.
To rinse the fresh water reservoir, re-
move the cover completely and remove
the fresh water filter.
Plug in the Intelligent Key.
Select the desired function by turning
the Info button.
The different functions are described in the
following.
In this menu item, the authorisations for the
yellow Intelligent Keys are released.
Press the info button while "Key menu
>>“ is displayed.
Remove the grey Intelligent Key and in-
sert the yellow Intelligent Key to be pro-
grammed.
Select the desired menu item to be
modified by turning the Info button.
Press Info button.
Adjust the menu item by turning the Info
button.
Confirm the setting by pressing the
menu item.
Select the next menu item to be modi-
fied by turning the Info button.
To save the authorisations, retrieve the
menu "Save settings" by turning the info
button and pressing it.
To exit, retrieve the menu "Exit menu" by
turning the info button and pressing it.
Parameters that are adjusted with the grey
Intelligent Key, are kept until another set-
ting is selected.
Turn the program selection switch to
the desired cleaning program.
Turn the info button until "Cleaning App
>>“ is displayed.
Press the info button - the first adjusta-
ble parameter is displayed.
Press Info button - the set value blinks.
Set the desired value by turning the info
button.
Confirm the changed setting by press-
ing the Info button or wait till the set val-
ue is automatically accepted after 10
seconds.
Select the next parameter by turning
the Info button.
Setting the parameters
With yellow Intelligent Key
Cleaning
Lower the cleaning head
Lower the vacuum bar
Setting the Advance Speed (BD cleaning
head only)
Shutting Down the Appliance
Drain off dirt water
Drain off clean water
Grey Intelligent Key
Key menu >>
Cleaning App >>
18
EN
- B 40 W Bp D 43 B 40 W Bp R 45 B 40 C Ep R 55 B 40 C Ep R 45 B 40 W Bp D 51 B 40 C Bp R 55 B 40 C Ep D 51 B 40 C Bp D 51 B 40 C Bp R 45 B 40 C Ep D 43 B 40 W Bp R 55 B 40 C Bp D 43 B 40 W Bp Pack DOSE D 51 B 60 W Bp DOSE D 65 B 40 W Bp Pack DOSE R 55 B 60 W Bp DOSE R 65 B 40 W Bp Dose B 60 W Bp Dose B 40 W Bp B 60 W Bp B 40 C Bp Autolaveuse B 40 C-W version disque Autolaveuse B 60 W version disques Autolaveuse B 40 C-W version rouleaux Autolaveuse B 60 W version rouleaux B 40 W głowica dyskowa B 60 W głowica dyskowa B 60 W głowica rolkowa B 40 W głowica rolkowa B 40 W DOSE Walze B 60 W Bp DOSE Walze B 60 W Bp DOSE Scheibe B 40 W DOSE Scheibe B 60 W Bp Pack DOSE+R65 Sochi B 40 W DOSE roller B 60 W roller B 60 W disc B 40 W DOSE disc