Assembly & installation instructions – Hubbardton Forge 345715 User Manual
Page 3
H U B B A R D T O N F O R G E . C O M
hand-forged, vermont-made lighting and accessories
154 RT. 30 SOUTH
•
CASTLETON, VERMONT 05735
All designs and images ©1989-2013 Hubbardton Forge
®
. All rights reserved.
30442
Assembly & Installation Instructions
If you need further assistance, or find that you are missing any parts, please contact the dealer from which you purchased this product.
We hope you enjoy your fixture!
* Hubbardton Forge will not be liable for injury or damage caused by improper installation, lamping or use of this fixture.
To Complete Installation
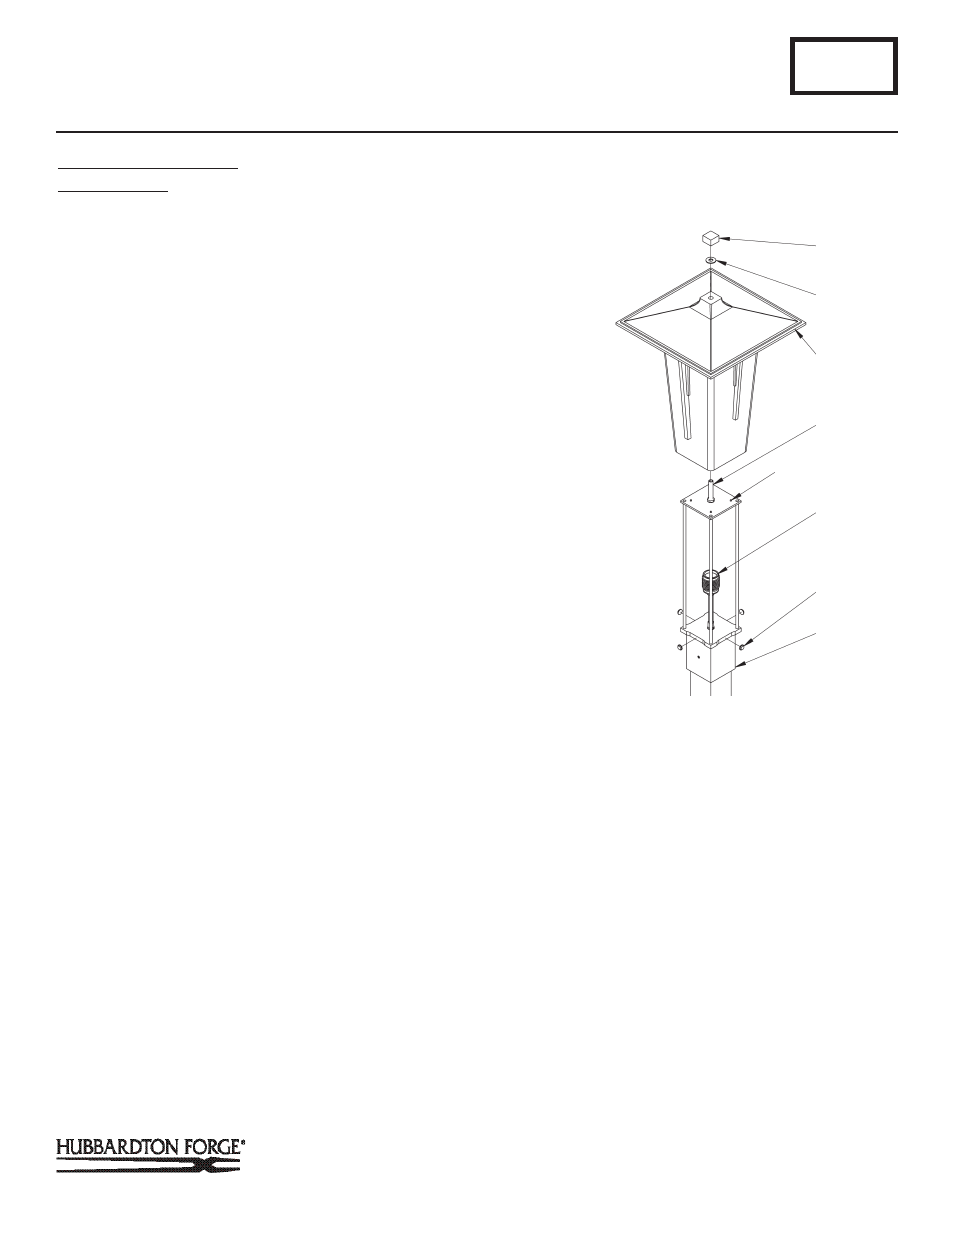
(Figure 3)
Component Parts
A Inner Frame
B Outer Frame
C Coupling
O Socket
P Rubber Washer
Q Nipple
R Clear Bumpers (4)
1. Install bulb (not included) into socket (O).
2. Loosen coupling (C) by turning counterclockwise and re-
move from inner frame (A) and retain for later use. Coupling
is shipped installed.
3. Apply clear bumpers (R) to sides of inner frame (A).
4. Slide outer frame (B) with glass down over inner frame (A).
5. Outer frame (B) should align with pins on the top of inner
frame (A).
6. Slip rubber washer (P) over nipple (Q).
7. Thread coupling (C) onto nipple (Q) and tighten.
8. Restore electricity at main breaker.
Modern Prairie Post-Mount 345715
Page 3 of 4
G18
(Figure 2)
(Figure 3)
(Continued)
ALIGNMENT PINS
C
P
B
O
A
Q
R