Hubbardton Forge 124442 User Manual
Assembly instructions
Assembly Instructions
Page 1 of 2
A3
For Semi-Flush Mount Fixtures—Model Numbers: 12-4412, 12-4422, 12-4432, 12-4442 and 12-4424
Please follow these instructions prior to installing fixture. Installation instructions on backside.
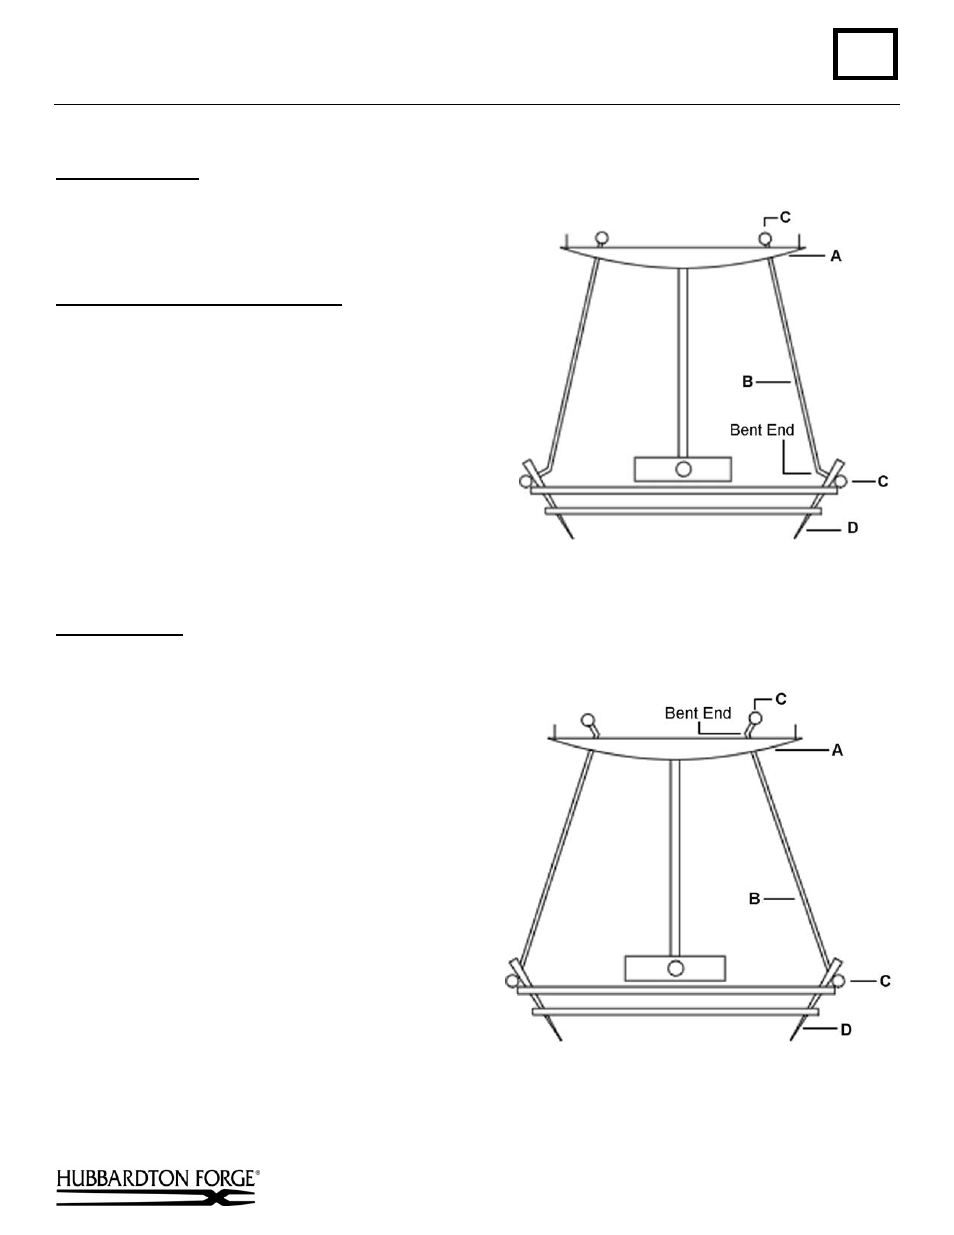
Component Parts
A Canopy
B Support Rods
C Knurled Ball/Nuts
D Ring Assembly
To Attach Support Rods to Canopy
1. Refer to the drawing that corresponds to the model
number of your fixture.
2. Remove Knurled Ball/Nut (C) from one end of each
Support Rod (B).
3. Insert Support Rods (B) through outermost holes in
Canopy (A) and reattach Knurled Balls/Nuts (C). For
models 12-4422, 12-4423, and 12-4442 the straight end
of the rods should be in the canopy (Figure 1).
Note: Model 12-4412 will require the removal of an
insulation pad to install rods. Please make sure that this
pad is replaced prior to installing the fixture.
4. Refer to Installation Instructions (on the back of this
sheet) and install fixture.
Figure 1
Models 12-4422, 12-4432, 12-4442, 12-4424
To Install Glass
1. Install fixture prior to installing glass.
2. Attach Ring Assembly (D) to two of the Support Rods
(B) using Knurled Balls/Nuts (C).
3. Place glass into Ring Assembly.
4. Move ring Assembly (D) into position and secure by
inserting remaining Support Rod (B) into Ring
Assembly and attaching Knurled Ball/Nut (C).
Figure 2
Model 12-4412
Hand-Forged,
Vermont-Made Lighting and Accessories
P.O. Box 827, 154 Route 30 South, Castleton, Vermont 05735
14007 Rev. A