A147, Assembly & installation instructions – Hubbardton Forge 123252F User Manual
Page 2
Assembly & Installation Instructions
A147
For Semi-Flush Vortis Fixtures 12-3250F & 12-3252F
Page 2 of 2
Hand-Forged,
Vermont-Made Lighting and Accessories
P.O. Box 827, 154 Route 30 South, Castleton, Vermont 05735
21183
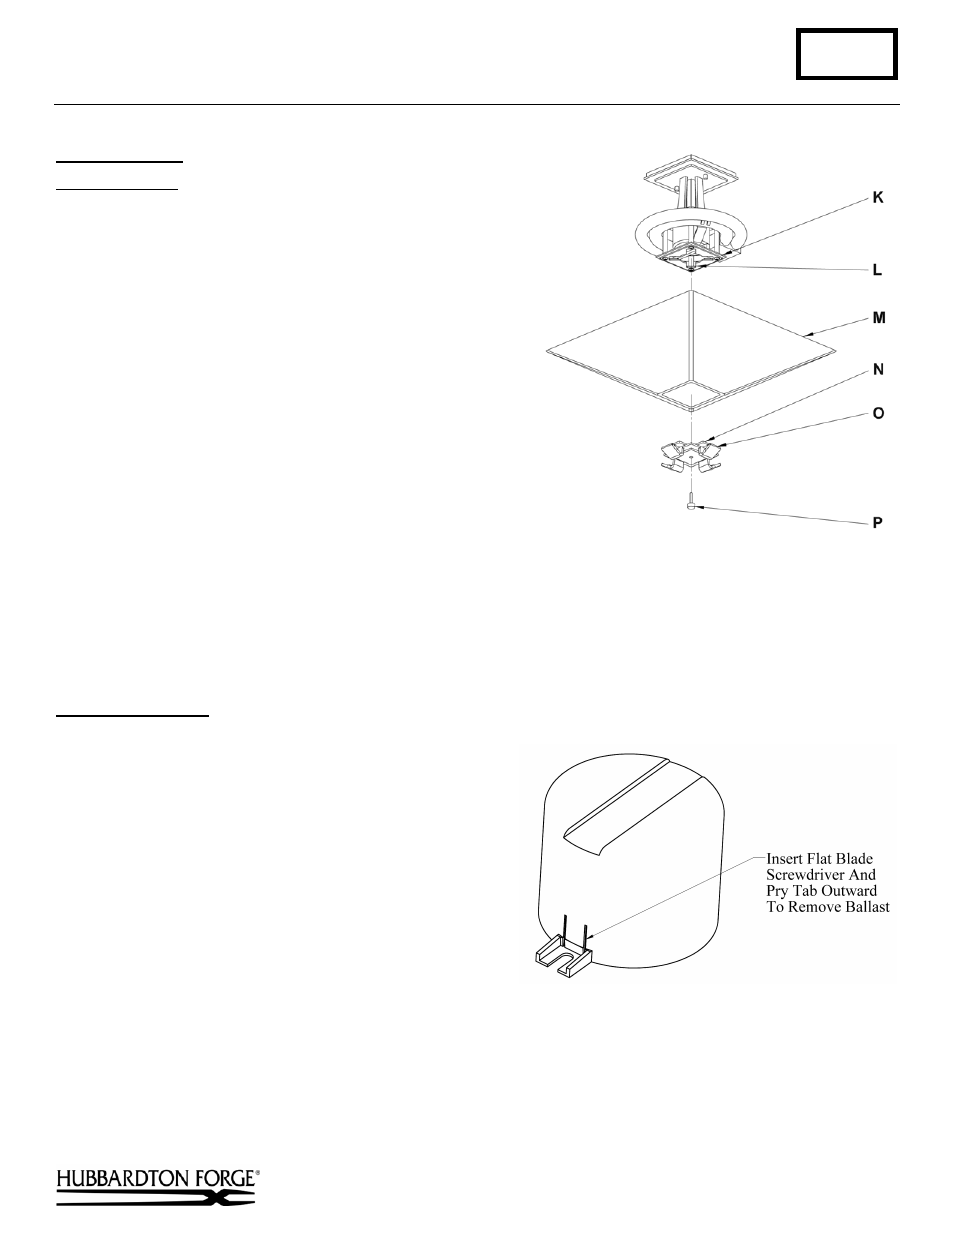
To Install Glass
(Figure 3)
Component Parts
K Fixture
Assembly
L Fixture
slot
M Glass
N Retainer
Tab
O Glass
Retainer
P Tensioning
Screw
1. Remove glass retainer (O) from bottom of fixture by
removing tensioning screw (P) and turning the glass
retainer 45 degrees to allow it to drop out of the
bottom of the fixture.
2. Place glass (M) into glass retainer (O).
3. Lift glass (M) and glass retainer (O) up to fixture
assembly (K) aligning retainer tabs (N) with fixture
slots (L).
4. Lift so retainer tab (N) slips completely through
fixture slot (L).
5. Turn glass (M) and glass retainer (O) approximately
45 degrees so glass retainer stays in place.
6. Turn tensioning screw (P) to prevent glass retainer (O) to lift and possibly drop out of fixture assembly (K). Turn
until snug and glass retainer will not spin freely.
To Replace Ballast
(Figure 4)
The ballast in this fixture is replaceable without cutting wires.
Caution: Be sure power is off at the main breaker box
prior to replacing ballast.
1. Remove ballast from fixture by inserting a flat bladed
screwdriver behind tabs, located on the side of the
ballast adjacent to the mounting screws, and prying
outward.
2. Attach new ballast to fixture by aligning tabs
snapping it into place For replacement ballast
information, refer to the phone number printed on the
ballast case.
If you need further assistance, or find that you are missing any parts, please contact the dealer from which you purchased
this product. We hope you enjoy your fixture!
* Hubbardton Forge will not be liable for injury or damage caused by improper installation, lamping or use of this fixture.
(Figure 3)
(Figure 4)
(Figure 3)