B118, Installation & assembly instructions – Hubbardton Forge 207875 User Manual
Page 2
Installation & Assembly Instructions
B118
For Exos Wave Wall Sconce 20-7875
Page 2 of 2
Hand-Forged,
Vermont-Made Lighting and Accessories
P.O. Box 827, 154 Route 30 South, Castleton, Vermont 05735
19873 Rev B
5. Carefully tuck all wires behind the fixture assembly and inside the wall mount bracket and place the fixture over
the brackets so that the screw (E) in the top of the brackets go through the hole in the top of the fixture. Secure the
fixture by threading the remaining black #8 screw (E) up through the hole in the bottom of the fixture and into the
mounting brackets.
6. Install light bulb (Figure 2, I). Be careful not to touch bulb with bare hands. Oil from the hands will dramatically
reduce bulb life.
7. Thread bulb shield (Figure 2, J) onto socket. Future bulb changes may be accomplished by snapping glass bulb
shield on and off rather than unthreading the holder
8. Restore electricity at main breaker.
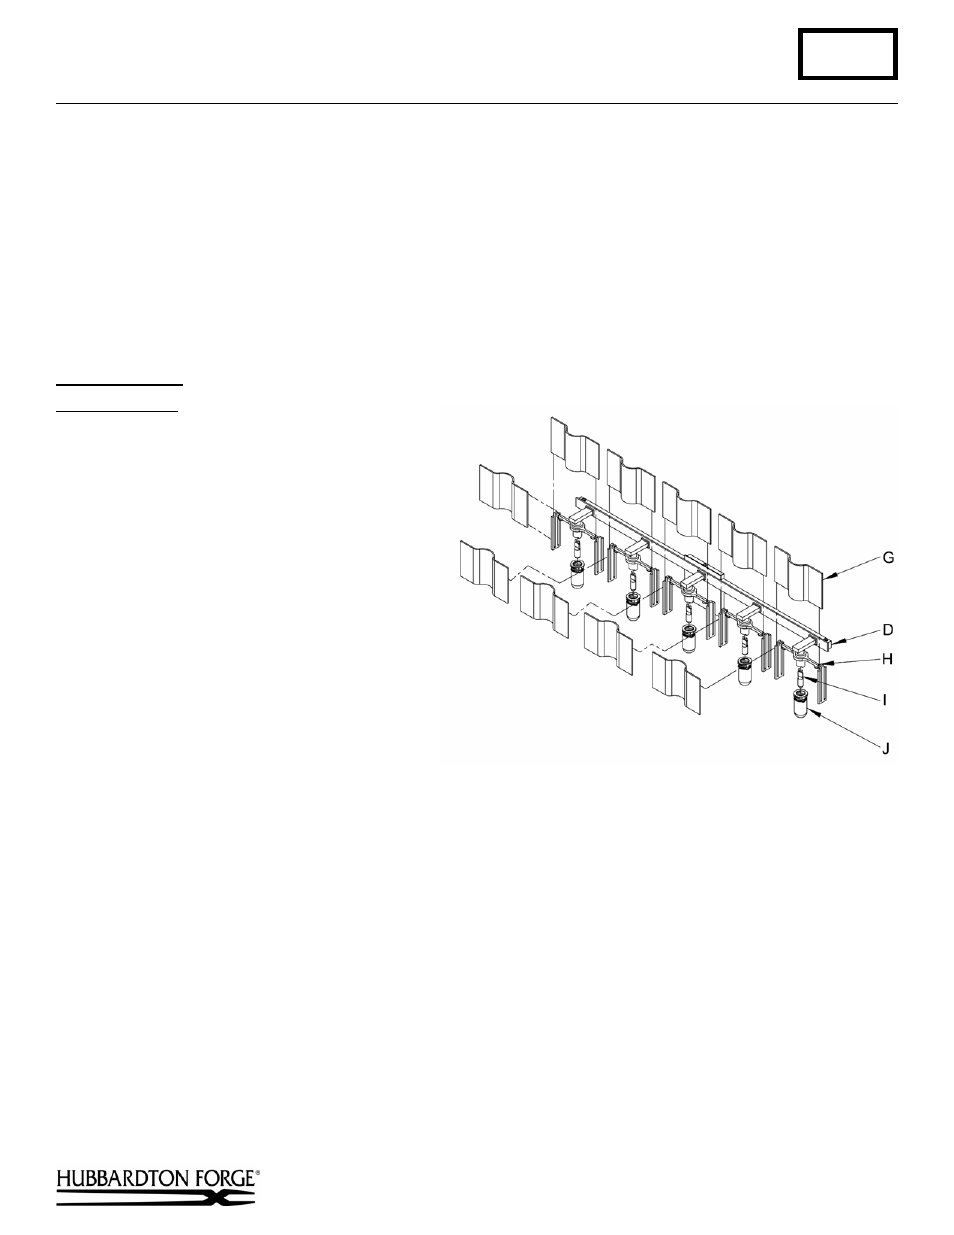
To Install Glass
(Figure 2)
Component Parts
(Figure 2)
D Fixture
G Glass
(10)
H Metal Glass Clip (10)
I Bulb
J Bulb
Shield
1. Mount metal glass clip (H) into notches on
fixture (D).
2. Slide glass (G) into back slots in fixture from
the side (start from left or right side not the
center).
3. Slide front glass (G) into fixture from the
top.
4. Align the glass until it protrudes equal
amounts on both sides of fixture.
If you need further assistance, or find that you are missing any parts, please contact the dealer from which you purchased
this product. We hope you enjoy your fixture!
*
Hubbardton Forge will not be liable for injury or damage caused by improper installation, lamping or use of this fixture.