Assembly & installation instructions – Hubbardton Forge 18352 User Manual
Page 2
Assembly & Installation Instructions
A60
For Adjustable Pendant Model 18-332 & 18-352
Page 2 of 2
Hand-Forged,
Vermont-Made Lighting and Accessories
P.O. Box 827, 154 Route 30 South, Castleton, Vermont 05735
16520 Rev C
8. Slide canopy (C) over threaded studs (F) and push firmly to
ceiling, making sure that no wires are pinched between fixture
canopy and ceiling. Fasten with knurl balls (G). Be sure studs are
fully seated in the knurl balls.
9. Once the fixture is fastened to the ceiling, tighten the set screw (J)
in clutch (I) firmly with hex wrench provided. Only after the set
screw (J) is tight should you install the glass.
10. Refer to instructions following to install glass.
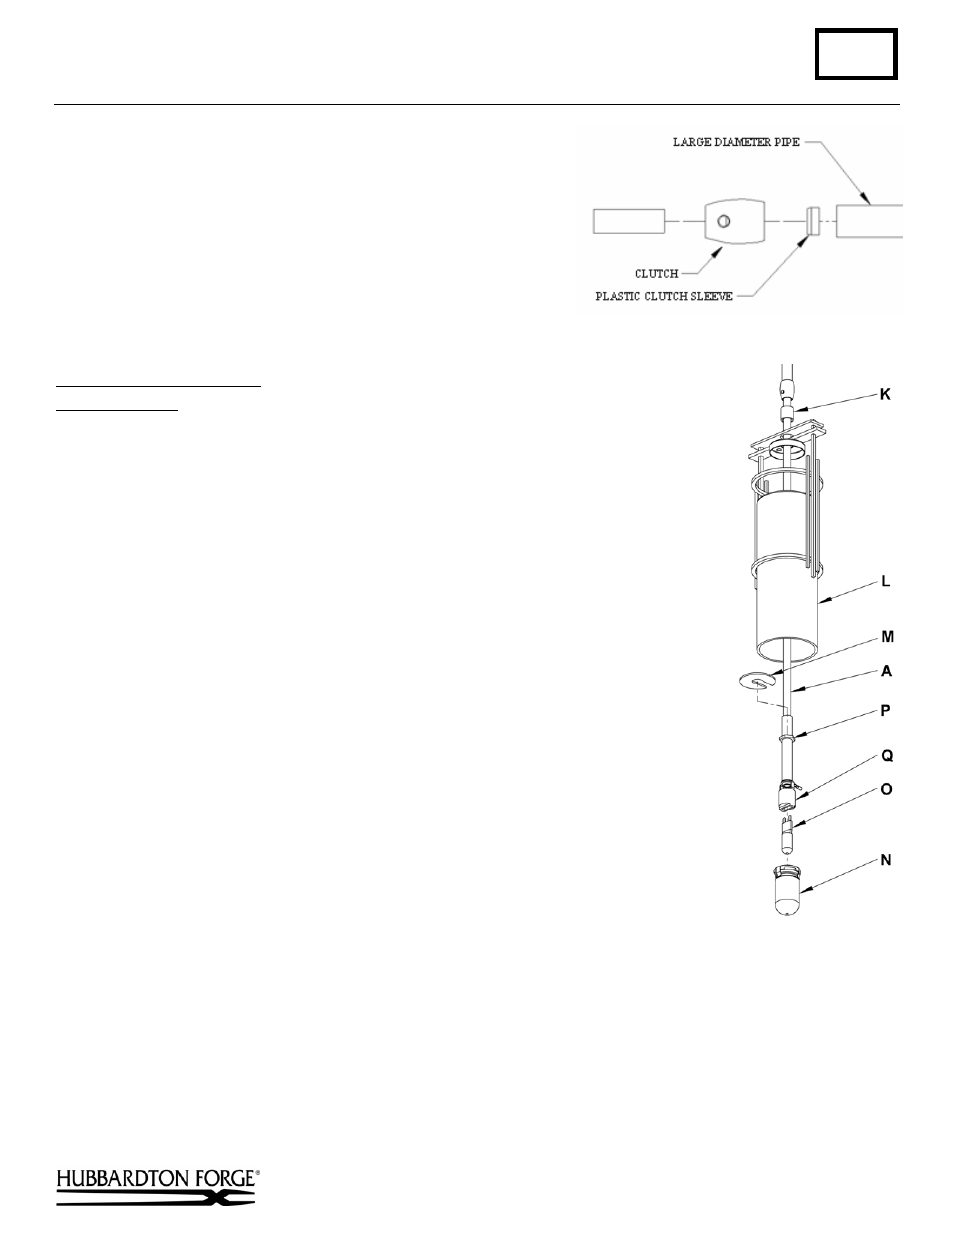
To Install Glass and Bulb
(Figure 3)
Component Parts
A Fixture
Pipe
K Locking
Nut
L Glass
M Washer
N Bulb
Shield
O Bulb
P Hex
Nut
Q Socket
1. Unscrew locking nut and slide locking nut and frame up fixture stem.
2. Raise washer (M) up until slot will slip fixture pipe (A) and remove. Save to
use later.
3. Install bulb (O) in socket (Q).
Caution: Use a cloth or gloves when handling the bulb; do not to touch bulb with
bare hands. Oil from the hands will dramatically reduce bulb life.
4. Thread bulb shield (N) onto socket just far enough to stay in place. Future bulb
replacement can be accomplished by snapping the glass from the holder rather
than unscrewing the entire holder.
Caution: Keep protective barrier in place when operating fixture.
5. Slip glass (L) over socket (Q) and raise until it rests inside fixture frame.
6. Install washer (M) back on top of hex nut (P).
7. Carefully lower glass (L), frame, and locking nut (K) back into position and
tighten locking nut, making sure glass and frame are straight and level.
8. Restore electricity at main breaker box.
If you need further assistance, or find that you are missing any parts, please contact the dealer from which you purchased
this product. We hope you enjoy your fixture!
* Hubbardton Forge will not be liable for injury or damage caused by improper installation, lamping or use of this fixture.
(Figure 2)
(Figure 3)
This illustration represents a typical
fixture and may not match every style.