A346, Installation instructions – Hubbardton Forge 161120 User Manual
Page 2
If you need further assistance, or find that you are missing any parts, please contact the dealer from which you purchased this product.
We hope you enjoy your fixture!
* Hubbardton Forge will not be liable for injury or damage caused by improper installation, lamping or use of this fixture.
H U B B A R D T O N F O R G E . C O M
hand-forged, vermont-made lighting and accessories
154 RT. 30 SOUTH
•
CASTLETON, VERMONT 05735
All designs and images ©1989-2013 Hubbardton Forge
®
. All rights reserved.
30031 B
Installation Instructions
To Install the Canopy
(Figures 1 & 2)
(Continued)
CAUTION: MAKE SURE WIRE CONNECTORS ARE TWISTED ON SE-
CURELY, AND NO BARE WIRE IS EXPOSED.
8. Raise canopy (D) close to ceiling. Align holes in canopy (D)
with holes in crossbar (A) and secure with (2) #8 screws (E).
9. If fixture height needs to be adjusted to achieve desired
height, loosen knob and push up on canopy gripper (G) and
gently pull down/push up on supply/support cable (H).
Note: Excessive movement of cable through the gripper
could cause cable to fray slightly. Usage of the cable gripper
is not recommended to frequently adjust the fixture up and
down in height.
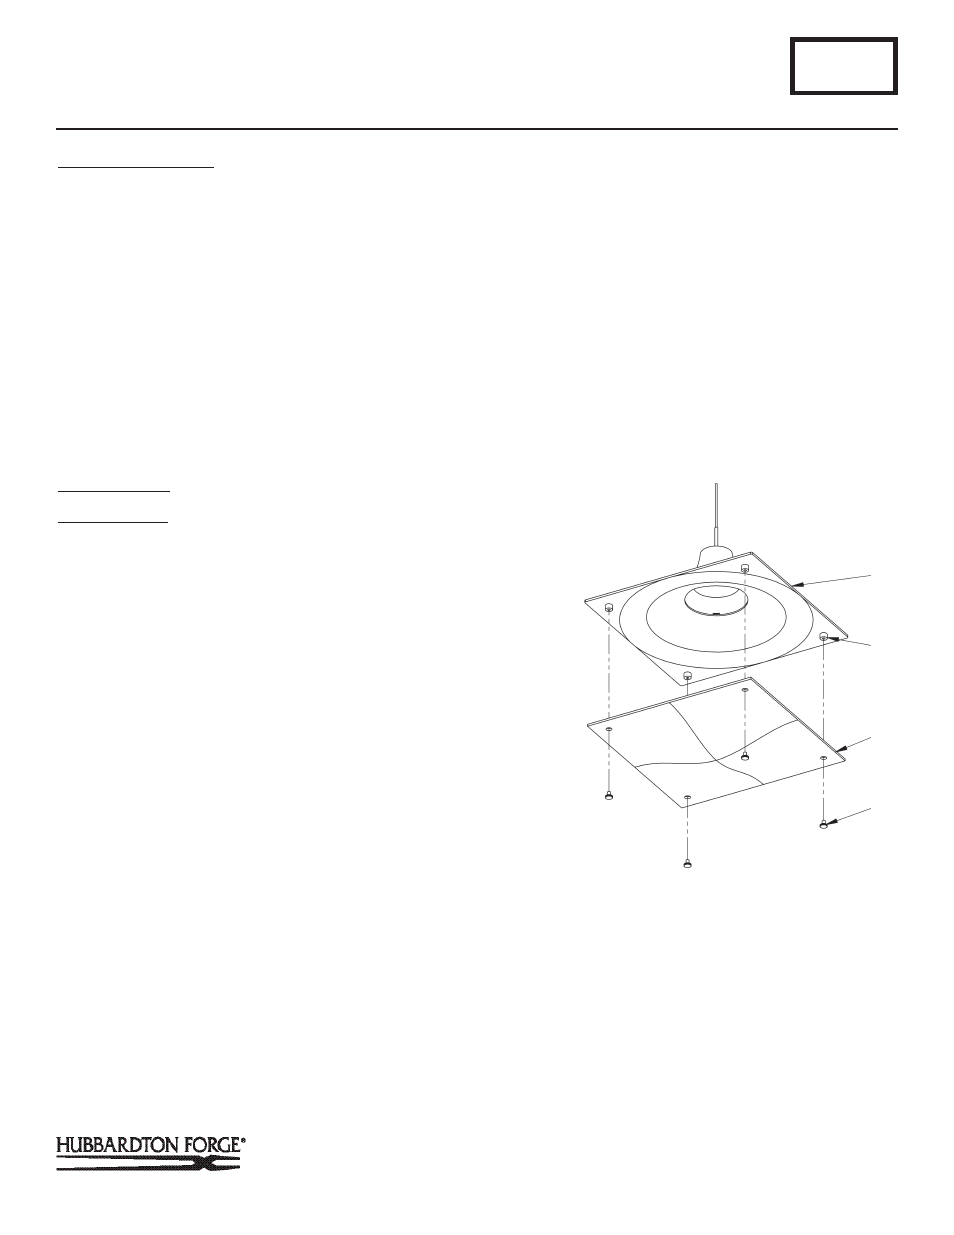
To Install Glass
(Figure 2)
Component Parts
F Fixture
I Knurled Screws (4)
J Threaded Studs (4)
K Glass
1. Remove knurled screws (I) from threaded studs (J) and set
them aside.
2. Install light bulb (not included).
3. Raise glass (K) and align holes with threaded studs (J).
4. Fasten glass (K) to threaded studs (J) using kurled screws
(I). Be careful not to overtighten.
5. Restore electricity at main breaker.
A346
Hood Pendant Vintage Platinum 161120
Page 2 of 2
(Figure 2)
F
K
I
J