A351, Installation instructions – Hubbardton Forge 161040T User Manual
Page 2
If you need further assistance, or find that you are missing any parts, please contact the dealer from which you purchased this product.
We hope you enjoy your fixture!
* Hubbardton Forge will not be liable for injury or damage caused by improper installation, lamping or use of this fixture.
H U B B A R D T O N F O R G E . C O M
hand-forged, vermont-made lighting and accessories
154 RT. 30 SOUTH
•
CASTLETON, VERMONT 05735
30427 Rev A
Installation Instructions
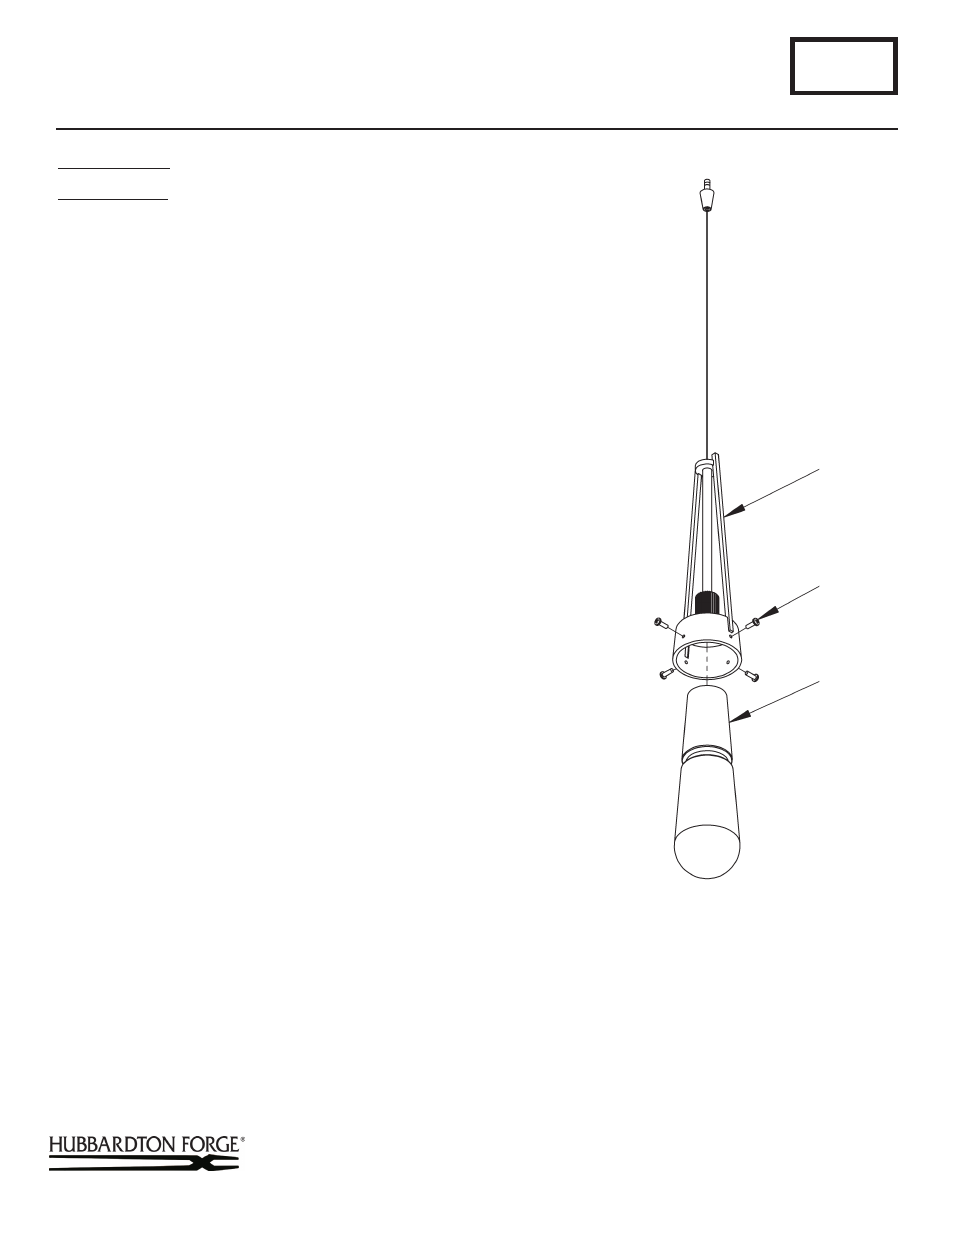
To Install Glass
(Figure 2)
Component Parts
C Fixture
D Screws
E Glass
1. Install bulb (not included). Be careful not to touch bulb with
bare hands; oil from the hands will dramatically reduce bulb
life.
CAUTION: TO REDUCE THE RISK OF FIRE DO NOT USE A LAMP
IDENTIFIED FOR USE IN ENCLOSED LUMINAIRES.
2. Loosen the four screws (D). It is not necessary to remove
them from the fixture.
3. Raise glass (E) until groove is aligned with screws (D).
4. Tighten the four screws (D) equal amounts until snug with
glass (E). Be careful not to over tighten.
5. Restore electricity at main breaker.
INSTRUCTIONS PERTAINING TO A RISK OF FIRE, OR INJURY
IMPORTANT SAFETY INSTRUCTIONS
Lighted lamp is HOT!
WARNING – To reduce the risk of FIRE OR INJURY:
Turn off power and allow to cool before replacing lamp.
Lamp gets HOT quickly! Contact only switch/plug when turning
on.
Do not touch hot lens, guard, or enclosure.
Keep lamp away from materials that may burn.
Do not touch the lamp at any time. Use a soft cloth. Oil from
skin may damage lamp.
Do not operate the luminaire with a missing or damaged shield.
SAVE THESE INSTRUCTIONS
A351
Link Low Voltage Pendant 161040T
Page 2 of 4
(Figure 2)
E
D
C
(Figure 2- Continuity Test #1)