To install glass (figure 3), Component parts, B271 – Hubbardton Forge 308015 User Manual
Page 2: Installation instructions
Installation Instructions
B271
Ethos Sconce
308010D
&
308015D
Page 2 of 2
Hand-Forged, Vermont-Made Lighting and Accessories
154 Route 30 South, Castleton, Vermont 05735
27720 A
5. Apply a generous bead of a suitable caulking material to caulking lip (I) on the
fixture (not provided) (Figure 2).
6. Carefully tuck all wires behind the fixture assembly and inside the wall mount
bracket and place the fixture firmly onto bracket (B) and fasten with #8 black
screw (E) and rubber washer (F) on top.
7. Install 2
nd
black screw (E) in bottom of fixture attaching to wall mounting
bracket (B).
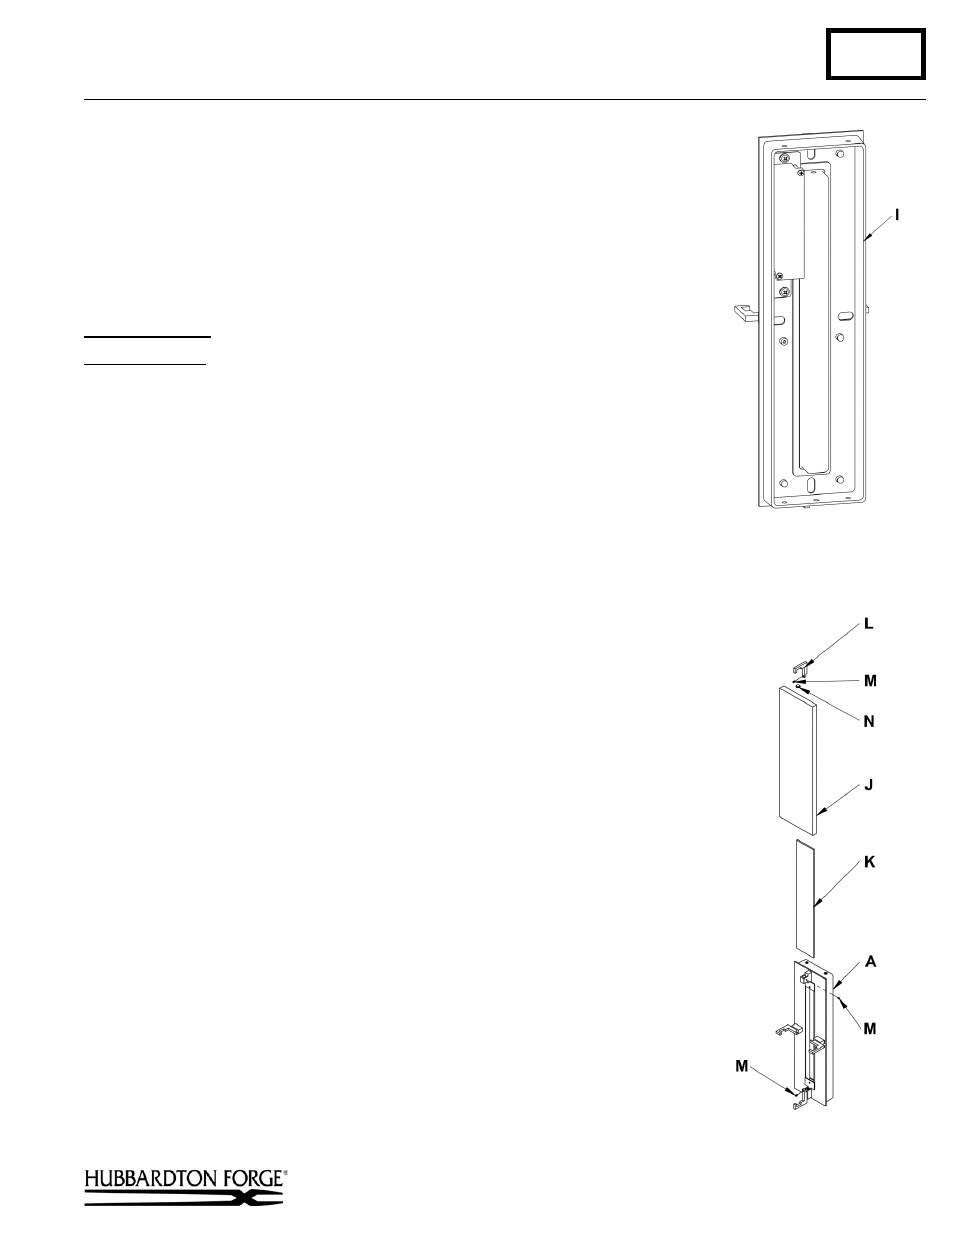
To Install Glass
(Figure 3)
Component Parts
A Fixture Assembly
J
Decorative Glass
K Glass Diffuser
L
Top Bracket
M Set Screw (3)
N Plastic Bumper
1. Set Screws (M) are shipped installed in the fixture. Prior to glass installation,
ensure that all set screws (M) are unscrewed enough to allow installation of glass.
2. Slide glass diffuser (K) down into the fixture from the top. Diffuser should be
seated in the bottom bracket.
3. Tighten set screw (M) in bottom bracket against glass diffuser (K). Do not
over tighten.
4. If desired, the plastic bumper (N) can be adhered to the top of the decorative
glass (J).
5. Slide decorative glass (J) down into the fixture from the top. Decorative glass
should be seated in the bottom bracket.
6. Slide top bracket (L) into the fixture. Check fit between set screw (M) in top
bracket (L) and glass diffuser (K). Adjust Set Screw as necessary to contact
glass diffuser (K). Note: Removal of Top Bracket is necessary to adjust Set
Screw. Once top bracket is seated in fixture, against the glass, tighten the set
screw (M) in fixture (A) against top bracket (L).
7. Restore electricity at main breaker.
If you need further assistance, or find that you are missing any parts, please contact
the dealer from which you purchased this product. We hope you enjoy your fixture!
*
Hubbardton Forge will not be liable for injury or damage caused by improper
installation, lamping or use of this fixture.
(Figure 3)
(Figure 2)