A356, Installation instructions – Hubbardton Forge 126747 User Manual
Page 2
If you need further assistance, or find that you are missing any parts, please contact the dealer from which you purchased this product.
We hope you enjoy your fixture!
* Hubbardton Forge will not be liable for injury or damage caused by improper installation, lamping or use of this fixture.
H U B B A R D T O N F O R G E . C O M
hand-forged, vermont-made lighting and accessories
154 RT. 30 SOUTH
•
CASTLETON, VERMONT 05735
All designs and images ©1989-2013 Hubbardton Forge
®
. All rights reserved.
30435
Installation Instructions
6. Using the 1" #10 screws (D), screw the bracket securely
to the ceiling. Be careful not to over-tighten or strip the
anchors.
7. Raise fixture (A) close to ceiling. Attach safety cable (K) to
mounting bracket (B) using a short #8 screw (L) from kit bag.
Temporarily suspend fixture using cable.
CAUTION: THE CABLE IS INTENDED TO TEMPORARILY SUSPEND
THE FIXTURE TO HELP WITH INSTALLATION. NEVER DEPEND ON
THEM TO SUPPORT FIXTURES WITH GLASS INSTALLED.
8. Hold the fixture (A) close to the mounting bracket (B) and
using suitable wire connectors (not provided) connect fixture
wires to supply wires (white to white and black to black).
Run a pigtail lead from the ground screw (F) and cupped
washer (G) to the electrical box and connect all ground
wires (bare copper or green to bare copper or green).
CAUTION: MAKE SURE WIRE CONNECTORS ARE TWISTED ON SE-
CURELY, AND NO BARE WIRES ARE EXPOSED.
9. Carefully tuck all wires behind the fixture (A) and place
over the bracket (B) so the holes in fixture (A) align with
holes in the mounting bracket (B). Secure by threading the
(4) #8 black screws (E) through the holes in the fixture (A)
and into the mounting bracket (B).
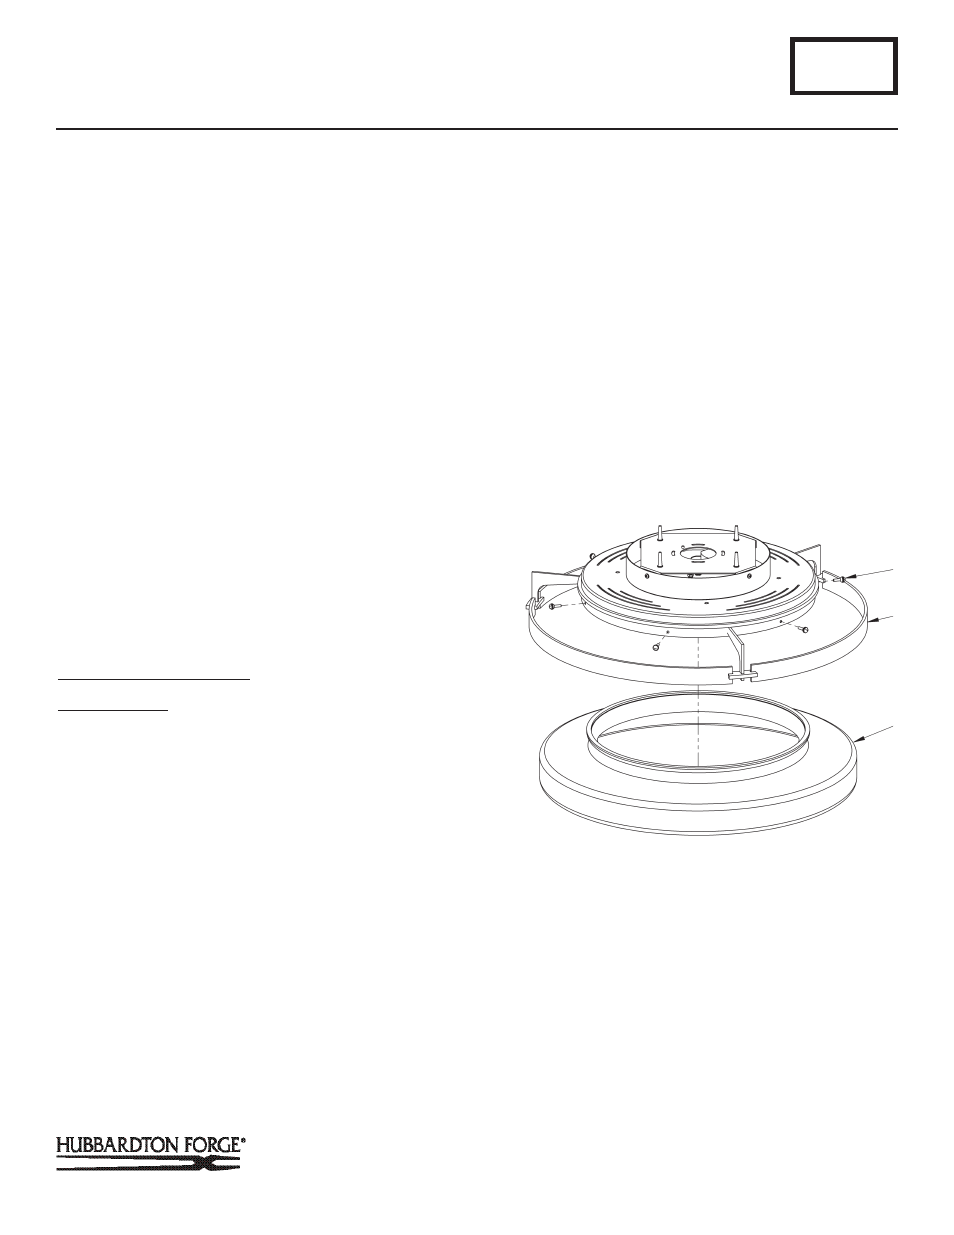
To Install Glass on 126747
(Figure 2)
Component Parts
A Fixture
H Glass
I Ball Head Screws (6)
1. Raise glass (H) and install into fixture (A).
2. Install (6) Ball Head Screws (I) and tighten to secure glass.
Be sure not to over tighten.
Note: Screws are shipped installed. It might be necessary to
back out screw before glass can be installed.
3. Restore electricity at main breaker.
A356
For Semi-Flushes 126747D & 126742D
Page 2 of 3
(Continued)
(Continued)
(Figure 2)
I
A
H