Ask Proxima 9100 User Manual
Page 7
Introducing the DP9100
i-5
Step 1: Setting up the projector
1 Place the projector on a solid, flat surface.
2 Position the projector so that the side with the handle is facing the
projection screen.
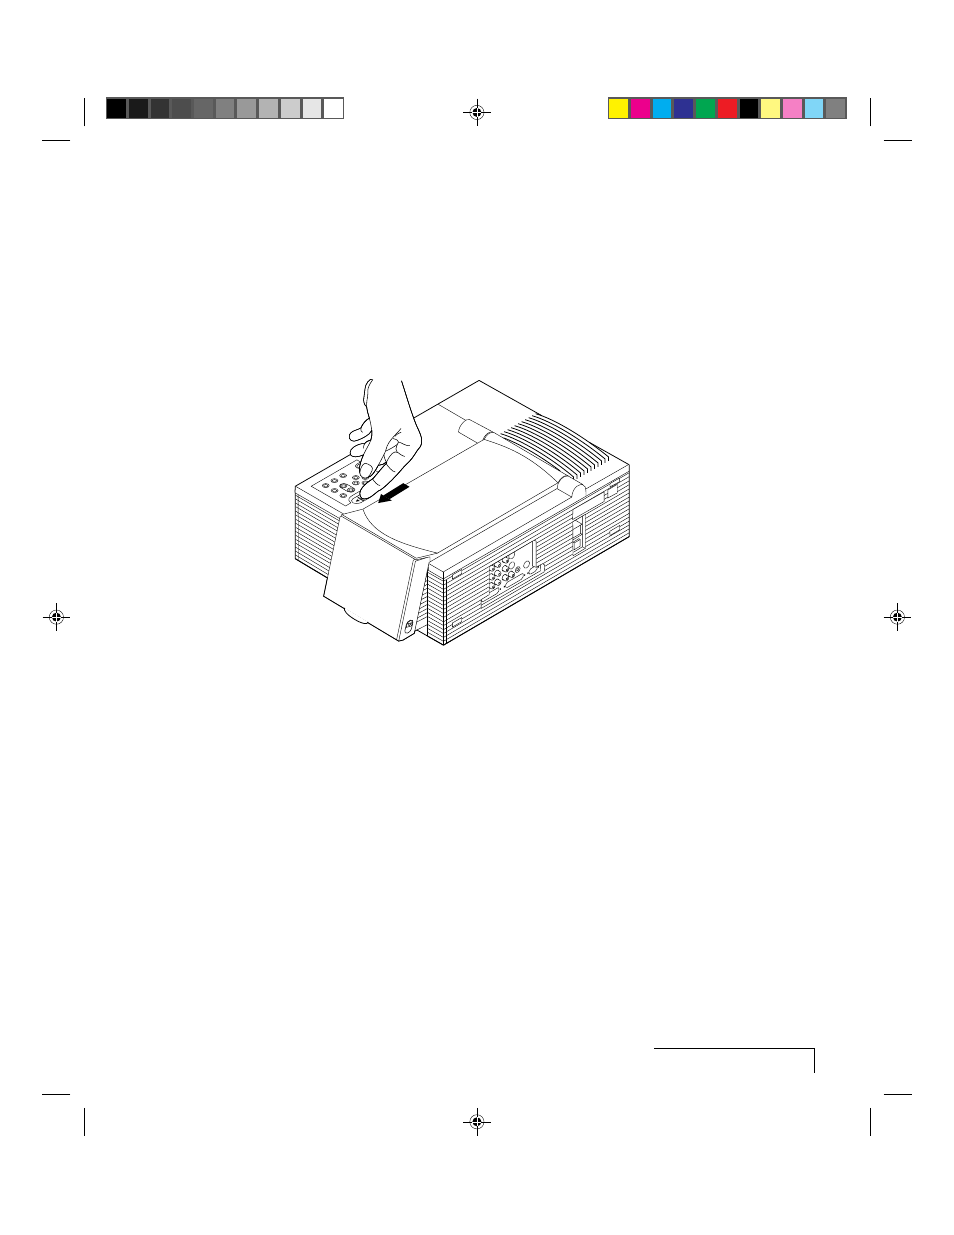
3 Locate the arm release lever (see the next figure). Slide it gently in the
direction of the arrow.
Figure i-4, Pressing the lever to release the arm
4 The arm pops up. Gently lift the arm. It raises automatically until it is
fully extended. Do not force the arm further.
See also other documents in the category Ask Proxima Projectors:
- Ultralight LS2 (1 page)
- C130 (50 pages)
- DP2000s (2 pages)
- DP2800 (83 pages)
- IN42 (49 pages)
- DP6810 (1 page)
- ASK M3 (32 pages)
- DP9240 (1 page)
- DP6105 (2 pages)
- C410/C420 (50 pages)
- + DP6850 (1 page)
- DP6150 (1 page)
- C420 (DP8200X) (1 page)
- C90 (11 pages)
- DP2300 (71 pages)
- 700 (29 pages)
- C440 (13 pages)
- M5 (1 page)
- Pro AV 9410 (2 pages)
- Pro AV 9310 (2 pages)
- Ultralight SV1 (19 pages)
- DP5610 (1 page)
- C105 (DP6155) (1 page)
- DP9250 (52 pages)
- Campus 300 (2 pages)
- Pro AV 9350 (2 pages)
- C300HB (3 pages)
- DP6100 (4 pages)
- DP5600 (45 pages)
- Pro AV 9300 (2 pages)
- DP9260 (1 page)
- C5 (1 page)
- DP5800 (5 pages)
- C40 (DP2000s) (3 pages)
- C420 (1 page)
- C1 (1 page)
- 21 (1 page)
- C160 (1 page)
- Ultralight DS2 (1 page)
- Impression 860 (46 pages)
- C440/C450 (61 pages)
- Ultralight LS1 (49 pages)
- A9+ (8 pages)
- Pro AV 9310L (49 pages)