Installing a sensor or probe – DAVIS Fan-Aspirated Radiation Shield User Manual
Page 4
Page 4
Fan-Aspirated Radiation Shield
Installing a Sensor or Probe
For models without a pre-installed sensor, continue to the section
“To install a
sensor or probe on the sensor board.”
(See below).
If you want to install your own Davis Temperature/Humidity sensor (#7859 or
#7860), you must remove your old sensor housing and attach a new and
smaller sensor board cover. Please continue to the section
“To attach a new
sensor board cover.”
(See below.)
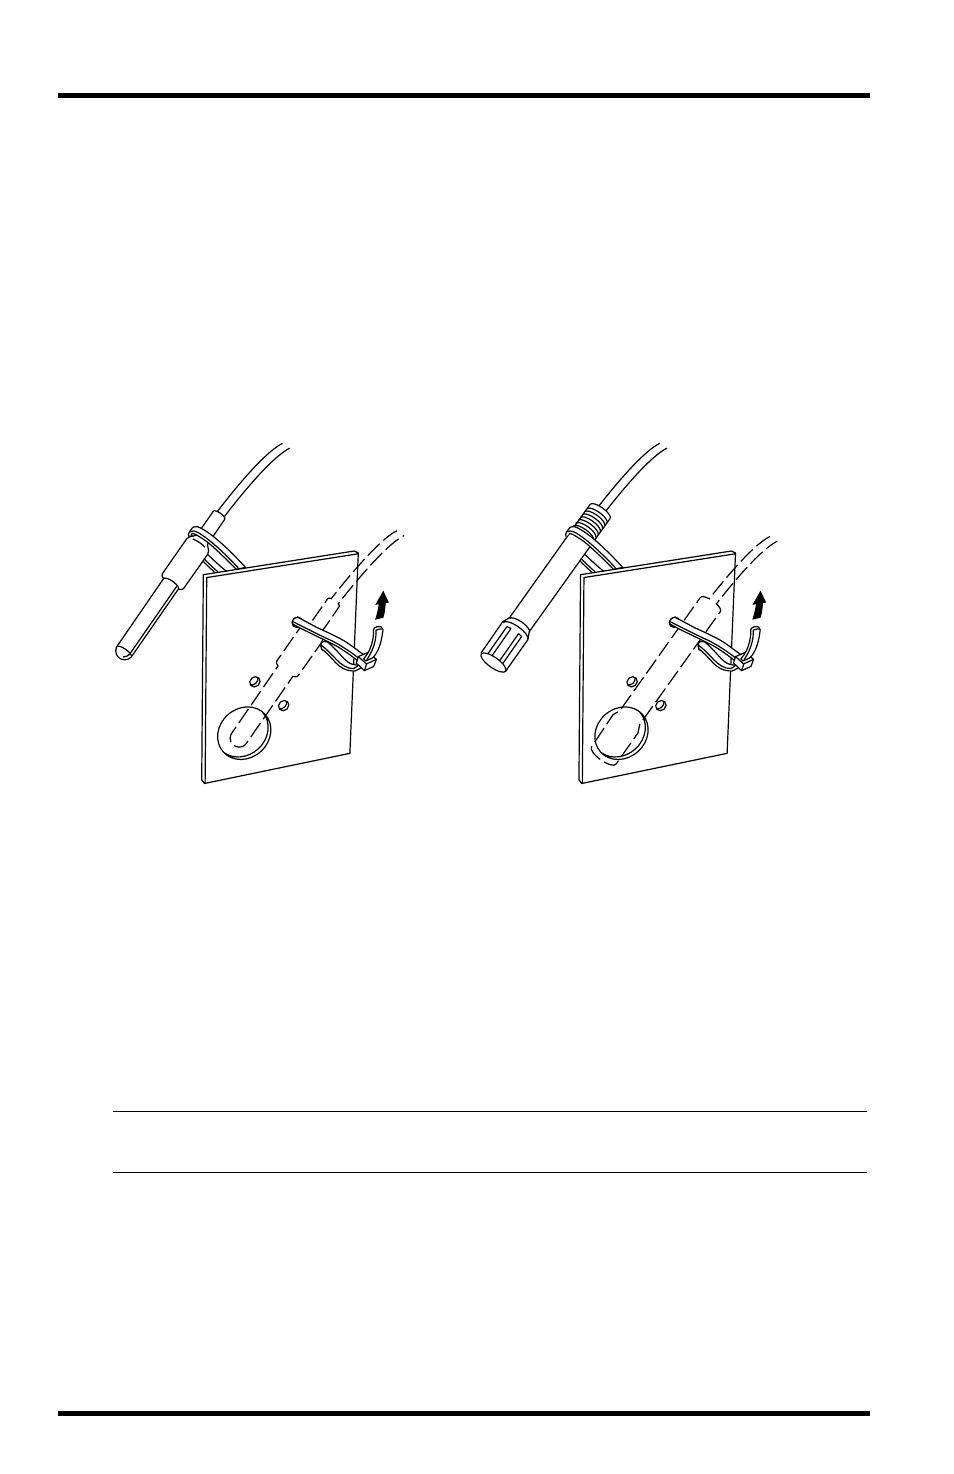
To install a sensor or probe on the sensor board:
1.
Attach the sensor or probe to the board using the cable ties.
2.
You are now ready to install the sensor board. (See page 6.)
To attach a new sensor board cover:
If you have an existing Temperature/Humidity sensor model # 7859 or # 7860,
you need to attach a new sensor cover as follows:
1.
Remove the shell and main cover by removing the screw at the front of the
board beside the cable exit point.
2.
Remove the warranty label on the back of the cover and undo the screw.
Note:
Removing this warranty label to attach a new sensor board does not void your warranty in this
instance. To avoid damaging sensitive components on the PC board, hold the board by the edges.
Sensor
Board
Davis
Temp Probe
Cable Ties
(2 places)
Sensor
Board
Vaisala
Temp Probe
Cable Ties
(2 places)
Installing a Sensor or Probe on the Sensor Board