System installation – PowerTap Pro User Manual
Page 8
8
SYSTEM INSTALLATION
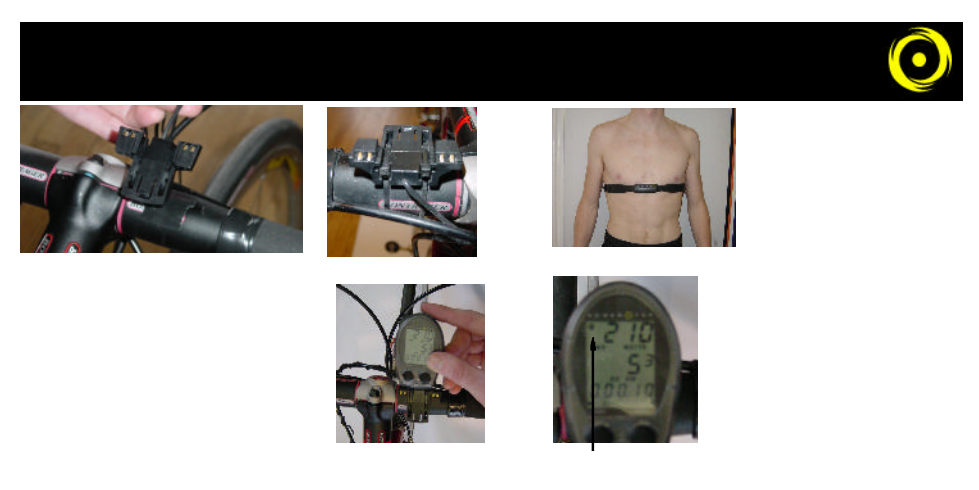
Figure 3A: Mounting of computer mount
3. Attach Computer Mount to Handlebar
The computer mounts to the handlebar in a similar
fashion. Position the foam mounting tape beneath
the mount and secure with cable ties to handle-
bar(3A). The head of the cable tie fits flush into a
recessed cavity on the mount. (see figure 3B)
4. Place Computer
Place the computer into the mounting shoe on the
handlebar. Line up the slots on the base of the
computer with the bracket. Slide completely into
computer mount. (see figure 4)
5. Heart Rate Monitor Strap
Position the heart rate monitor strap
on your torso as pictured in figure 6.
The strap should rest just beneath
the pectoral muscles of the chest.
Make sure the electrodes on the
strap are slightly moist where it con-
tacts the skin for best results. The
heart rate strap must be worn to
enable the heart rate functionality of
the Powertap. (see figure 5) The
chest strap is not coded.
6. Verify Installation
Check all the components to make
sure they are securely attached.
Spin the rear wheel and verify that
the transmission icon on the com-
puter display is illuminated (see fig-
ure 6). Adjust the receiver if neces-
sary.
Figure 5: Placement of heart rate strap
Figure 4: Attaching of computer
Figure 3B: Cable ties
Figure 6: Transmission icon in
upper left corner of display