PowerTap MTB Disc Hub User Manual
Powertap pro disc installaɵon guide
PowerTap Pro Disc InstallaƟon Guide
Warnings:
Rotor may become very hot during use. Avoid contact during and
directly after riding.
Rotor may contain sharp edges. Avoid contact while the wheel is spinning.
Installation should only be completed by a trained technician. Improper
installation could cause serious or fatal injuries.
This product is designed for cross country use only.
Maintenance and Break-in:
A break-in period of 30-40 complete, moderate stops is required
for the rotors to reach full braking power.
Disc rotor may be periodically cleaned with Isopropyl Alcohol.
Rotor bolts should be periodically checked for proper tightening torque.
To replace batteries, rotor must first be removed. Refer to page 36 of
owner’s manual for additional instructions.
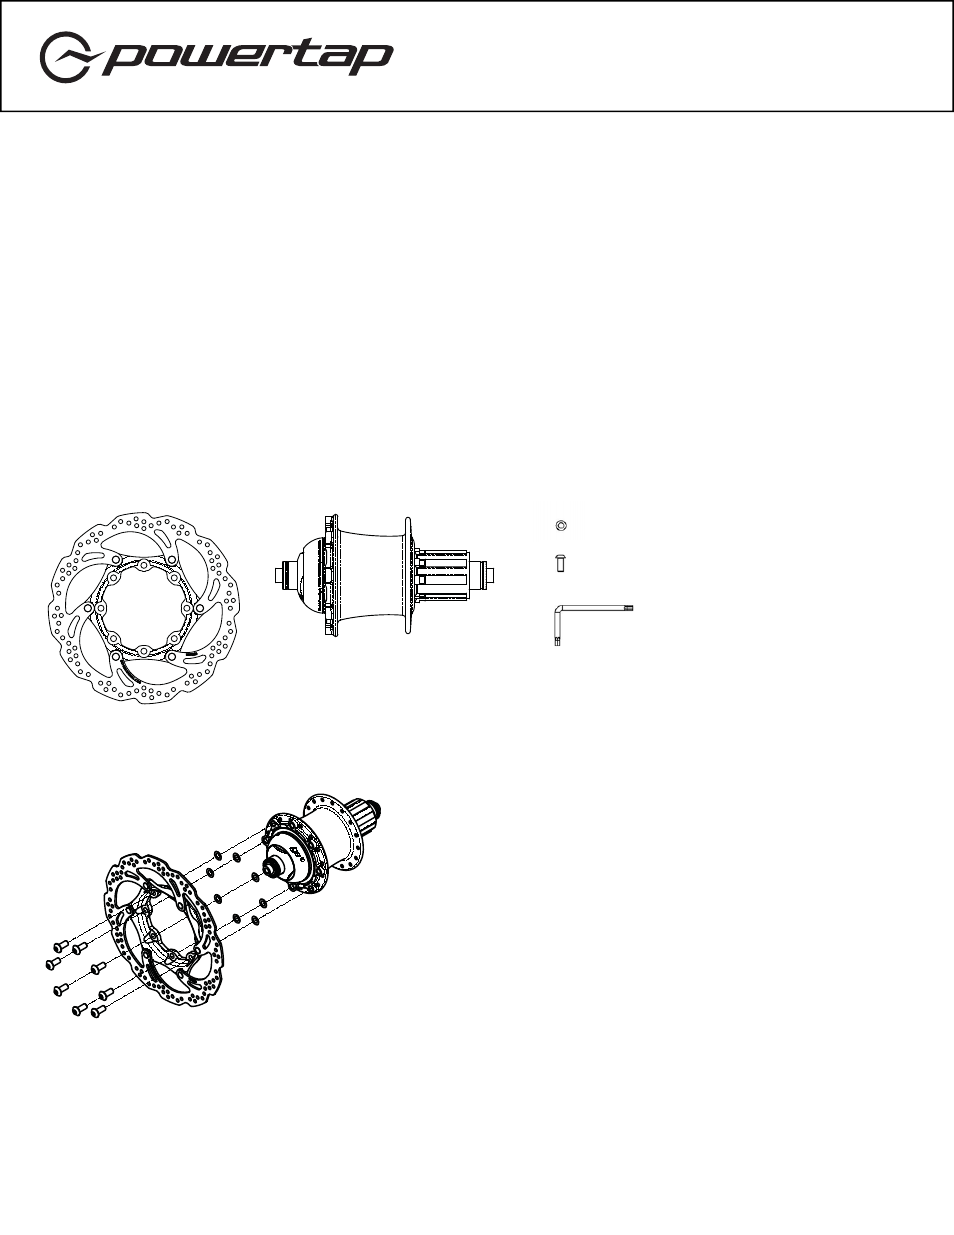
Assembly Instructions:
This kit includes:
Assemble as shown:
Notes:
Tighten bolts to 55in-lbs, in star pattern.
Optional—M5x0.2mm shims may be used between hub and rotor to center rotor in caliper.
1x
1x
16x
8x
1x
Additional Information/Replacement Parts
For replacement rotors, please contact Saris.
See complete Owner’s Manual for additional information.
M5 x 0.2mm shims
M5 x 12mm bolts
T25 Torx Wrench
MTB Disc PowerTap Hub
160mm PowerTap Disc Rotor
Saris Cycling Group, Inc. 5253 Verona Road Madison WI 53711 800.783.7257 www.powertap.com
21609 05/13
Hub/Wheel Building Information:
Spoke Holes—32
Disc Rotor Diameter—160mm
Hub Over-Locknut Distance —135mm
Non-drive side flange dimensions:
Flange
Diameter—74.0mm
Center to Flange—31.3mm
Drive-side flange dimensions:
Flange
Diameter—70.0mm
Center to Flange—18.5mm
IMPORTANT: For your safety, the
non-drive side of the PowerTap hub
must be built with at least a 3x lacing
pattern. Because of the patented
PowerTap design, torque is transferred
through the hub to the non-drive side.
Failure to adhere to this precaution will
void the warranty.