Installation – JKS 4100 User Manual
Page 2
JKS4100
JKS Quicker Disconnect Installation
2 Page
Installation
1. REMOVE ORIGINAL EQUIPMENT (OE)
SWAYBAR LINKS
Remove front swaybar drop links and mounting
hardware per the factory service manual instruc-
tions for your vehicle.
2. INSTALL UPPER TAPERED POST
Mount the tapered Upper Stainless Steel Post (C)
on outboard side of the swaybar, ensuring small
Click Pin holes are horizontal or parallel with the
ground.
Apply medium strength threadlocker to the tip of
1/2” x 1-3/8” Bolt (A).
Secure tapered post to swaybar by inserting the
1/2” x 1-3/8” Bolt (A) and 1/2” Lock Washer (I)
from the inboard side and tighten to 65 ft-lb. using
a torque wrench.
HINT: A small Philips head screwdriver or punch
inserted into the Click Pin hole will enable you
to prevent the Stainless Steel Post from rotating
when tightening the mounting bolt.
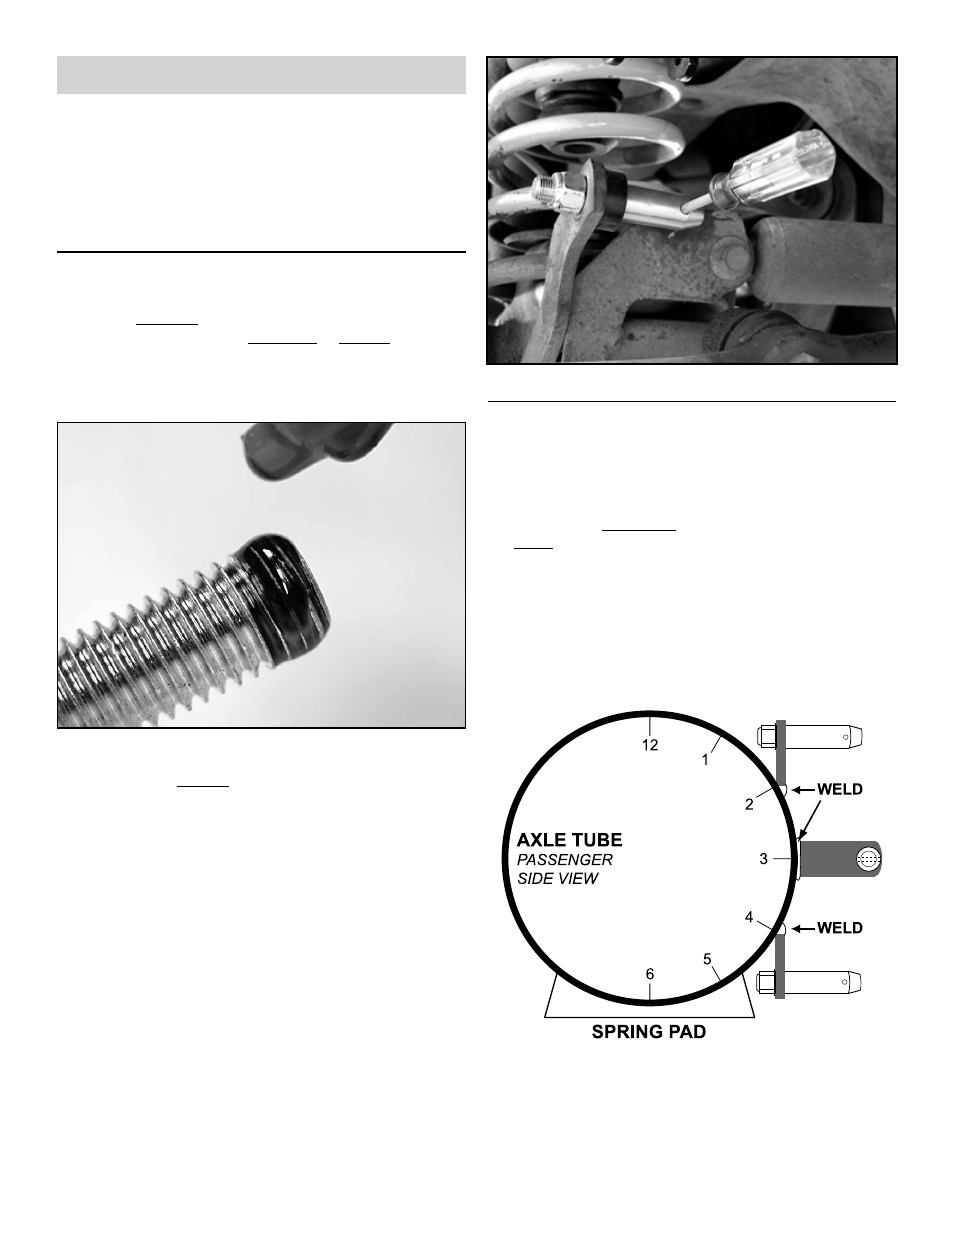
3. DETERMINE MOUNTING LOCATION FOR
WELD-ON TAB
It will be necessary to weld the lower mounting tab di-
rectly to the front axle housing. The base of the tab can
be positioned in the 2-, 3-, or 4-o’clock configuration as
viewed from the passenger side (8-, 9-, or 10-o’clock from
the driver side).
HINT: The position of the mounting tab will
depend on the vehicle and amount/type of suspension lift
installed.
HINT: For easiest operation, the tapered mounting post
should point forward as illustrated in the 2- or 4-o’clock
configuration. Alternatively, a perpendicular mounting posi-
tion (as illustrated in the 3-o’clock configuration) may also
be utilized in tight clearance applications.