Do not exceed, Warning, Maximum range of adjustment – JKS 2210 User Manual
Page 4
JKS2210
JKS Adjustable Coil Spacer Installation
4 Page
WARNING
DO NOT EXCEED
MAXIMUM RANGE OF ADJUSTMENT
Adjustment Range*
Minimum: 1" (1.0 in)
Maximum: 3-1/2" (3.5 in.)
Rotate Adjuster Ring (B) to desired position and
tighten the recessed 5/16” x 1-1/4” Cap Bolt (D) to
lock in place.
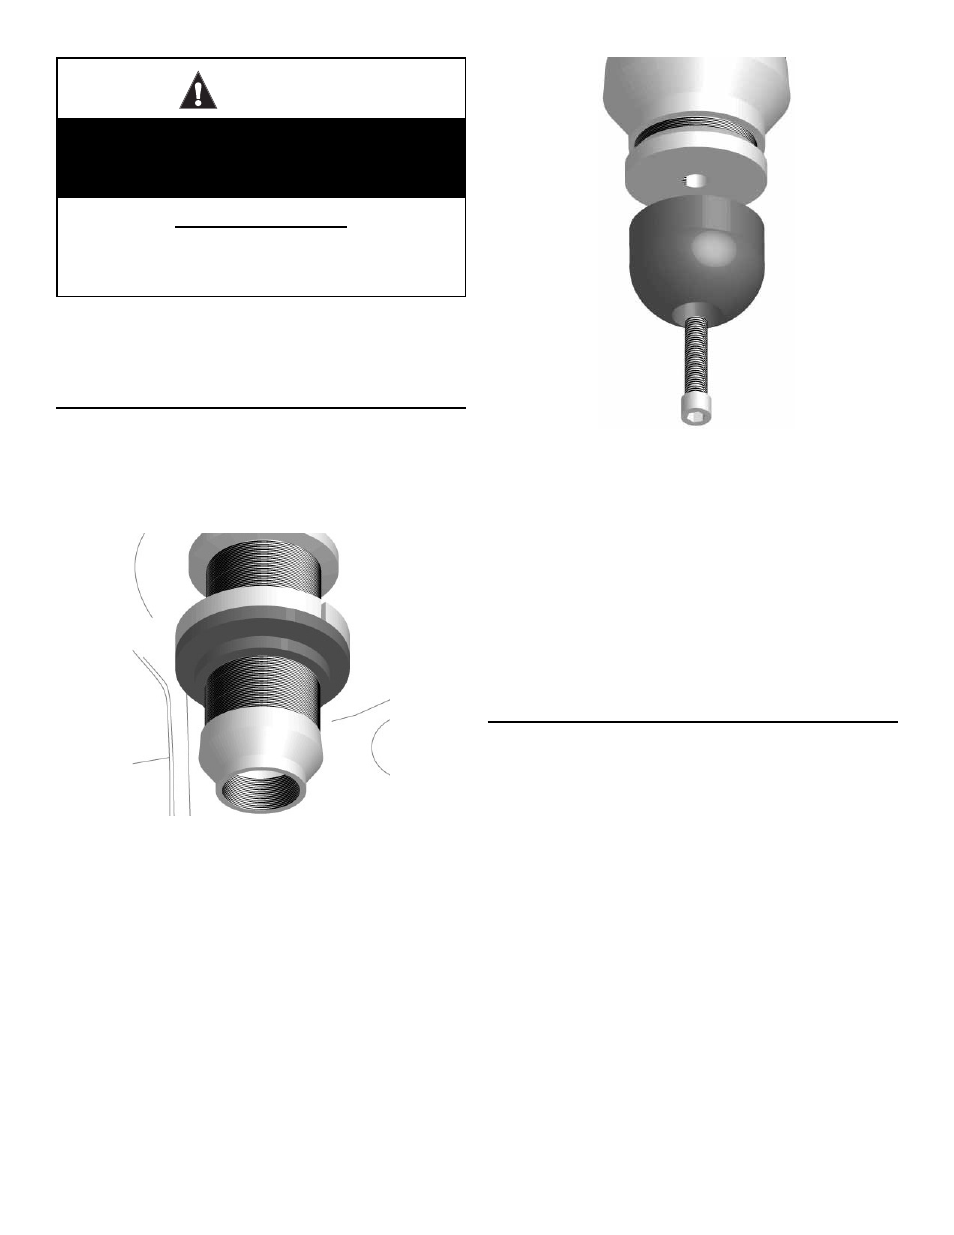
5. INSTALL BUMP STOP ON THREADED
TUBE OF ACOS
Apply a drop of medium strength thread locking
compound to bottom few threads of Threaded
Tube (A).
Install Bump Stop Adapter (E) onto Threaded Tube
(A) and tighten by hand until snug.
IMPORTANT: If flange end of Threaded Tube (A) begins
to pull away from the upper spring mount before the
Bump Stop Adapter (E) is completely installed, turn
the Bump Stop Adapter counter-clockwise one full
turn and reseat Threaded Tube against upper spring
mount.
Apply anti-seize lubricant to threads of Bump Stop
Plug (F).
Install Bump Stop Plug (F) by threading it com-
pletely into the Bump Stop Adapter (E).
Insert the 10mm x 90mm Cap Bolt (H) into the
recessed hole in Polyurethane Bump Stop (G) and
through the hole in the bottom of the Bump Stop
Plug (F).
x
Secure the Polyurethane Bump Stop (G) to the
Bump Stop Plug (F) by installing the 3/8” Flat
Washer (I) and 10mm Locking Nut (J) from above
the upper spring mount.
HINT: To install the 3/8” Flat Washer and 10mm
Locking Nut, tape them onto a 17mm socket at-
tached to a 6” long socket extension and lower into
the access hole located above the upper spring
mount.
Slowly tighten 10mm x 90mm Cap Bolt (H) until
the sides of the Polyurethane Bump Stop (G) begin
to bulge. Do NOT overtighten!
6. RE-INSTALL FRONT COIL SPRINGS
Re-install the front coil springs per the factory ser-
vice manual instructions for your vehicle.
HINT: A coil spring compressor is useful for instal-
lation.
Also re-install any of the components that were
removed during the REMOVE FRONT COIL
SPRINGS section of this installation.