Installation – JKS 2210 User Manual
Page 2
JKS2210
JKS Adjustable Coil Spacer Installation
2 Page
Description
QTY
A
Threaded Tube
2
B
Adjuster Ring
2
C
Isolator Pad
2
D
5/16” x 1-1/4” Cap Bolt
2
E
Bump Stop Adapter
2
F
Bump Stop Plug
2
G
Polyurethane Bump Stop
2
H
10mm x 55mm Cap Bolt
2
I
3/8” Flat Washer
2
J
10mm Locking Nut
2
Installation
1. REMOVE FRONT COIL SPRINGS
Remove the front coil springs per the factory ser-
vice manual instructions for your vehicle.
HINT: A coil spring compressor is useful for re-
moval.
Depending on the application, it may be neces-
sary to completely or partially remove any of the
following components before spring can be free
from upper mount.
Â
Shock Absorber
Â
Swaybar
Â
Brake Line
Â
ABS Wire
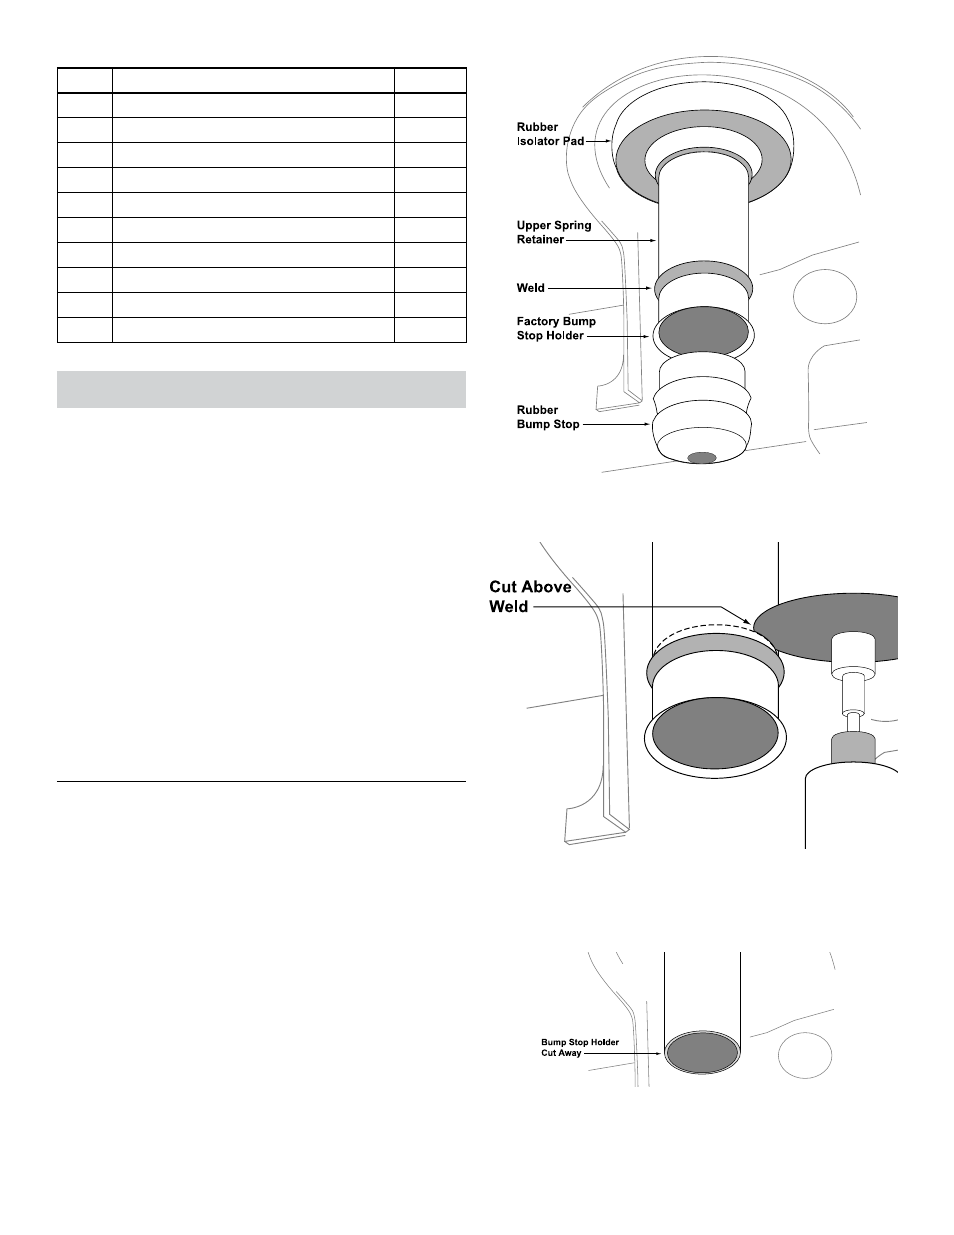
2. PREPARE SPRING RETAINER
The factory bump stop holder is welded to the upper spring
retainer and must be permanently removed in order to
install the ACOS™.
Pry the rubber bump stop (jounce bumper) free
from the bump stop holder.
Remove the rubber isolator pad from the upper
coil spring retainer.
Locate the factory weld that secures the bump
stop holder to the upper coil spring retainer.
Cut away the bump stop holder immediately above
the weld as illustrated.
HINT: A die grinder with
cut-off wheel or reciprocating saw is useful for cut-
ting away the bump stop holder.
Remove any sharp edges from the cut portion of
the upper spring retainer.
HINT: A file or deburring
tool is useful for removing sharp edges.