X" - 1/2" = ride height – JKS 2210 User Manual
Page 3
JKS2210
JKS Adjustable Coil Spacer Installation
Page 3
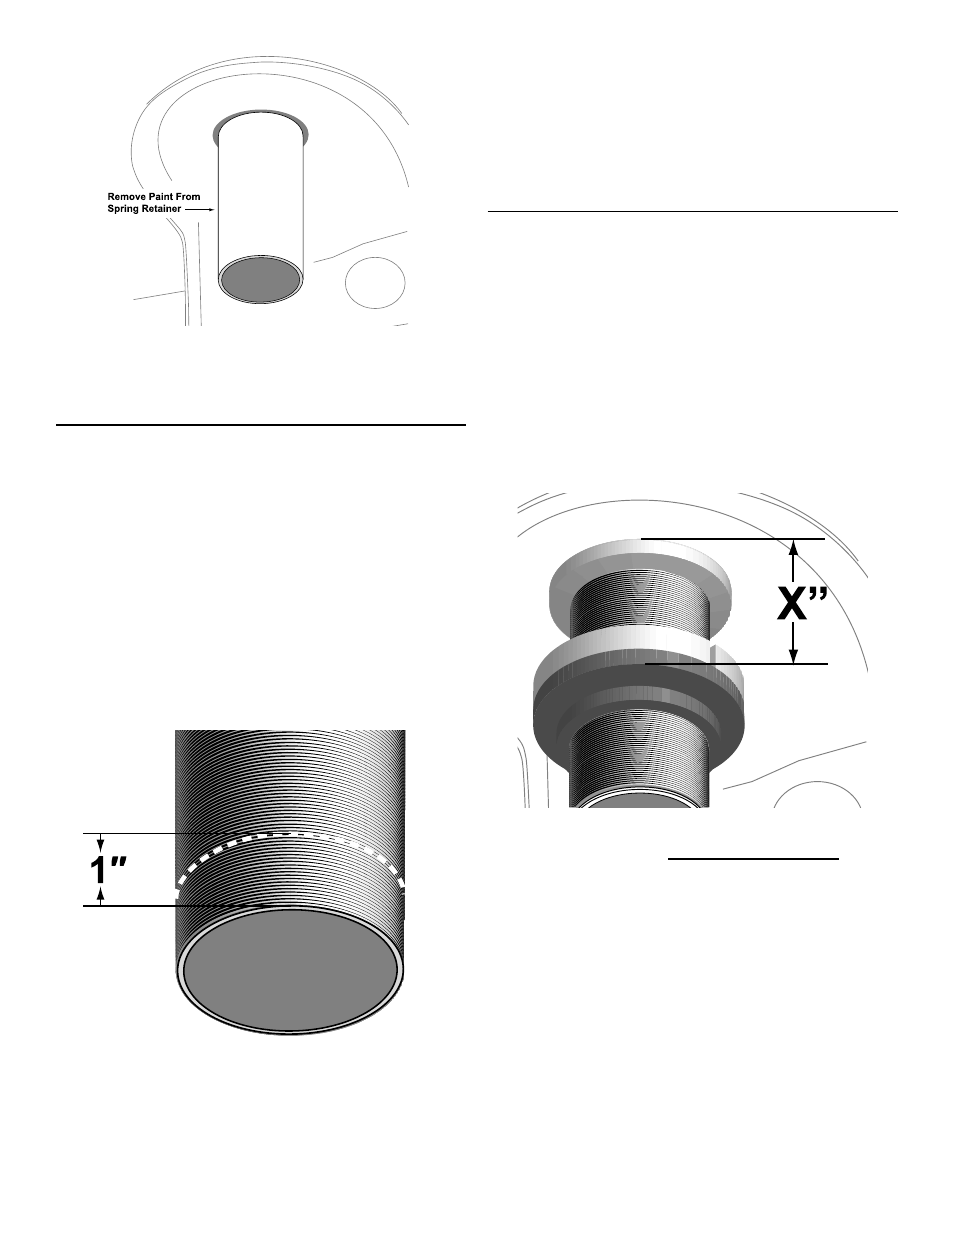
Remove all of the factory paint from the surface of
the upper spring retainer.
HINT: Emory cloth or a
suitable stripping tool is useful for paint removal.
3. SHORTEN THREADED TUBE OF ACOS
On vehicles with a net lift height of less than 1", it will
be necessary to shorten the Threaded Tube (A) to pro-
vide sufficient clearance between the Bump Stop (G)
and the axle pad. This step will reduce the maximum
adjustment height from 3.5" to 2.5". Example situa-
tion: Coils have sagged 1" below stock as a result of a
heavy bumper, ACOS installed to reset ride height to
factory - will require this trimming procedure. If you
have questions about your application or this modifi-
cation please contact JKS Manufacturing Tech Sup-
port.
Measuring 1.0” from the threaded end, mark a line
on the Threaded Tube (A).
Remove the excess portion by cutting completely
through the Threaded Tube (A) at the location
marked in the previous step.
HINT: A band saw is
useful for cutting the
Threaded Tube, although a sharp hack saw with
an appropriate fine tooth blade or cutting wheel
may also be used. Use extreme care to avoid
damaging remaining threads.
Inspect end of Threaded Tube (A) for damaged
threads and repair as needed.
HINT: A 16TPI
thread restoring file or equivalent is useful for
repairing threads.
4. SET ADJUSTER RING FOR DESIRED
RIDE HEIGHT
Apply spray lubricant to threads of Threaded Tube
(A).
Install Adjuster Ring (B) by threading it onto the
Threaded Tube (A).
Slide Isolator Pad (C) onto Threaded Tube (A) until
flush with Adjuster Ring (B).
IMPORTANT: Vehicle ride height is determined by
measuring the distance between the bottom of upper
spring mount and bottom of Isolator Pad, and then
subtracting 1/2” (0.50 in.).
X" - 1/2" = RIDE HEIGHT*
* Represents increase in ride height over OE Suspension